Assembly
The assembly procedure is the reverse of the dismantling
procedure.
Make sure all components are thoroughly clean prior to
assembly. Renew all 'O' rings.
1 Lubricate the piston 21 with hydraulic oil and press fully
into bore of clutch housing.
2 Fit oil baffle 20, spring 19 and spring retaining plate 18.
3 Compress spring and fit circlip 17.
4 Fit the disc spring assembly 16 and the thin pressure
plate (4mm thick) 13A.
5 Fit counter plates 15 and friction plates 14 alternately,
starting with a counter plate.
6 Fit the thick pressure end plate (6mm thick) 13 and
clutch friction/counter plate retaining circlip 11.
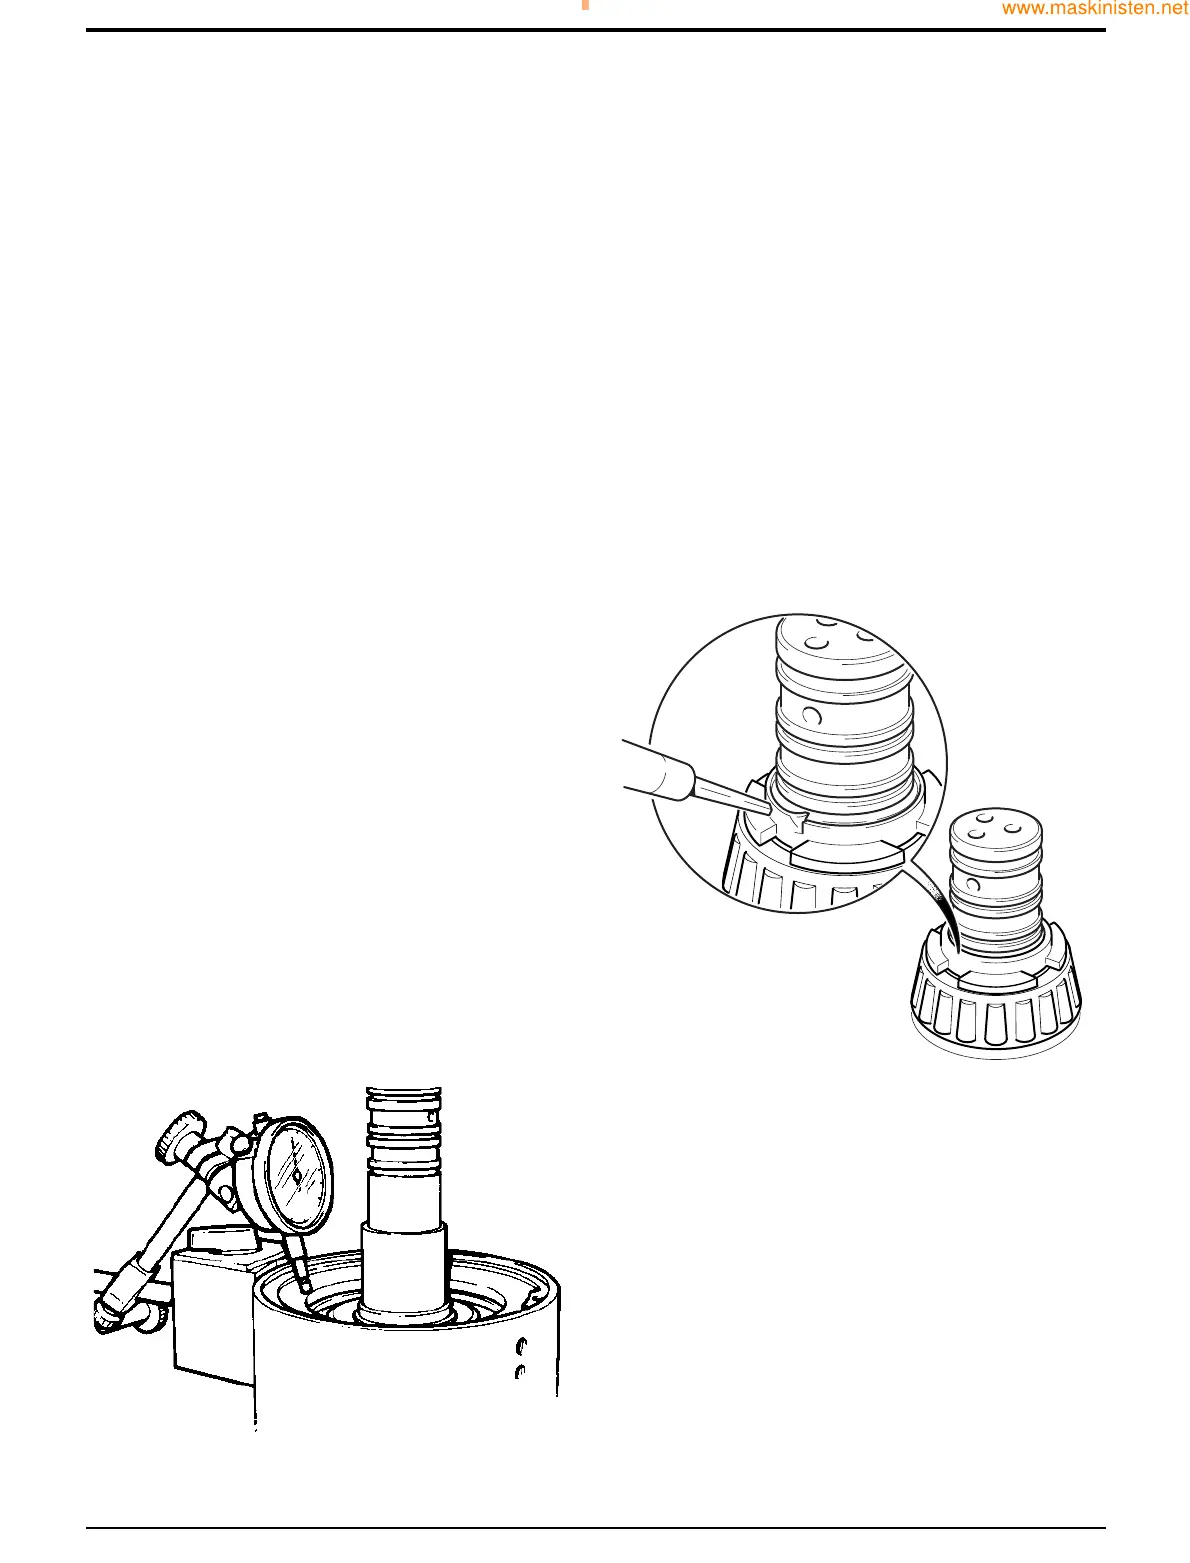
7 Using a dial test indicator as shown at A, measure the
end float of the pressure end plate 13, which should be
2.0 to 3.3 mm (0.079 to 0.130 in). If the float is above
3.3mm (0.130 in), fit shim 12 between the retaining
circlip and pressure end plate to bring end float within
tolerance. If the float is below 2.0 mm (0.079 in),
remove the thin pressure plate (4mm thick) 17 at piston
end and replace with a counter plate 13, then shim as
necessary to bring end float within tolerance.
8 Fit thrust washers 10 and 8 and thrust bearing 9.
9 Carefully align teeth of clutch plates using a thin rod or
screwdriver. Fit gear and splined hub assembly 6.
10 Fit needle roller bearing 7, thrust washers 5 and 3 and
thrust bearing 4.
62 - 4
11 Pack the clutch end bearing with JCB MPL Grease and
press the bearing onto clutch shaft.
12 Fit a new stake nut 1A and torque tighten to 200 Nm
(147.5 lbf ft).
Note: To tighten the nut locate the clutch assembly into the
holding fixture (service tool 892/01065) as shown in
dismantling and use the adaptor spanner (service tool
892/01064) and a 1/2” square drive torque wrench.
13 Re-stake the nut using a square ended staking tool as
shown at B.
14 Fit piston ring seals.
15 Assemble the opposite clutch assembly (torque
converter end) by repeating steps 1 to 14.
Section F Transmission
9803/7130
Section F
62 - 4
Issue 1
Reverser Unit
S191420