P/N 960-000167R_Rev. 1 {EDP #214645} © 2013, Japan CashMachine Co., Limited
DT-300™ Series Download Tool Operator Integration Guide
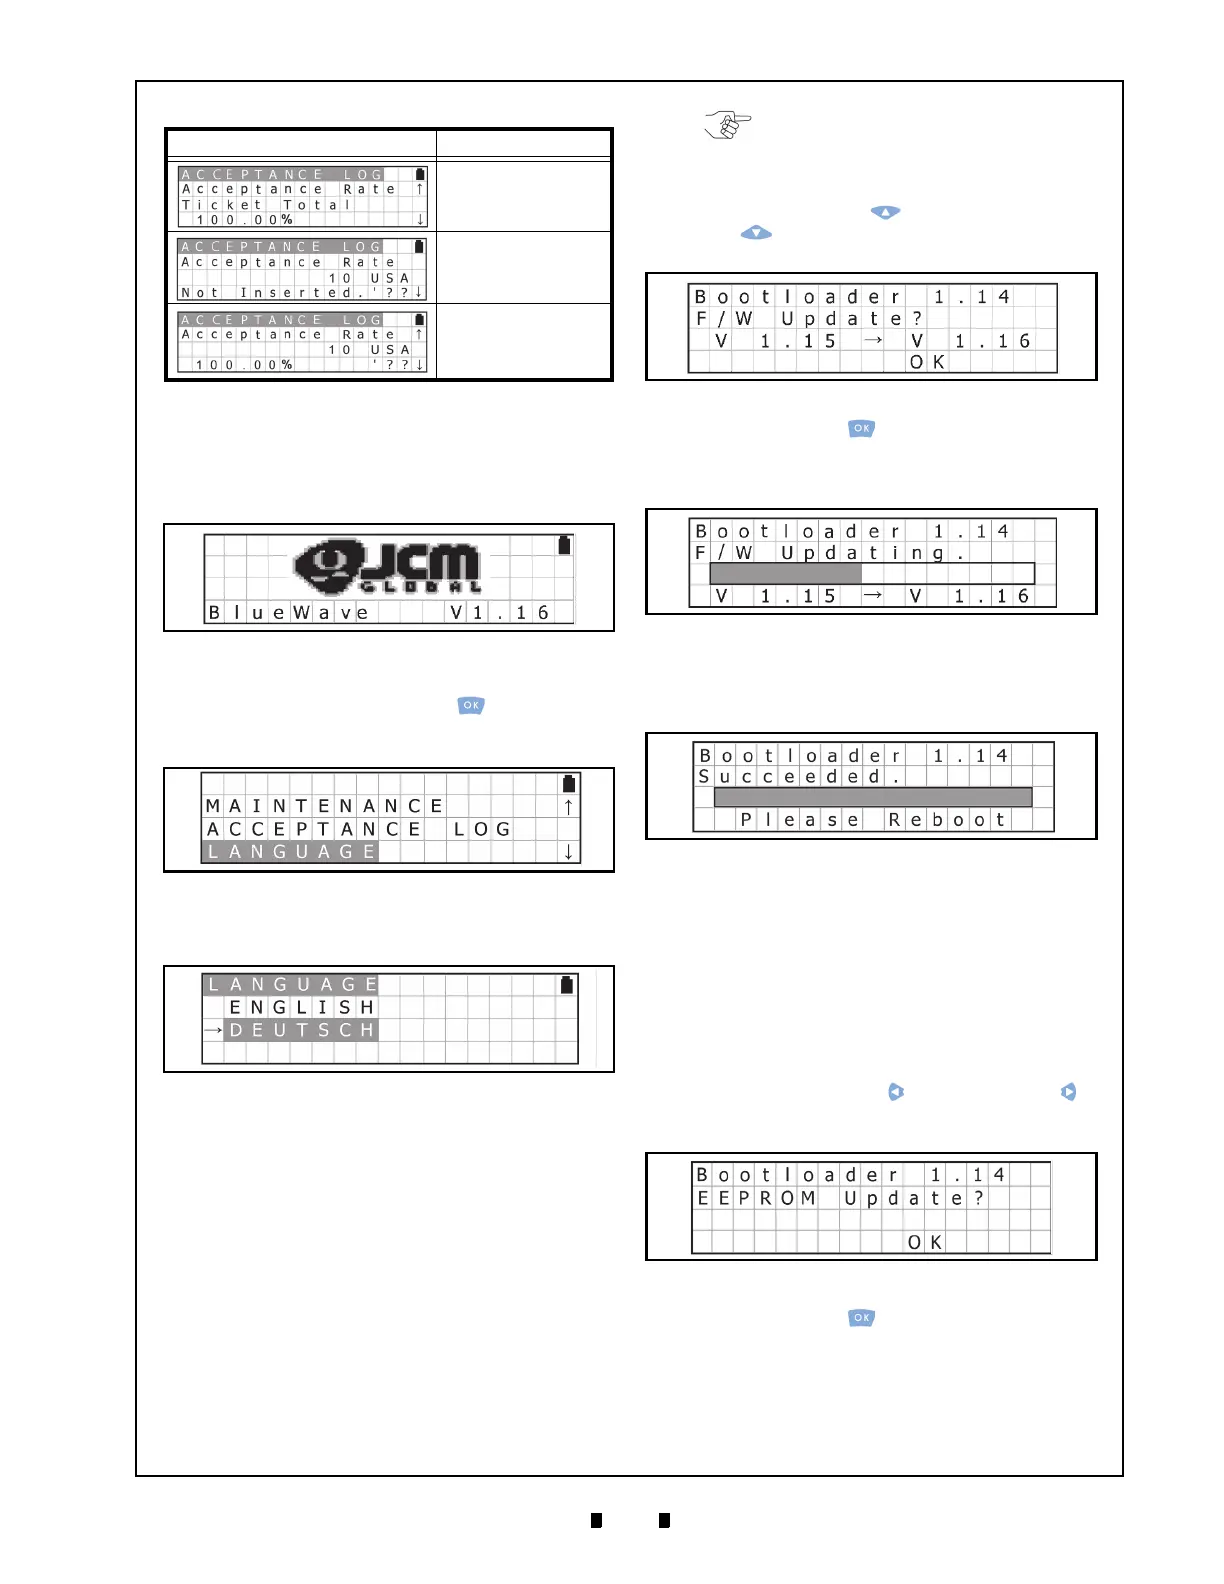
Language Function
To change a Language from English to another
Language, proceed as follows:
1. Turn the DT-300™ Power Switch ON, and the
SD Card check will begin (See Figure 45).
2. Select “
LANGUAGE” from the Function Selection
Screen and press the
OK Key to select the
desired Language from the list available
(See Figure 46).
3. Select the preferred language; English or Deutsch
(G
erman) as shown in Figure 47 in this example.
Operation Procedures
(Bootloader)
This portion provides each Bootloader procedure of
the DT-300™ Device operation.
DT-300 F
IRMWARE
U
PDATE
To update the Firmware of the DT-300™, proceed
as follows:
1. Ensure that the SD Card contains the latest Ver-
sion of Firmware (Refer to “Firmware File” on
page 13 of this Guide for details regarding the
proper Firmware File selection).
2. Turn the DT-300™ Power Switch ON while
pressing the
UP Key and the DOWN
Key . The Firmware Update Confirmation
Screen shown in Figure 48 will appear.
3. Press the
OK Key to begin the DT-300™
Firmware update. The LCD Screen will display a
Prog
ress Bar during the Firmware updating pro-
cess as shown in Figure 49.
4. Once the update is comp
lete, the LCD Screen will
display the new “
Bootloader X.XX Succeeded.”
Message (See Figure 50).
DT-300 EEPROM U
PDATE
To update the EEPROM Data in the DT-300™
Device, proceed as follows:
1. Ensure that the SD Card contains the EEPROM
Data (Refer to “EEPROM Data File” on page 13
of this Guide for details regarding the EEPROM
Dat
a File).
2. Turn the DT-300™ Power Switch ON while
pressi
ng the
LEFT Key or the RIGHT Key .
The EEPROM Update Confirmation Screen
shown in Figure 51 will appear.
3. Press the
OK Key to begin the EEPROM
update. The LCD Screen will display a Progress
Bar
during the EEPROM updating process as
shown in Figure 52.
Tota l Tick e t
Acceptance Rate
Limited Number of the
Banknote
Acceptance Rate 1
Limited Number of the
Banknote
Acceptance Rate 2
Table 9 Acceptance Logs Available (Continued)
Screen Description
Figure 45 SD Card Confirmation Screen 8
Figure 46 Function Selection Screen 8
Figure 47 Language Selection Screen
NOTE: The Firmware File should be
newer than the current Firmware Version
presently in the DT-300.
Figure 48 Firmware Update Confirmation Screen
Figure 49 Firmware Update Progress Bar
Figure 50 Firmware Update Success Screen
Figure 51 EEPROM Update Confirmation Screen