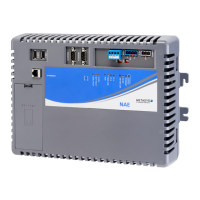
Table 2: Physical features of the SNE
Callout Physical features
9 • SNE22000
• SNE11000
• SNE10500
• SNE110L0
• SNE22001
• SNE11001
• SNE10501
• SNE110L1
• SNE22002
• SNE11002
• SNE10502
• SNE110L2
One Ethernet port;
1000/100/10 Mbps; 8-
pin RJ-45 connector. See
Ethernet port.
10 Multi-color LED status indicators. See LED
status indicators.
11 Reset button. See Reset button.
12 Recovery button. See Recovery button.
Mounting
Location considerations
Follow these guidelines when mounting a network
engine:
• Ensure that the mounting surface can support the
network engine and any user-supplied enclosure.
• Mount the network engine in the proper orientation
(horizontal preferred, vertical acceptable).
• Mount the network engine on an even surface in wall
mount applications whenever possible.
• Mount the network engine in areas free of corrosive
vapors and observe the environmental limitations
listed in the SNE technical specifications section.
• Do not mount the network engine on surfaces that are
prone to vibration, such as duct work, or in areas where
electromagnetic emissions from other devices or wiring
can interfere with network engine communication.
• Allow sufficient space for cable and wire runs and
terminal connections.
• Mount the power supply above the network engine to
ensure adequate heat dissipation and to position close
to the power wiring conduit.
• Do not install the network engine in an airtight
enclosure. Make sure the enclosure offers sufficient
ventilation to ensure the temperature in the enclosure
does not exceed 50°C (122°F).
• Mount the network engine so that the enclosure wall
or the transformer does not obstruct ventilation of the
network engine housing.
Mounting the SNE for DIN rail mount
applications
About this task:
To mount the SNE to a DIN rail, complete the following
steps:
1. Securely mount a 19.0 cm (7.5 in.) or longer section
of 35 mm (1 1/8 in.) DIN rail in the required space.
2. On the network engine, extend the two lower
mounting clips.
3. Hang the top of the network engine to the DIN rail
clip. Then press the network engine against the
DIN rail and hold in place while pushing up on the
lower mounting clips to secure the unit.
Figure 3: Network Engine secured with mounting clips
in latched positions (rear view)
Mounting the SNE for wall mount
applications
Use the holes in the three mounting clips for wall mount
applications. To mount the SNE on a vertical surface,
complete the following steps:
1. Pull the bottom two mounting clips downwards to
their extended positions.
2. Mark mounting hole locations on the wall using the
dimensions shown in Figure 1, or hold the bracket
against the wall and mark the hole locations through
the mounting clips. The screw holes on the network
engine can accommodate M4 and #8 screws.
3. Drill holes in the wall based on the locations marked
in Step 2. Insert wall anchors for each hole if
necessary.
4. Hold the device in place, insert the screws through
the mounting clips and into the screw holes, and
then carefully tighten all screws.
Important: Do not overtighten the mounting
screws. Overtightening the screws can crack
the network engine wall mount feet or housing.
Mounting the SNE in a panel
To mount the SNE in a panel, follow these requirements:
• Mount the panel in accordance with the manufacturer’s
instructions.
• Mount the network engine in the panel following the
guidelines in the Location considerations and Mounting
sections of this document.
SNE Installation Guide 3