Table 9: Modbus Adapter connection detail
Callout Description
1 USB connection: Connect USB cable from SNE
to RS-232 converter
2 USB-to-RS-232 adapter
3 To Modbus devices
4 FC Bus terminal connection
3. To add additional vendor devices, wire from one
device to the next as shown below. Do not connect
more than two wires to each terminal to ensure
that a daisy chain configuration is used. For general
Modbus protocol rules, see Wiring considerations
and guidelines.
Figure 9: Modbus RTU wiring detail: daisy chained
devices
4. Go to Connecting the power source.
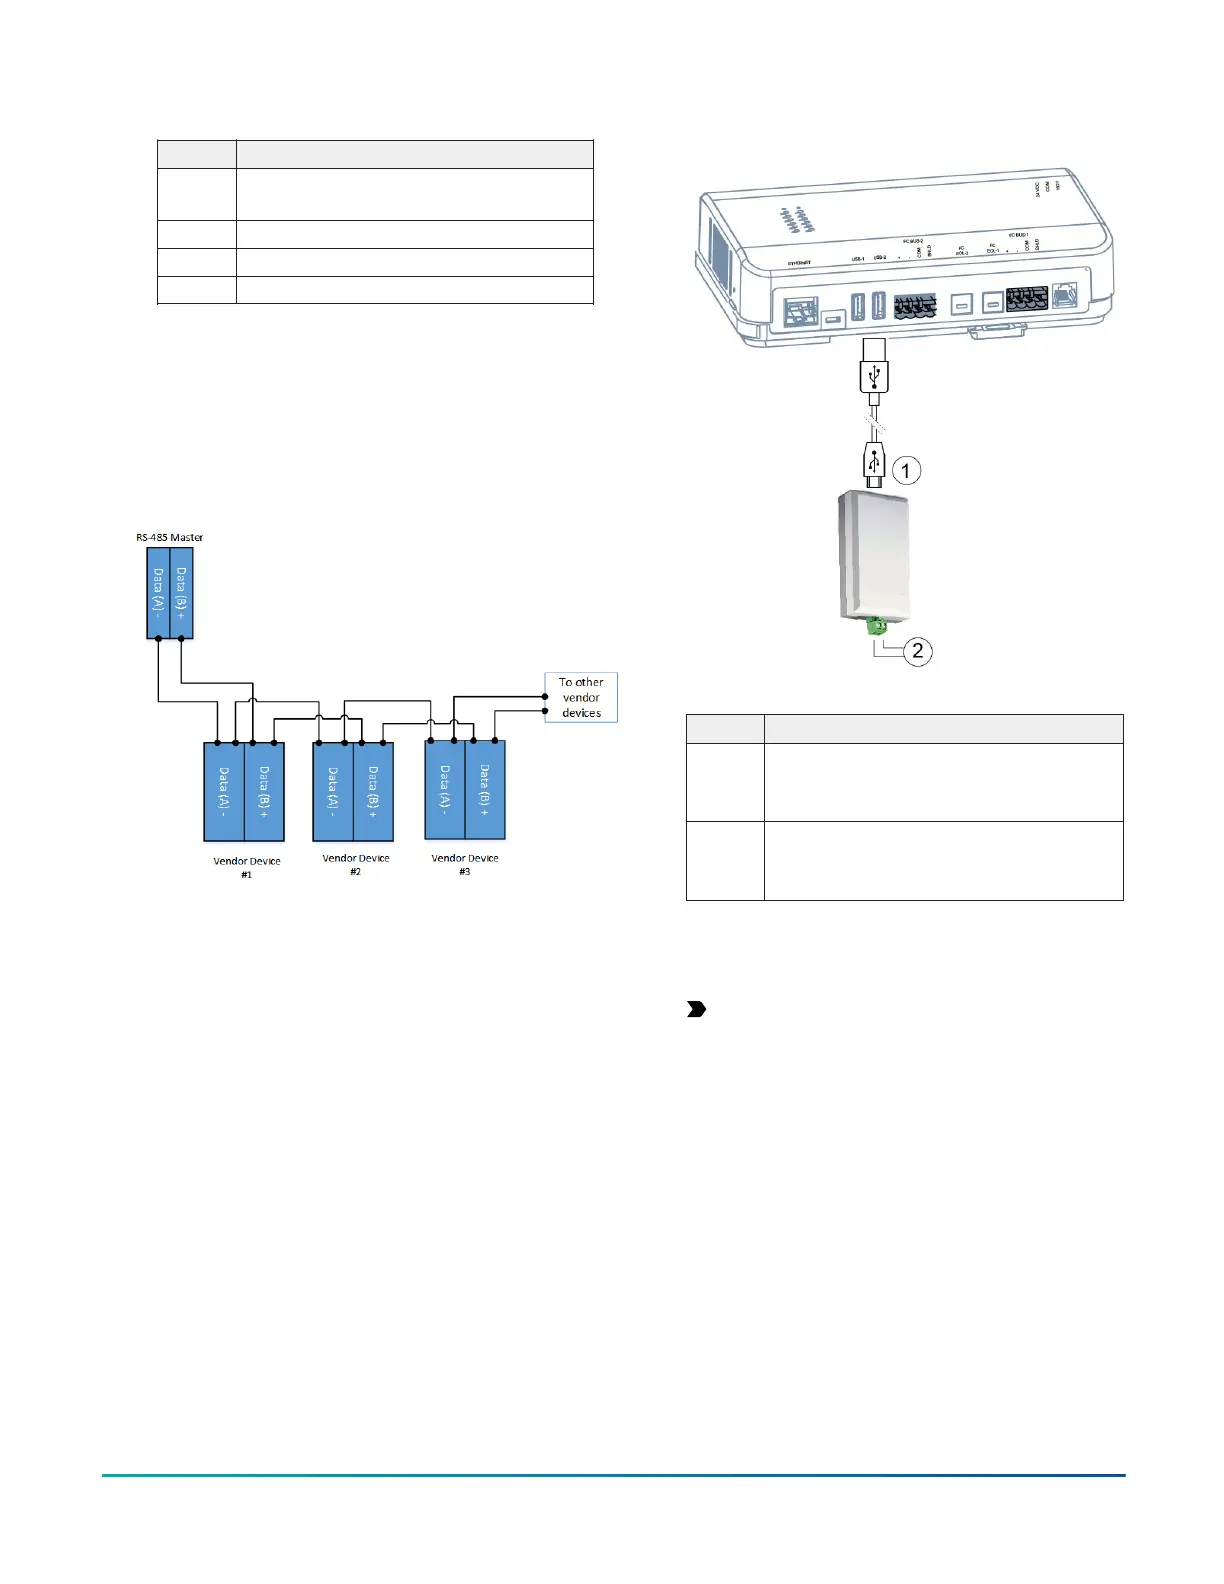
Connecting M-Bus devices using USB to
M-Bus adapter
About this task:
The SNE can connect to the M-Bus network devices by
using the M-Bus Adapter. Two components are needed:
USB cable (Type B) and M-Bus Mikro-Master USB device.
(After installation and wiring are complete, refer to the
Network Engine Commissioning for M-Bus Vendor Integration
Application Note (LIT-12013149) for additional information.)
1. Connect the 2-wire cable from the M-Bus device to
the USB to M-Bus adapter.
Figure 10: Connecting SNE to M-Bus Network using M-
Bus Adapter
Table 10: M-Bus Adapter connection detail
Callout Description
1 USB connection:
Connect USB cable from SNE to RS-232
converter
2 M-Bus connection:
1: M-
2: M+
2. Connect the USB cable from the USB adapter to the
USB-1 or USB-2 port on the SNE. You can use either
port.
Important: Use only the USB adapters that
were tested and qualified for use with the
SNE. Other non-qualified adapters do not
function in the USB ports of the SNC. See USB
ports for more information.
3. Go to Connecting the power source.
Connecting M-Bus devices using USB to
RS-232 adapter
About this task:
The SNE can connect to the M-Bus network devices by
using the M-Bus Level Converter. Four components are
needed: USB cable (Type B), RS-232 adapter (code number
ACC-USBRS232-0), serial connection cable (INT-DX-
KAB01), and the M-Bus Level Converter. (After installation
and wiring are complete, refer to the Network Engine
Commissioning for M-Bus Vendor Integration Application
Note (LIT-12013149) for additional information.)
SNE Installation Guide 9