EasyManua.ls Logo

JUKI KE-2000 Series User Manual

JUKI KE-2000 Series
52 pages
To Next Page IconTo Next Page
Page #1 background imageLoading...
Page #1 background image











KE
KEKE
KE‑
‑2010/2020/2030/2040
2010/2020/2030/20402010/2020/2030/2040
2010/2020/2030/2040

INST
INSTINST
INSTALLATION
ALLATIONALLATION
ALLATIONGUIDE
GUIDEGUIDE
GUIDE
JUKICORPORATION
JUKICORPORATIONJUKICORPORATION
JUKICORPORATION
ELECTRONICASSEMBLY&
ELECTRONICASSEMBLY&ELECTRONICASSEMBLY&
ELECTRONICASSEMBLY&
TESTSYSTEMSDIVISION
TESTSYSTEMSDIVISIONTESTSYSTEMSDIVISION
TESTSYSTEMSDIVISION
SMTTRAININGCENTER
SMTTRAININGCENTERSMTTRAININGCENTER
SMTTRAININGCENTER

Table of Contents

Question and Answer IconNeed help?

Do you have a question about the JUKI KE-2000 Series and is the answer not in the manual?

JUKI KE-2000 Series Specifications

General IconGeneral
BrandJUKI
ModelKE-2000 Series
CategoryIndustrial Equipment
LanguageEnglish

Summary

Basic Configuration and Component Identification

KE-2010/2020/2040 Configuration Details

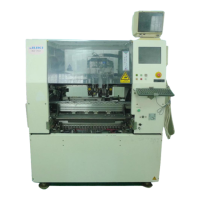
Details the configuration and parts for KE-2010, KE-2020, and KE-2040 models.

KE-2030 Configuration Details

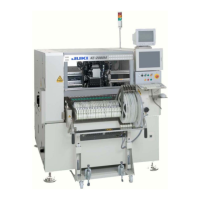
Details the configuration and parts for the KE-2030 model.

Main Unit Installation Procedure

Detaching Packing Materials

Overall Machine Cover Removal

Procedure for removing the main vinyl cover from the machine.

Safety Cover Unpacking

Instructions for peeling filament tapes from the safety cover.

Transport Cover Unpacking

Steps to remove filament tapes from the transport cover.

Pneumatic Units Unpacking

Detaching air caps from finger valve and drain bottle.

Feeder Relay Cable Unpacking

Removing filament tapes securing the feeder relay tube and air tube.

Replacement Table Trolley Unpacking

Detaching air cap cover and feeder relay cable from trolley.

Machine Height Adjustment and Leveling

KE-2010/2020/2040 Leveling Procedure

Steps to adjust transport height and level the machine for specific models.

KE-2030 Leveling Procedure

Steps for adjusting transport height and leveling the KE-2030 machine.

X-Y Unit Setup and Preparation

Detaching X-axis Frame Fixing Parts

Procedure for removing fixing parts for the X-axis frame on model 2030.

Detaching Head Fixing Parts

Instructions for removing stopper rubber fixing the head.

Head Unit Installation and Preparation

Detaching Head Unit Packing Materials

Removing air cap, rust preventive paper, and desiccating agent.

Detaching Head Unit Fixing Parts

Instructions for detaching head unit fixing parts.

Board Transport Unit Setup

Detaching Packing Materials from Transport Rail

Removing filament tapes and air caps from the transport rail.

Detaching Packing Materials from BU Table

Removing filament tapes fixing the BU table.

Center Station Y-Axis Drive Setup

Removing band fixing transport unit to detach packing material.

Unpacking Supply Parts

Taking out backup pins and hand knobs from the packing carton.

ATC Unit Setup

CAL Block Setup

Connecting Compressed Air Tube

Connecting the Power Cord

KE-2010/2020/2040 Power Connection (CE Machine)

Procedures for connecting the power cord for CE machine models.

KE-2010/2020/2040 Power Connection (Standard Machine)

Procedures for connecting the power cord for Standard machine models.

Mounting Accessories

Signal Light Mounting

Instructions for mounting the signal light.

Vision Monitor Mounting

Instructions for mounting the vision monitor.

Keyboard Bracket Mounting

Procedure for securing and connecting the keyboard bracket assembly.

HOD (Handheld Operating Device) Connection

Connecting the HOD cable to the main unit and locking it.

Hand Knob Installation

Placing the hand knob on the groove of the pulley cover.

Feed Relay Cable Connection

Connecting feeder relay cable and air tube to main unit cover.

Chip Box Installation

Instructions for installing the chip box.

Interface with External Equipment

KE-2020/2040 External Interface Details

Details interface connectors for KE-2020 and KE-2040 models.

KE-2010/2030 External Interface Details

Details interface connectors for KE-2010 and KE-2030 models.

Connecting Matrix Tray Changer (MTC)

MTC Interface Panel Connection

Connecting MTC power and signal connectors to the interface panel.

TR-4SN Mounting Procedure

Instructions for mounting the TR-4SN unit on the main unit's rear.

TR-6SN and TR-6DN Mounting Procedure

Instructions for mounting TR-6SN and TR-6DN units on the main unit's right.

TR-5SN and TR-5DN Mounting Procedure

Instructions for mounting TR-5SN and TR-5DN units on the main unit's rear.

Pre-Power On Checks

Adjusting Feeder Exchange Trolley Height

Caster Plate Mounting Position Adjustment

Adjusting caster plate position for 2-step height adjustment.

Adding Trolley Spacers for Height Adjustment

Procedure for adding spacers to increase trolley height.

Bank Stopper Mounting Position Adjustment

Adjusting bank stopper position based on board transport height.

Bank Valve Position Adjustment

Moving bank valve fixing position for proper alignment.

Related product manuals