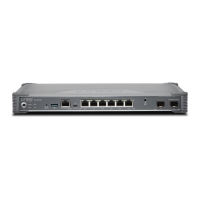
3. Unplug the power adapter from the services gateway. Verify that the Power LED is
off.
4. Label the cables connected to the Mini-PIM so that you can later reconnect each
cable to the correct Mini-PIM.
5. Disconnect the cables from the Mini-PIM.
6. If necessary, arrange the cables to prevent them from dislodging or developing stress
points.
7. Remove the screws on each side of the Mini-PIM faceplate using a 1/8-in. (3-mm)
flat-blade (–) screwdriver.
8. Grasp the screws on each side of the Mini-PIM faceplate and slide the Mini-PIM out
of the services gateway.
9. Place the Mini-PIM in the electrostatic bag or on the antistatic mat.
10. If you are not reinstalling a Mini-PIM into the empty slot, install a blank faceplate over
the slot to maintain proper airflow.
Installing a Mini-Physical Interface Module
To install a Mini-Physical Interface Module (Mini-PIM) in the services gateway.
1. Attach an electrostatic discharge (ESD) grounding strap to your bare wrist, and connect
the strap to the grounding point on the back of the services gateway.
2. Power off the services gateway by briefly pressing the Power button on the front panel.
Wait for the Power LED to turn off before proceeding. Disconnect the services gateway
from its power source.
3. Remove the Mini-PIM from the electrostatic bag.
4. Grasp the screws on each side of the Mini-PIM faceplate and align the notches in the
connector at the rear of the Mini-PIM with the notches in the Mini-PIM slot in the
device.
CAUTION: Slide the Mini-PIM straight into the slot to avoid damaging the
components on the Mini-PIM.
5. Slide the Mini-PIM in until it lodges firmly in the services gateway.
Copyright © 2017, Juniper Networks, Inc.96
SRX300 Series and SRX550 High Memory Gateway Interface Modules Reference

 Loading...