3—Hardware Setup
16 Fusion Catalyst 4000 Getting Started Guide
3.5 Optional Octal Video Input Panel Connections
If the system includes the optional Octal Video Input Panel, connect the
panel to the appropriate Octal Video Board using the Octal Video Cable
(SCSI-type cable). This cable has yellow labels.
Each Input Panel supports up to two Octal Video Boards. The first Octal
Board (counted by the lowest chassis slot number) will be connected to the
left side of the Input Panel. The second board (next Octal Board in the
chassis) will be connected to the right side connector on the panel. Input
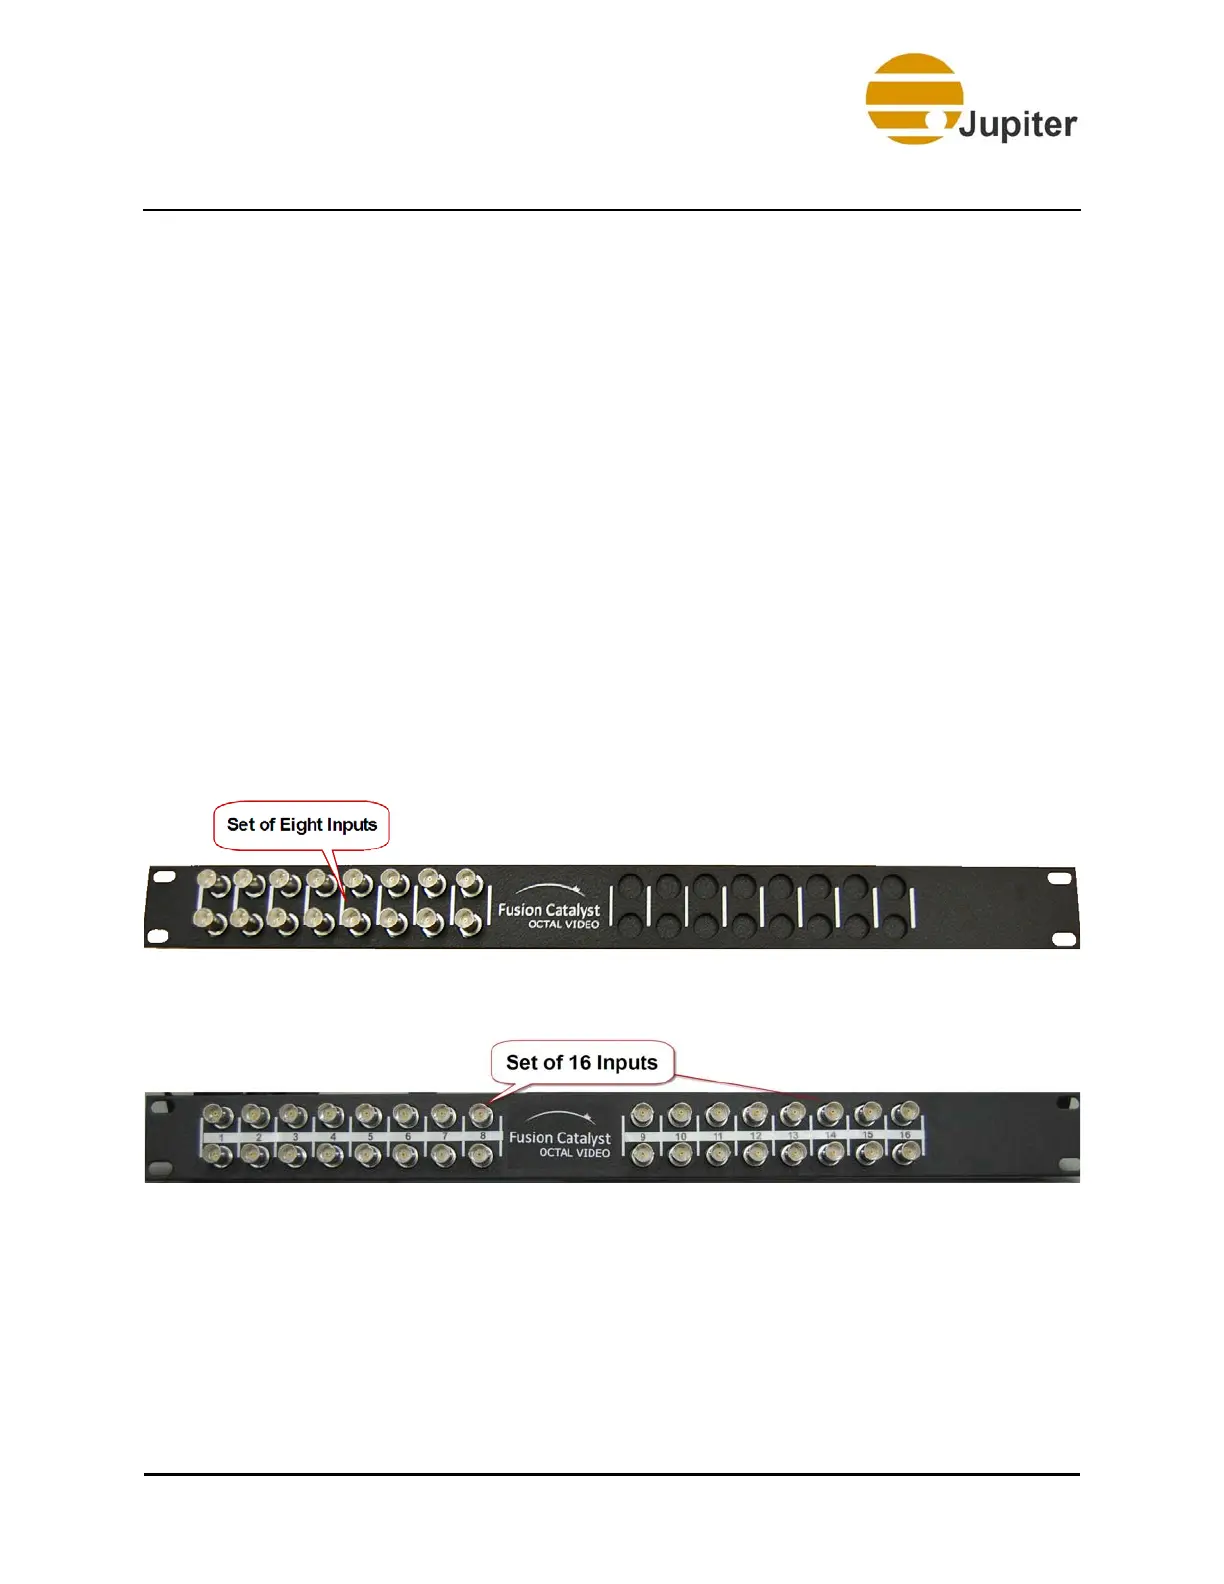
channels are counted from left to right (looking at the front of the panel).
Each BNC connector pair is labeled with an input number. The first set of 8
Octal Video inputs (left side) on the first Octal Video Input Panel are
labeled 1 to 8; the second set, if installed, will be labeled 9 to 16.
Each vertical pair of BNC connectors supports a single composite signal by
connecting a BNC cable to the upper connector (or a single S-video signal
by connecting the Luminance signal to the upper BNC connector) and the
Chrominance signal to the lower BNC connector (or by using an S-video to
dual BNC adapter).
Figure 9 - Octal Video Input Panel (8 inputs) – Front View
Figure 10 - Octal Video Input Panel (16 inputs) – Front View