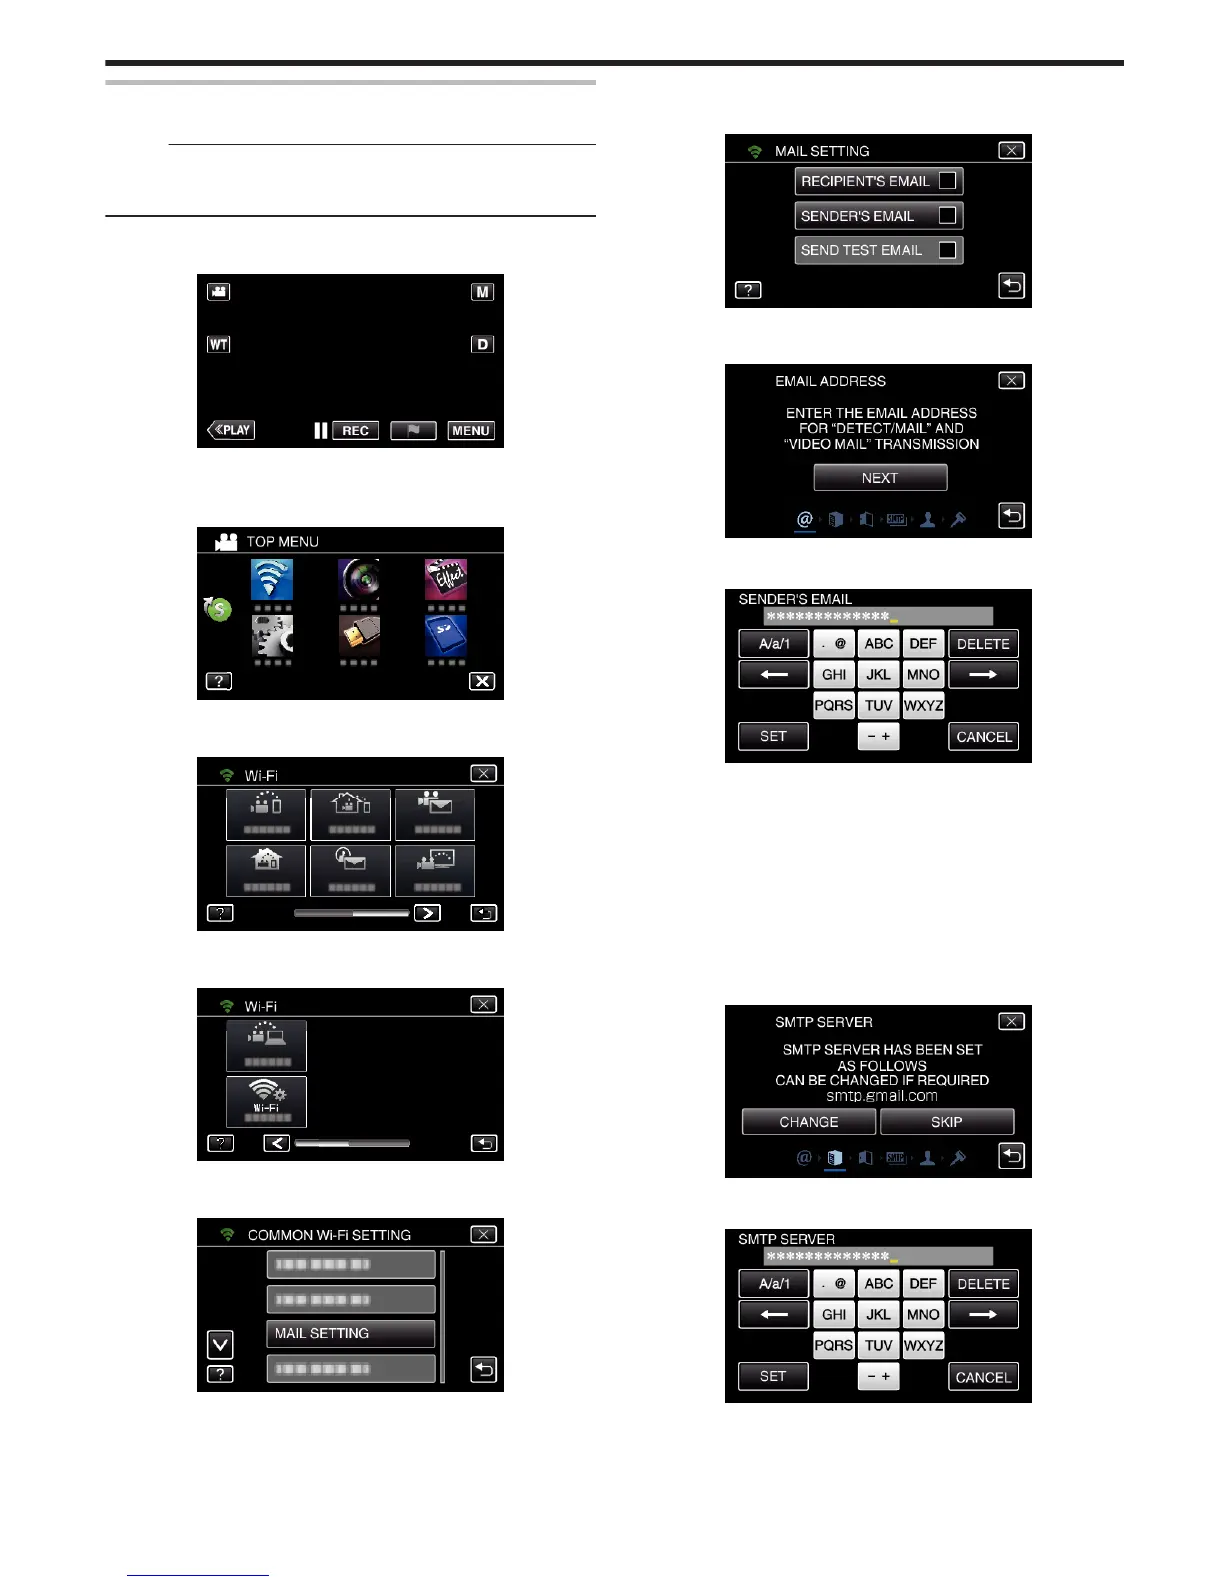
Setting the Sender’s E-mail Address of the Camera
Sets the address to be used for sending e-mails on the camera.
Memo :
0
By using Gmail as the sender’s mail address, some of the settings can be
omitted.
Use of Gmail is recommended for users who have a Gmail account.
1
Tap “MENU”.
(Operation on this camera)
.
0
The top menu appears.
2
Tap the “Wi-Fi” (
Q
) icon.
(Operation on this camera)
.
3
Tap 1 on the lower right of the screen.
(Operation on this camera)
.
4
Tap “COMMON Wi-Fi SETTING”.
(Operation on this camera)
.
5
Tap “MAIL SETTING”.
(Operation on this camera)
.
6
Tap “SENDER'S EMAIL”.
(Operation on this camera)
.
7
Tap “NEXT”.
(Operation on this camera)
.
0
Tap “CHANGE” to change the contents that are already set.
0
Enter the e-mail address and tap “SET”.
.
0
Tap on the on-screen keyboard to enter characters. The character
changes with every tap.
0
Tap “DELETE” to delete a character.
0
Tap “CANCEL” to exit.
0
Tap “A/a/1” to select character input type from upper case letter, lower
case letter, and number.
0
Tap E or F to move one space to the left or right.
0
After setting, tap “SET”.
8
Tap “NEXT”.
(In case of Gmail, tap “SKIP”)
(Operation on this camera)
.
0
Tap “CHANGE” to change the contents that are already set.
0
Enter the SMTP server and tap “SET”.
.
0
Tap on the on-screen keyboard to enter characters. The character
changes with every tap.
0
Tap “DELETE” to delete a character.
0
Tap “CANCEL” to exit.
Using Wi-Fi (GZ-EX355/GZ-EX310)
143
 Loading...