056$.$&,@0'(.$2(4,..$'(..$'1'($'(0
641
;@A.996;4A526;@6128;</
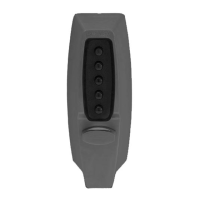
1. Place the knob (A) on the inside drive
sleeve (B). Locate the retaining clip
through the poke hole in the collar (C) of
the inside drive sleeve (B). If the thread
ring (D) covers this poke hole, loosen
the thread ring and align the hole in the
thread ring with the hole in the collar (C).
2. Depress the knob-retaining clip using
the pointed tip of the spanner wrench
(E) (see figure 11-1).
3. Push the inside knob on while simulta-
neously removing the spanner wrench
(E) — the retaining clip will snap back
into place securing the knob.
4. Retighten the thread ring if it was
loosened.
5. Turn the inside knob to the left to the
stop position and hold. The latch should
retract smoothly until it is flush with the
face plate. Repeat by turning knob to the
right.
6. Release the knob — the latch should
return to the fully extended position.
1. Coloque la perilla (A) en el eje interior
del impulsor (A). Encuentre la
abrazadera sujetadora a través del agu-
jero en el cuello (C) del eje (B). Si el aro
roscado (D) cubre el agujero, afloje el
aro y alinee el agujero del aro con el del
cuello (C).
2. Presione la abrazadera sujetadora de la
perilla, utilizando la punta de la llave de
arco (E) (véase la ilustración 11-1).
3. Introduzca la perilla mientras quita la
llave de arco (E) - la abrazadera
sujetadora volverá a colocarse en su
lugar, sujetando la perilla.
4. Vuelva a apretar el aro roscado, si se
aflojó.
5. Haga girar la perilla hasta que se pare y
manténgala en esa posición. El pestillo
debería replegarse suavemente hasta
quedar al ras con la placa de recubrim-
iento. Repita, girando la perilla a la
derecha.
6. Suelte la perilla - el pestillo debería
volver a salir completamente.
056$.$&,@0'(.&,.,0'412$4$&$/%,$4.$
&1/%,0$&,@0
;@A.996;4A520<:/6;.A6<;05.;42
=9B4.@@2:/9F
1. Insert the DF-59 key (A) into the cylinder
(B) of the combination change plug
assembly (see figure 12-1).
2. Insert the threaded bolt (C) through the
hole in the trim plate and into the
mounting stud located in the 1" (25 mm)
diameter cutout (see figure 12-1). #<
@=?6;4096=6@?2>B6?21
3. Turn the key clockwise until the collar of
the combination change plug assembly
butts up to the trim plate.
.BA6<; <;<A<C2?A645A2;
The key can be removed in either the
vertical or horizontal position.
1. Inserte la llave DF-59 (A) en el cilindro
(B) para cambiar la combinación.
2. Inserte el perno roscado (C) a través del
agujero en la placa interior hasta el
saliente de montaje situado en el agu-
jero de 1 pulg. (25 mm) de diámetro
(véase la ilustración 12-1). 15(
4(37,(4($%4$;$'(4$57-(6$'14$'(
4(5146(
3. Haga girar la llave hacia la derecha
hasta que el cuello del cilindro quede al
ras con la placa de adorno.
4(&$7&,@001$24,(6('(/$5,$'1
La llave puede sacarse en la posición
vertical u horizontal.