4746
TRAILER MOUNT: KEYBOARD
TROUBLESHOOTING GUIDE
Message sign does not
power on
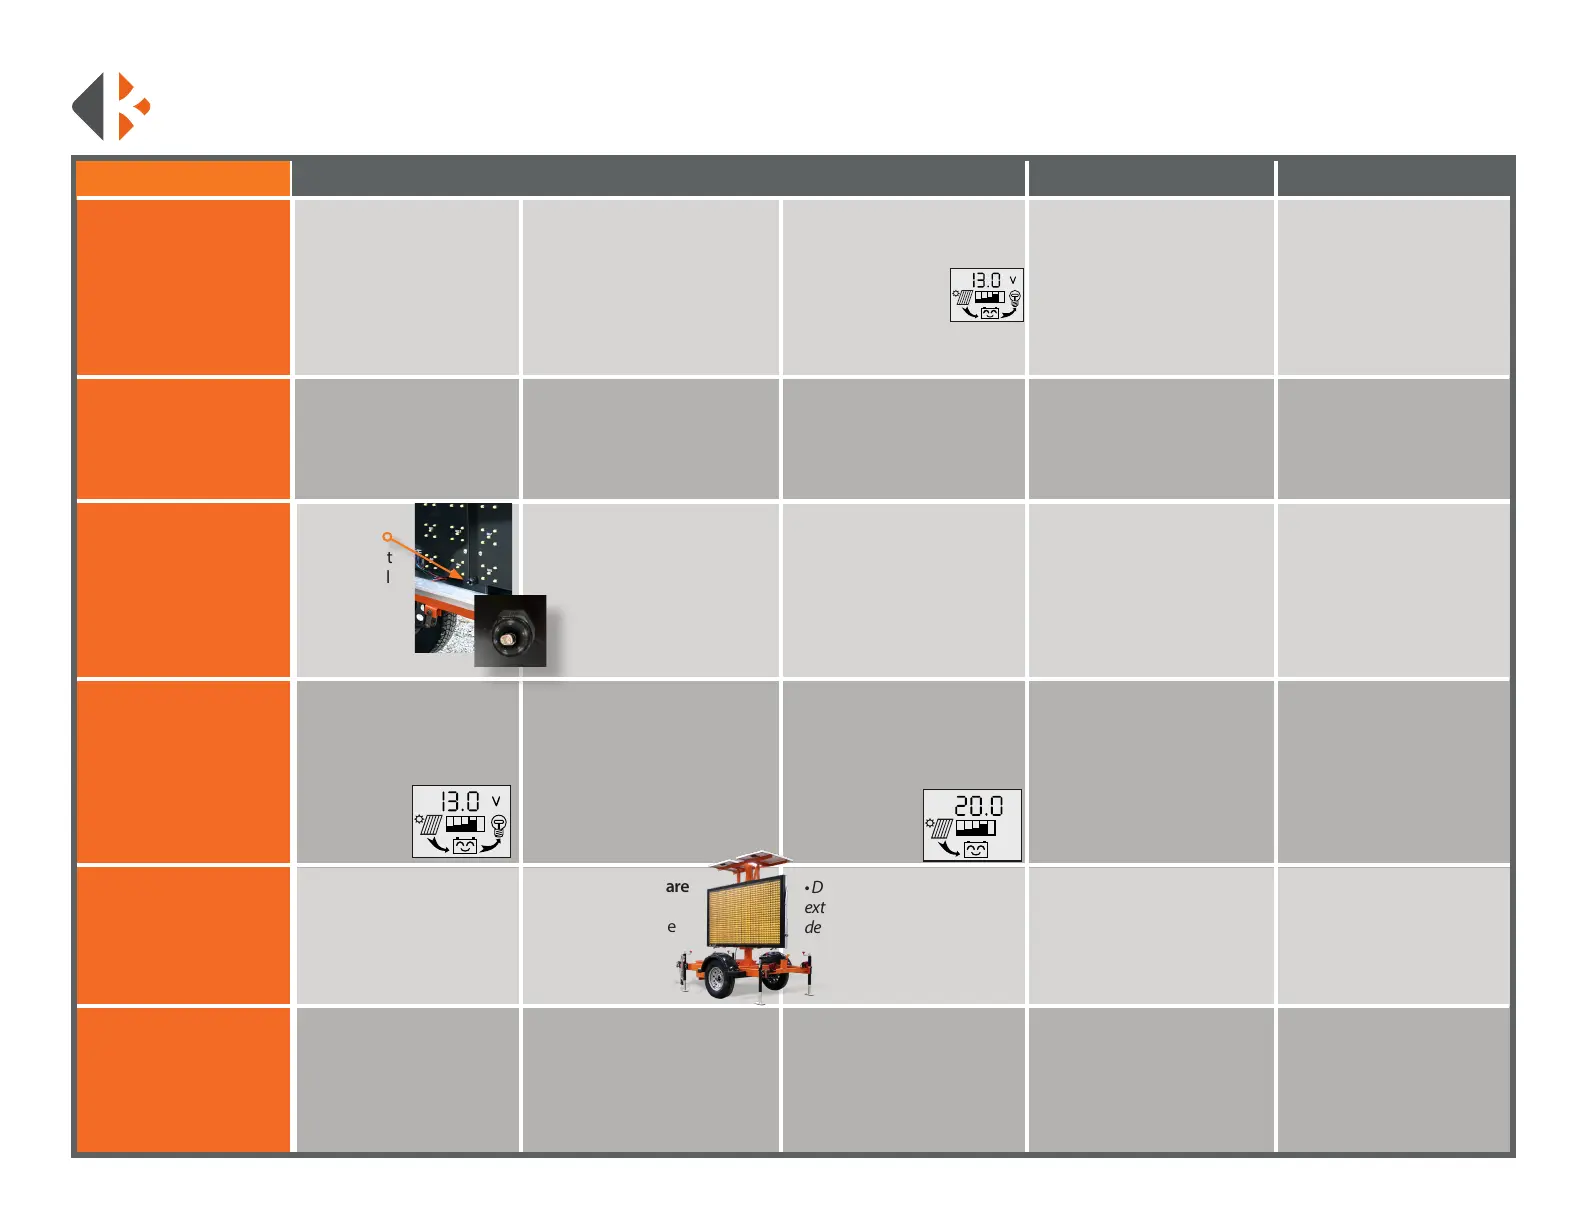
If the voltage is below 12V:
• Charge the unit via 110VAC
charge for at least 24hrs. Please
see the section below on the
message board not charging via
solar once charged.
• Check for power at the plug,
It should be at least 12V with
a smiling battery. The plug
is located on bottom of the
frame.
Message board not
charging via solar
once..
• Check that the solar
regulator registers a panel
connected to it. The main
screen should have a solar
panel symbol with an arrow.
If the solar panel symbol is not
present:
• There is a connection issue.
Check terminals at solar the
regulator and at the solar panels.
• Check solar wires for continuity.
LCD initializing
message shows
or sign will not save
messages
• Remove the bottom right
LED board to expose the rear
of the control box.
• Locate CR2032 battery on the
motherboard.
See page 51 for detailed
instructions for changing the
battery.
LED Panel displays
incorrect letters
• Locate the panel that is
displaying incorrectly. Verify
your units model number,
located on the bottom right of
the VIN tag.
(Example MB3L, MB14281 etc...)
• Locate the Dip Switch
Diagram on page 54.
Message Sign too
dim/bright
• Locate
photocell,
bottom right
of LED panel
display. The
second vertical
support from
the right.
• Ensure the photocell is not
covered by debris.
Dead Pixels
Test boards for pixel outage:
• Create a custom message.
• Type: [cb9] for the yellow
page. Include the brackets
• Press the H9 key.
Once all the LEDs are
activated:
• Make a note of the
boards that have
dead pixels.
• Battery replacement
requires a reset. Custom
messages will be lost. Input
your custom messages
again after replacement.
• Check battery for at least 3V.
• Replace battery if below 3V.
Optimal level is 3.2V
PROBLEM STEP 1 STEP 2 STEP 3 STEP 4 STEP 5
If the solar regulator reports
good voltage, the LOAD
ON/OFF function reports its
outputting power to the unit
but it’s still not powering on:
• Test for power at the power
switch.
If the issue persists:
• Call K&K Systems for further
Assistance.
If the regulator reports at least
12V:
• Is the arrow from the smiling
battery to the light
bulb lled?
If not lled:
• Click the right yellow button
(LOAD ON/OFF) until it’s lled.
• If polarity is correct, and
the wiring is good. But still
no current, please inspect
panels for damage and call
K&K Systems.
If the solar panel symbol is
present:
• Click the right button on
the two times to bring up the
solar generating
current screen.
• Solar Generating current
should display between 0.1A
and 5A depending on sun
conditions. If there is ample
sunlight and your current is at
0.00, check the polarity of your
solar cables. Pull the solar wires
out and verify with a voltmeter.
• Turn OFF all dip switches.
Reset switches per Dip Switch
Diagram for your units model
number.
If the LED board still displays
incorrectly:
• Call K&K Systems for further
Assistance.
Please call 888-414-3003 for Tech Support if this guide does not
solve your issue.
If the photocell is not working:
• Call K&K Systems for further
Assistance.
• Test photocell with a
ashlight. Hold a ashlight
at the photocell to see if it
brightens up. If it wont dim,
place a piece of electrical tape
over the bulkhead to test if it
dims. Brightness changes have
a short delay
If dimming does not change:
• Remove the bottom
right LED panel. Trace
wires from photocell back
to motherboard. Refer to
included wiring diagram to
verify wiring on page 54.
• Contact K&K with outage
information for repairs.
• Do not leave on this page for
extended periods of time. It will
deplete the batteries quickly.
PV
A