Calibration
2-22
Step 5: Amps calibration
1. Connect the calibrator to the AMPS and INPUT LO
jacks, as shown in Figure 2-3.
2. Set the calibrator output to 200.000µA, and place the
unit in operate.
3. Send the following command to the Model 2002:
:CAL:PROT:DC:A200U 200E-6
If you are using a different calibration value, be sure to sub-
stitute that value for the parameter shown above. (The allow-
able range is from 95µA to 205µA.)
Wait for the instrument to complete this step before
continuing.
4. Repeat steps 2 and 3 for the following remaining amps
shown in Table 2-10.
Table 2-9
Ohms calibration summary
Cal point
Nominal
resistance Allowable range Command*
2MΩ
200kΩ
20kΩ
2kΩ
200Ω
20Ω
1MΩ
100kΩ
19kΩ
1.9kΩ
190Ω
19Ω
475kΩ to 1.025MΩ
95kΩ to 205kΩ
9.5kΩ to 20.5kΩ
0.95kΩ to 2.05kΩ
95Ω to 205Ω
9.5Ω to 20.5Ω
:CAL:PROT:DC:OHM1M 1E6
:CAL:PROT:DC:OHM200K 100E3
:CAL:PROT:DC:OHM20K 19E3
:CAL:PROT:DC:OHM2K 1.9E3
:CAL:PROT:DC:OHM200 190
:CAL:PROT:DC:OHM20 19
* Nominal resistance values shown. Use exact calibrator resistance value for command parameter.
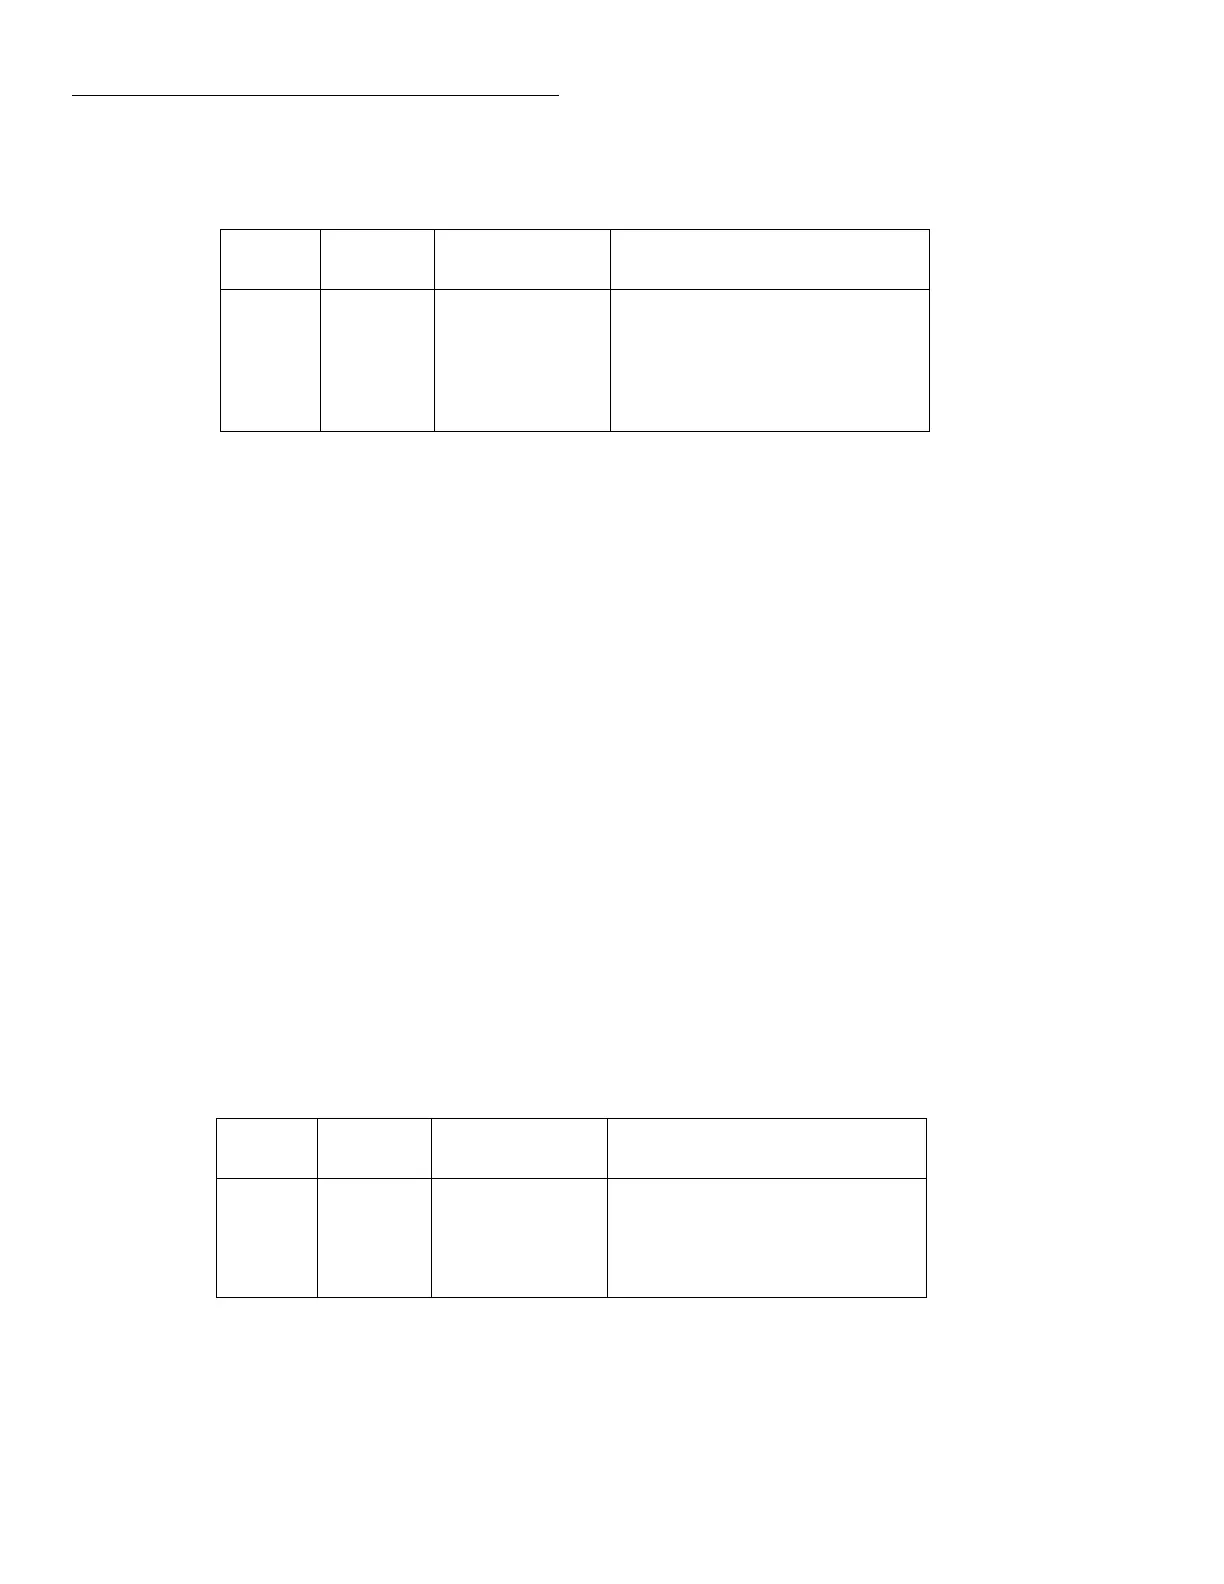
Table 2-10
Amps calibration summary
Cal point
Calibrator
current Allowable range Calibration command
200µA
2mA
20mA
200mA
2A
200.000µA
2.00000mA
20.0000mA
200.000mA
1.00000A
0.95µA to 205µA
0.95mA to 2.05mA
9.5mA to 20.5mA
95mA to 205mA
0.95A to 2.05A
:CAL:PROT:DC:A200U 200E-6
:CAL:PROT:DC:A2M 2E-3
:CAL:PROT:DC:A20M 20E-3
:CAL:PROT:DC:A200M 200E-3
:CAL:PROT:DC:A2 1
Step 6. Open-circuit calibration
1. Disconnect all test leads from the Model 2002 INPUT
and AMPS jacks.
2. Send the following command to the instrument:
:CAL:PROT:DC:OPEN
3. Wait until open-circuit calibration is complete before
going on to the next step.
Step 7: Perform AC user calibration
To perform user AC calibration, send the following
command:
:CAL:UNPR:ACC
Note that AC calibration will take about six minutes to
complete.