Stitch Width and Length Buttons
All stitches in your Sensor Sew 70 are pre-set for the best stitch
length and w_dth, but if you wish to change the settings here's
how:
You can set stitch w_dth and length with these two buttons.
(Use one at a time. The machine will remember the first one
while you set the other, wwthout your hawng to press the
memory button.)
Use the Plus "+" or minus "-" buttons to increase or decrease
the stitch width or length.
The indicator screen will show the stitch width or length you
have selected.
• Stitch Width Button
This button controls the width of z_gzag stitches.
NOTE:
If you press the stitch w_dth button whi_e doing
straight stitching, the stitch w=dth light will go on and
the _ndicator screen will show "C"- Your needle ts
m the "Center" If you press the "+" button, the
indicator wiil show "R" (Right). If you press the
"-" button, the indicator will show "L" (Left).
When you press this button for zigzag stitches, the stitch width
light will go on and the indicator screen will show the preset
stitch w_dth of "5.0"
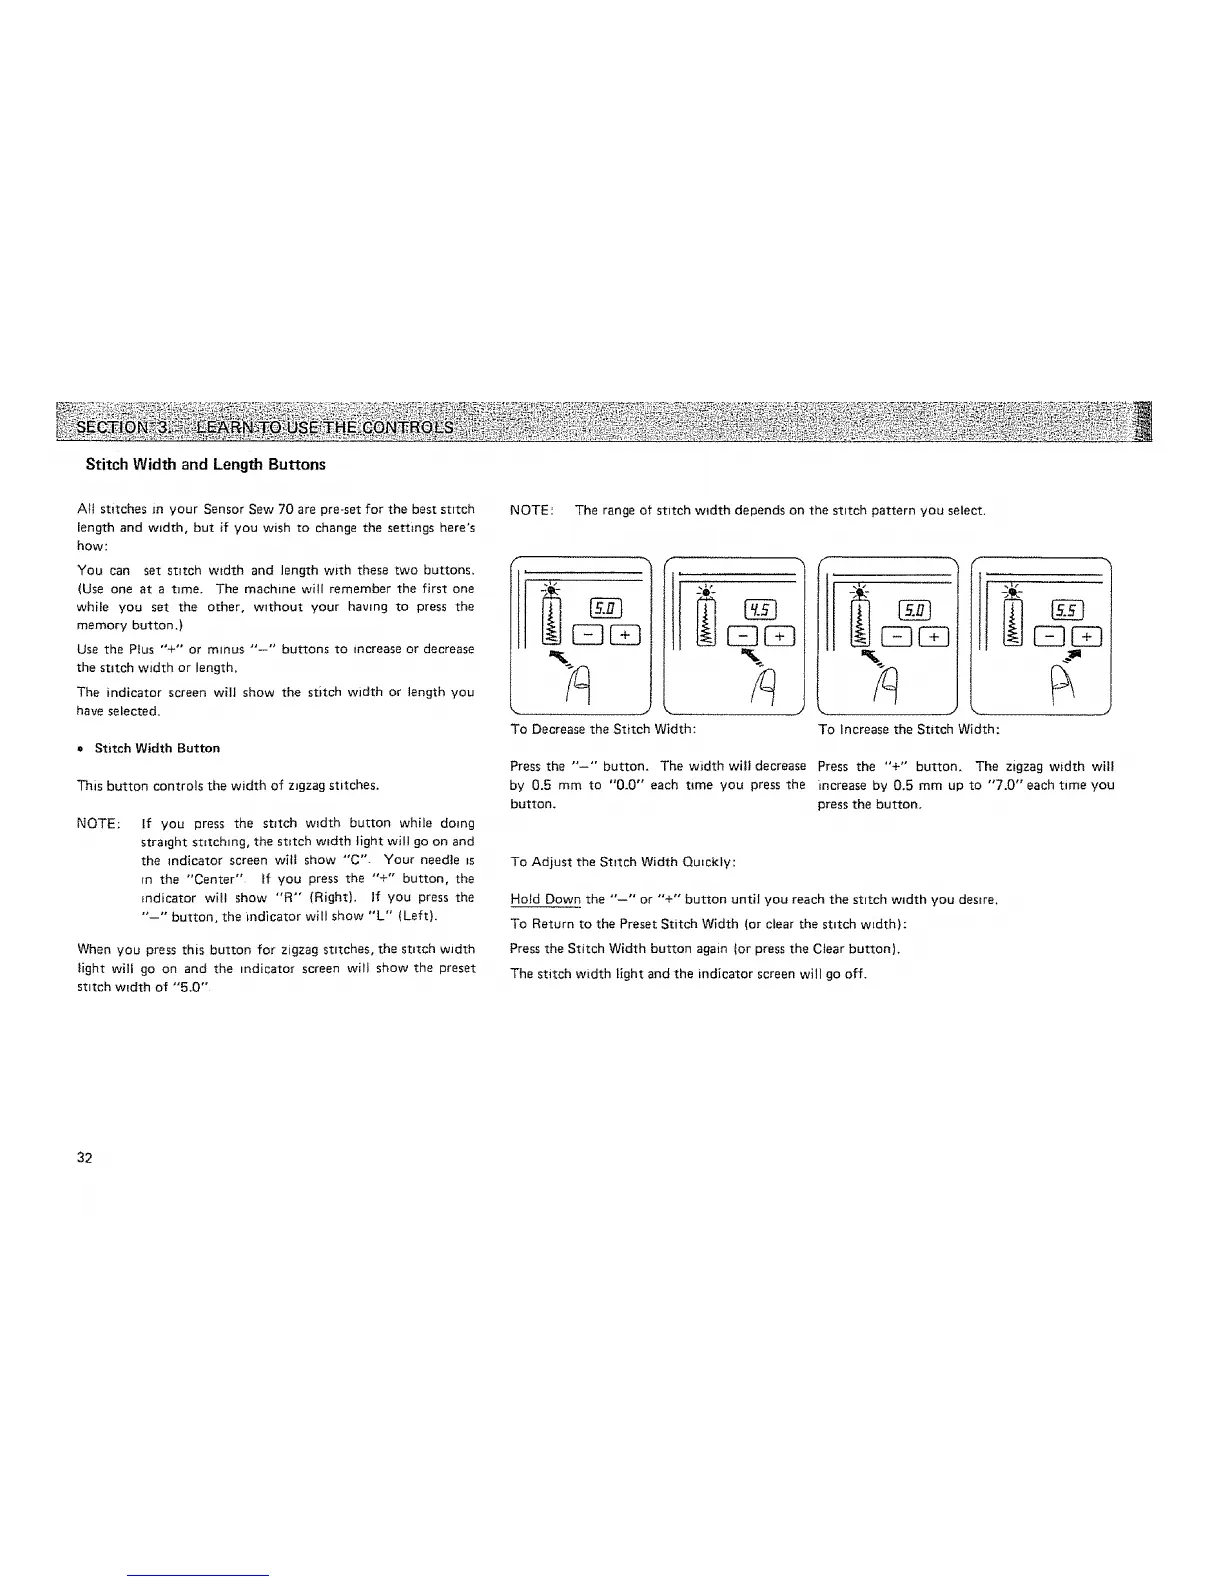
NOTE: The range of stitch width depends on the stitch pattern you select.
t
F
.....
To Decrease the Stitch Width:
I CZ3
r--
To Increase the Stitch Width:
Press the "-" button. The width will decrease Press the "+" button, The zigzag width will
by 0.5 mm to "0.0" each t4me you press the increase by 0.5 mm up to "7.0" each time you
button, press the button,
To Adjust the Stitch Width Quickly:
Hold Down the "'--°" or "+" button until you reach the stitch w_dth you desire.
To Return to the Preset Stitch Width (or clear the stitch width):
Press the Stitch Width button again ior press the Clear button).
The stitch width light and the indicator screen will go off.
32