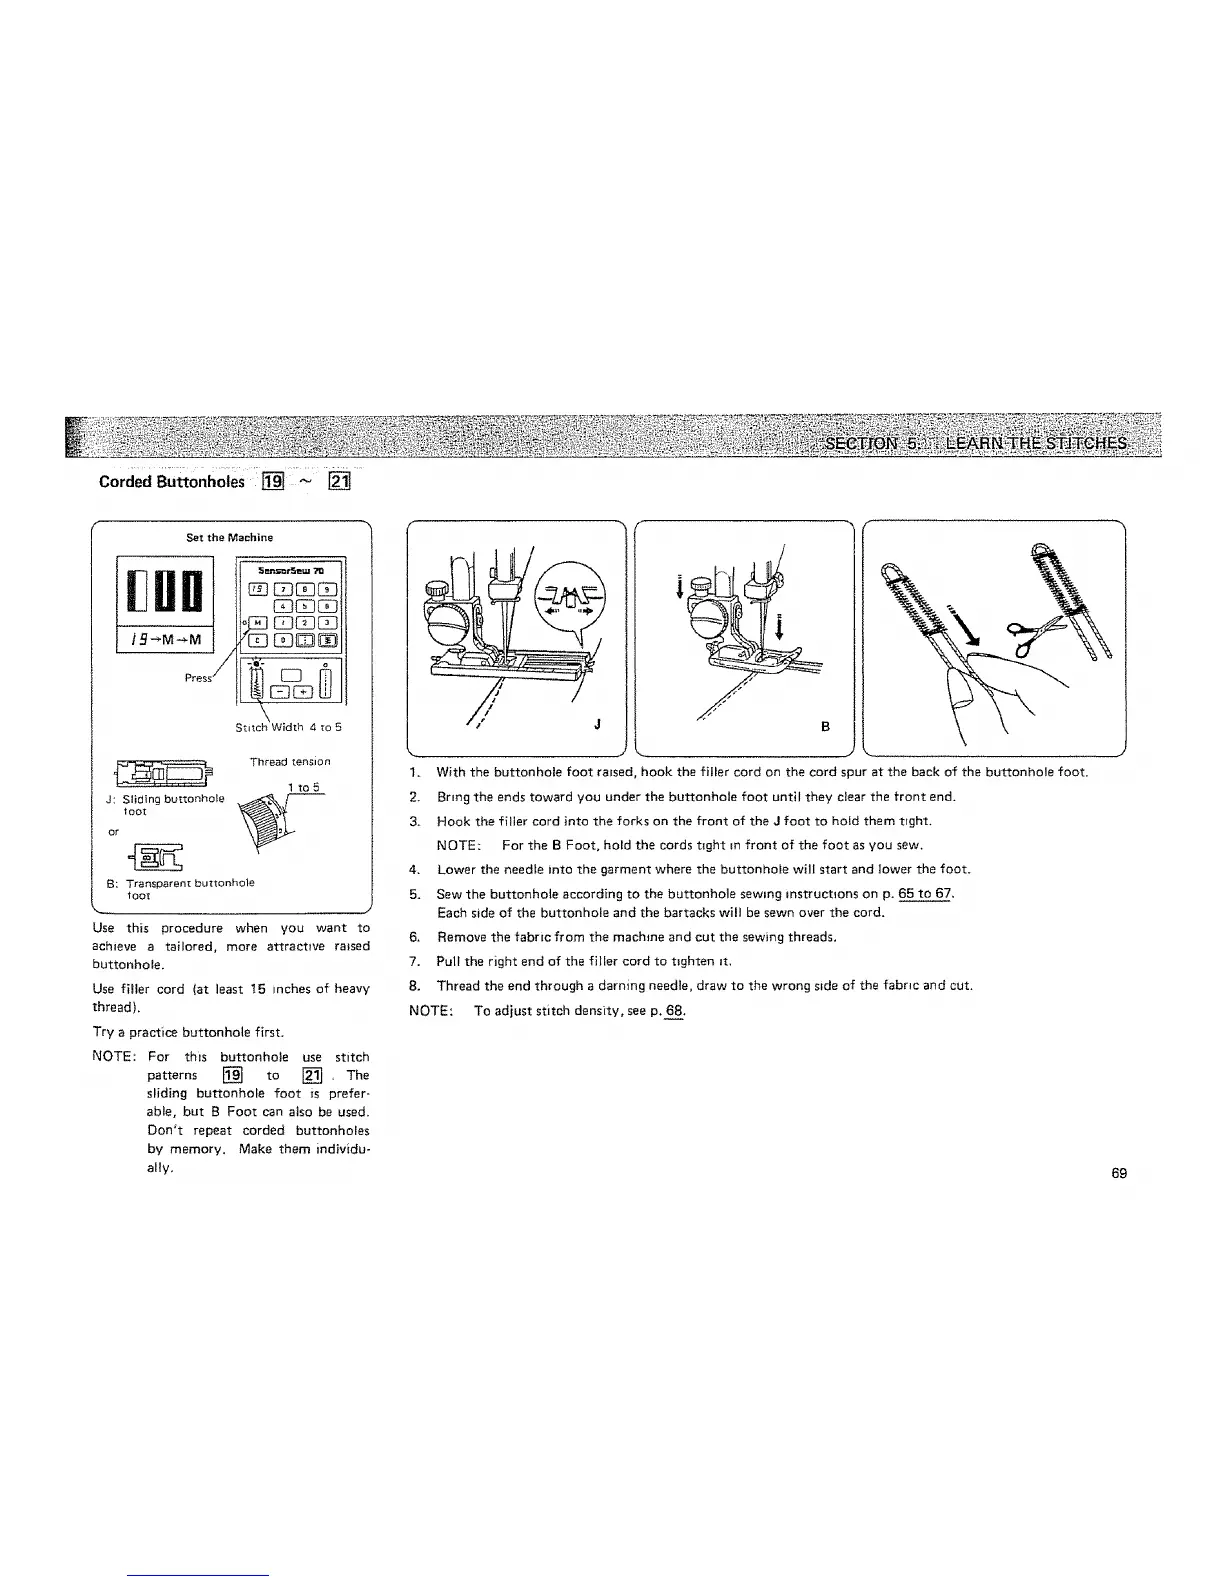
Corded Bu_onhoies :i[] _ _
Set the Machine
Stitch Width 4 to 5
J: Sliding buttonhole
toot
or
Thread tension
1 to5
B: Transparent buttonhole
tooI
Use this procedure when you want to
achieve a taiJored, more attracttve ratsed
buttonhole.
Use fitler cord (at least 15 inches of heavy
thread).
Try a practice buttonhole first.
NOTE: For this buttonhole use stitch
patterns [] to [] The
sliding buttonhole foot _s prefer-
able, but B Foot can also be used.
Don't repeat corded buttonholes
by memory. Make them individu-
ally,
6.
7.
8.
NOTE:
/
1. With the buttonhole foot raised, hook the filler cord on the cord spur at the back of the buttonhole foot.
2. Bring the ends toward you under the buttonhole foot until they clear the front end.
3. Hook the filler cord into the forks on the front of the J foot to hold them ttght.
NOTE: For the B Foot, hold the cords t_ght m front of the foot as you sew.
4. Lower the needle into the garment where the buttonhole will start and lower the foot.
5. Sew the buttonhole according to the buttonhole sewing instructions on p. 65 to 67.
Each side of the buttonhole and the barracks wilt be sewn over the cord.
Remove the fabric from the machine and cut the sewing threads.
Pull the right end of the filler cord to tighten it.
Thread the end through a darning needle, draw to the wrong side of the fabric and cut.
To adjust stitch density, see p. 68.
69