Remote Interface Configurations 6
Keysight J7211A/B/C Operating and Service Manual 55
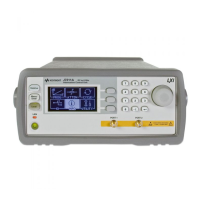
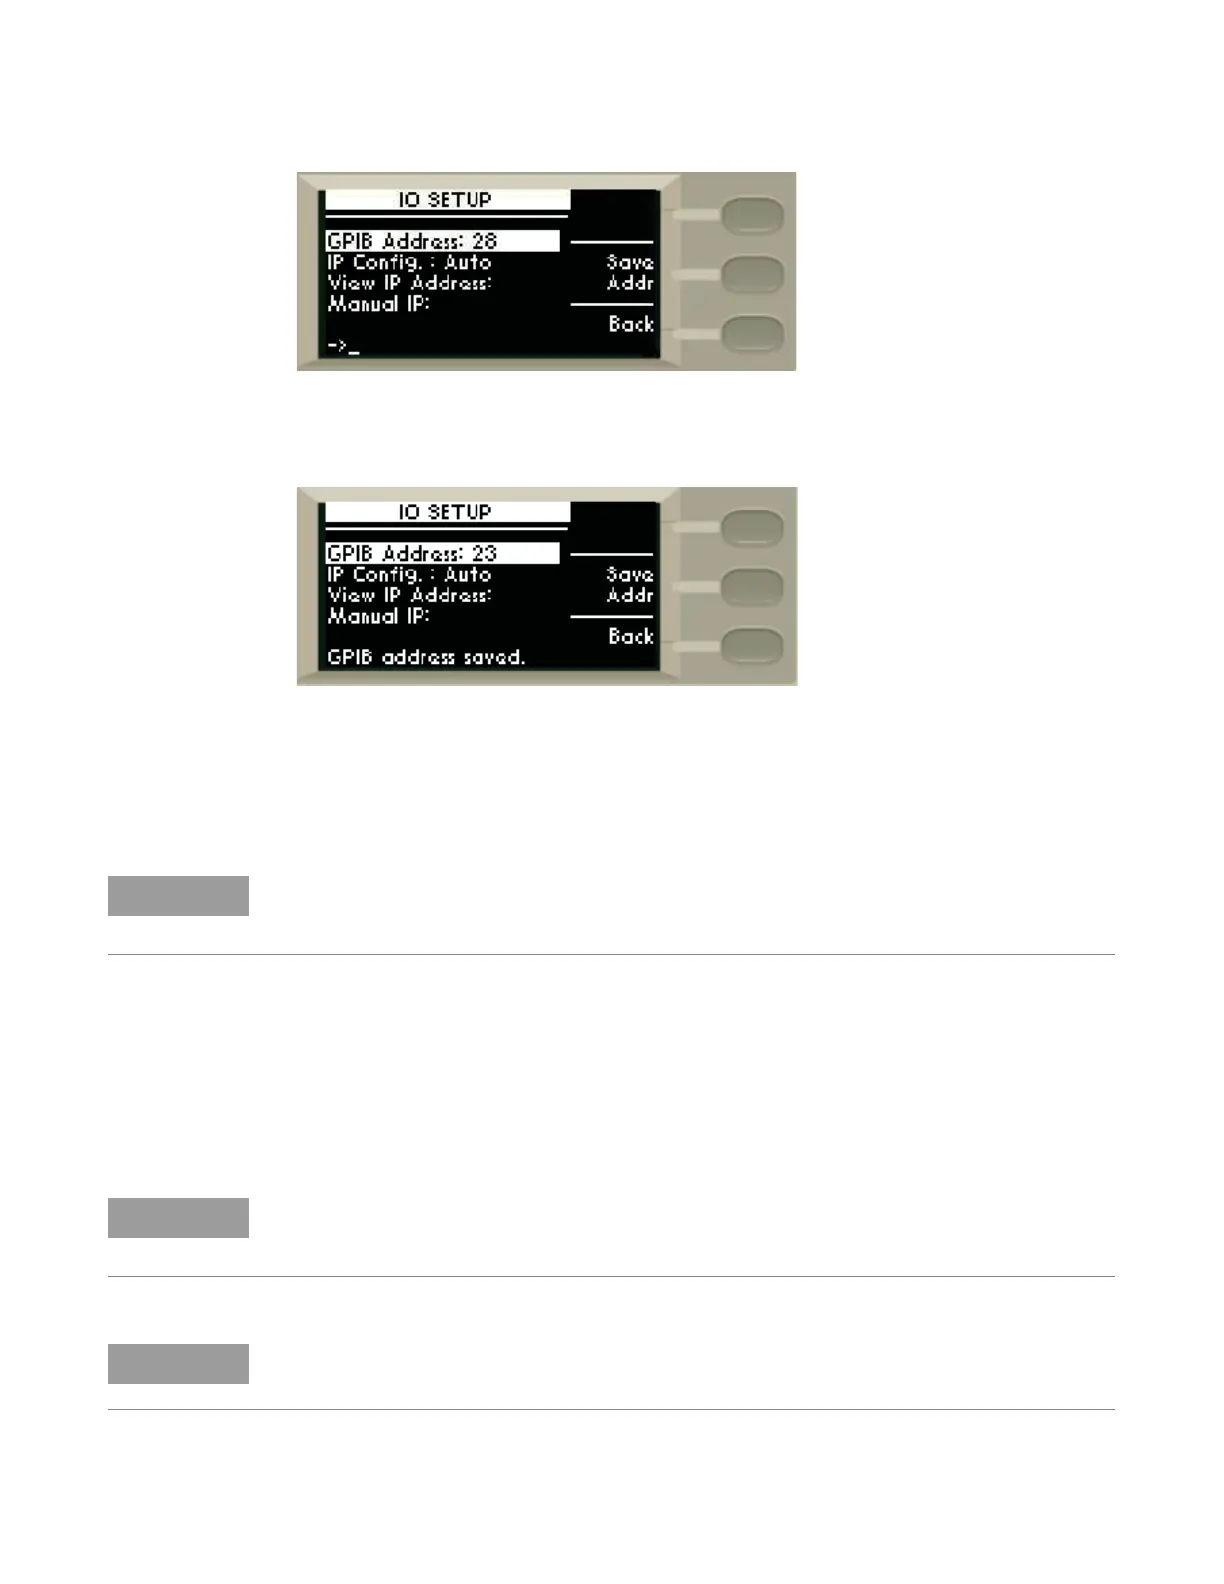
3 Scroll to change address by using rotary knob and press once on Save Addr softkey to save
changes.
4 Once saved, sentence of “GPIB address saved” appears on the bottom of the screen.
5Back softkey brings you back to the previous menu screen.
Connecting over USB
The USB interface requires no front panel configuration.
1 After I/O software is installed on your computer, connect a J7211A/B/C to your computer using
a Type Mini B 5—pin USB cable.
2 Make sure power is applied to your computer and verify that the operating system is fully
booted. Then, apply power to the J7211A/B/C.
3 The Found New Hardware Wizard will automatically start and guide you through configuring
the J7211A/B/C as a USB device. To install the software automatically, accept all defaults.
Before connecting the USB cable, make sure that I/O software is installed on your computer. See
““Connecting the J7211A/B/C to Your Computer” on page 66 for more information on installing
the Keysight I/O Libraries software.
If you have installed the Keysight IO Libraries Software, this also install the required low-level
software drivers. Therefore you do not need to insert the CD when the Found New Hardware
Wizard instructs you to do so.
If you have installed any other I/O interface software, refer to documentation included in that
software.