EasyManuals Logo

Keysight Technologies N5166B CXG Service Guide

Keysight Technologies N5166B CXG
451 pages
To Next Page IconTo Next Page
To Previous Page IconTo Previous Page
Page #361 background imageLoading...
Page #361 background image
Keysight CXG, EXG, and MXG X-Series Signal Generators Service Guide 361
Assembly Replacement
A3 RF Assembly (N5173B, N5183B)
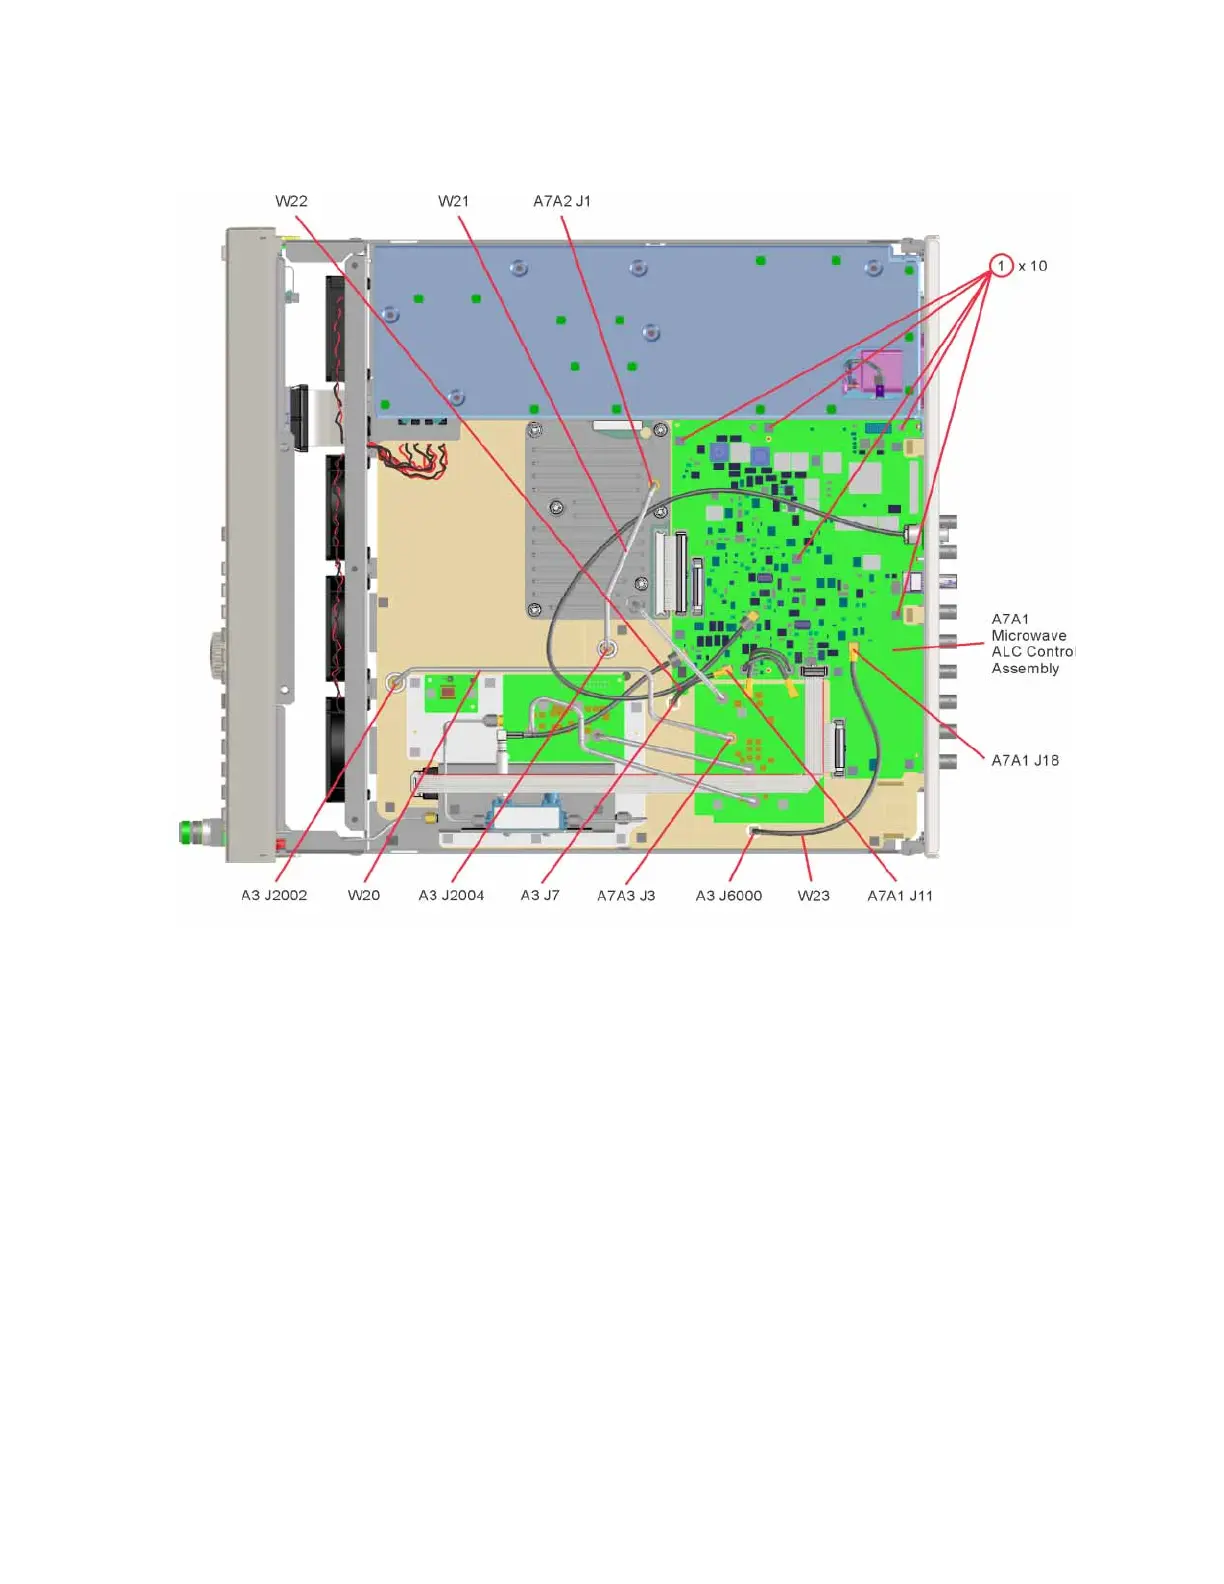
Figure 15-15 A7 Micro-Deck to A3 RF Assembly Interconnections
9. Refer to Figure 15-8. Using the T-10 driver, remove the 10 screws (1) that
connect the A3 RF assembly to the chassis.
10.Refer to Figure 15-10. Place the tip of a medium common screwdriver into
one of the three pry slots on the A3 RF assembly and twist the screwdriver
to release the board from the connector pins.
11.Repeat step 10 with the other two pry slots.
12.Remove the A3 RF assembly as shown in Figure 15-11.

Table of Contents

Other manuals for Keysight Technologies N5166B CXG

Questions and Answers:

Question and Answer IconNeed help?

Do you have a question about the Keysight Technologies N5166B CXG and is the answer not in the manual?

Keysight Technologies N5166B CXG Specifications

General IconGeneral
BrandKeysight Technologies
ModelN5166B CXG
CategoryPortable Generator
LanguageEnglish

Related product manuals