4-8
9. To remove the left or right electronic
control:
d) Open both oven doors.
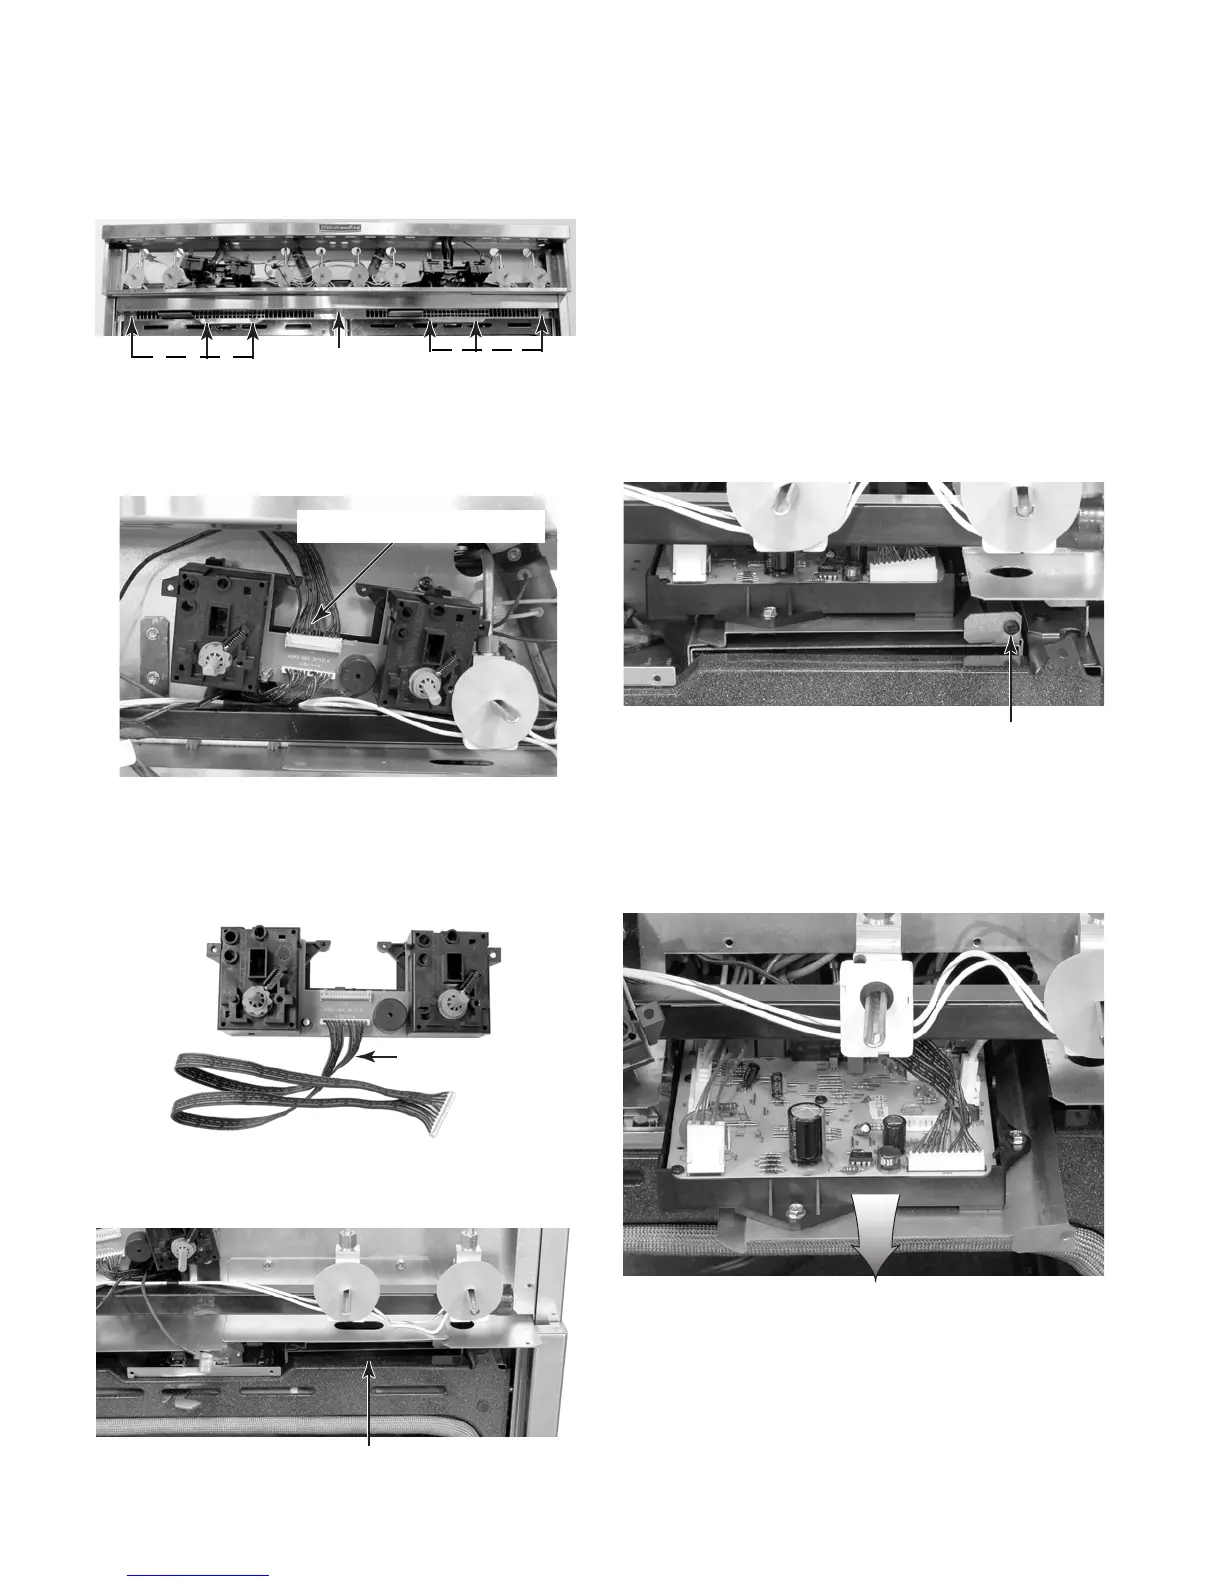
e) Remove the six screws from the vent
grille and remove the grille.
g) Remove the thermostat & selector
switch assembly from the unit by pull-
ing the 12-wire cable through the ac-
cess holes in the chassis.
f) Disconnect the 12-wire quick discon-
nect from the thermostat & selector
switch assembly
Vent Grille
3 Screws
3 Screws
12-Wire Quick Disconnect
12-Wire Cable
e) Pull the electronic control and trans-
former platform forward and discon-
nect the wire connectors from the pins.
NOTE: The board connector and pin
callouts are shown on the next page.
Platform Screw
a) Remove the control panel from the unit
(see step 3 on page 4-4 for the proce-
dure).
b) Remove the front panel frame (see
step 7 on page 4-7 for the procedure).
c) Remove the thermostat & selector
switch assembly (see steps 8c through
8g on pages 4-7 and 4-8 for the proce-
dure).
d) Remove the screw from the front of the
electronic control and transformer plat-
form for the electronic control.
Right Electronic Control Location
Pull Platform Forward