35
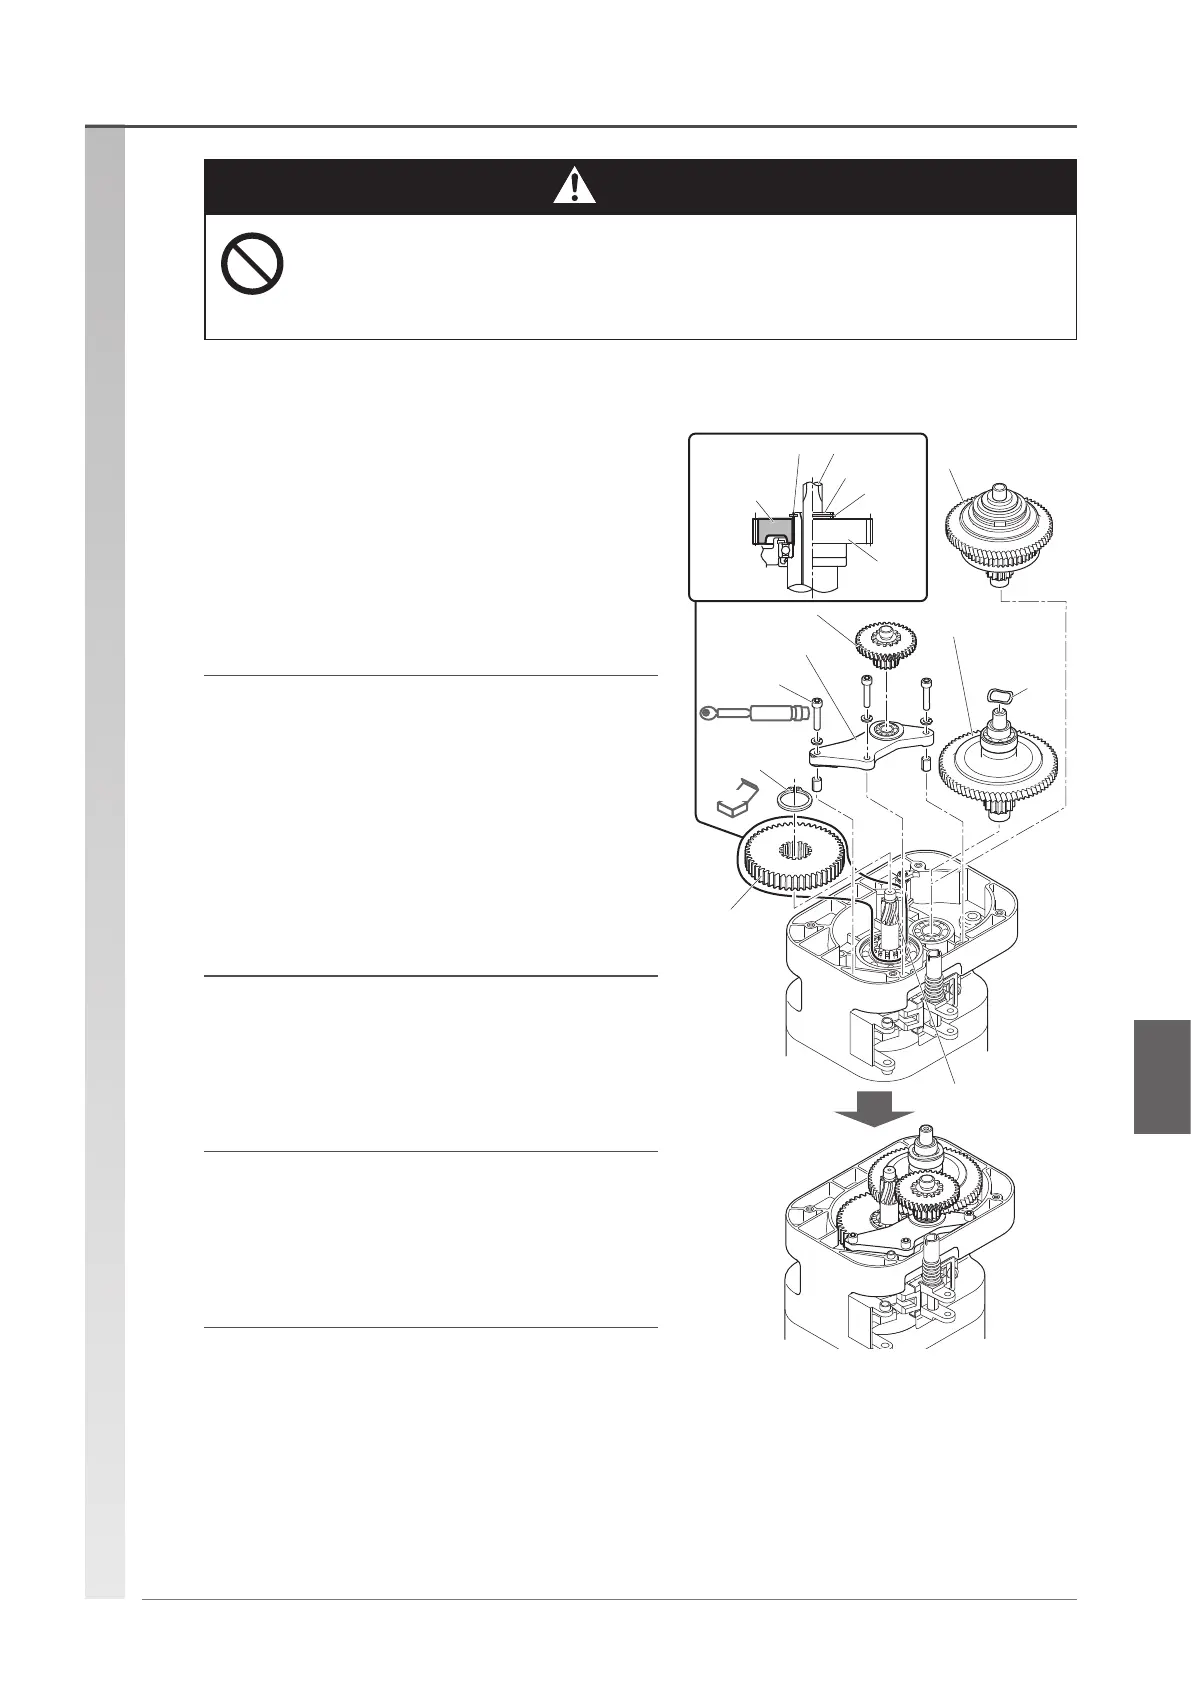
(2) Place the set pin to the body, and install the
gear holder plate with the 3 socket bolts.
Tightening torque M6 : 10.8 N·m
M8 : 37.2 N·m
Spring lock washer : Yes
Triple reduction
(1) Insert the load gear to the load sheave, and
lock it with a new snap ring.
•
For the orientation of the load gear to install it correctly,
refer to Figure A.
• Do not adjust the friction clutch or friction clutch with mechanical brake.
Failure to follow this instruction may result in death or severe injury.
(3) Install the friction clutch, and mount the
wave washer.
(4) Insert Gear B to the bearing of the gear
plate.
Gear holder plate
Gear B
Fig. A Orientation of the load gear
Snap ring
Socket bolt
(x3)
Load gear
Friction clutch
Wave
washer
NEW
Friction clutch with
mechanical brake
Load
gear
Snap ring
Load sheave
Pinion
Spline
Boss part
(Bearing side
has indentation.)
Torque
For the friction clutch with mechanical
brakespecication(option),installadditional
parts as in the case of the double reduction
specication.
(Refer to the previous page.)
Prohibited
Danger
Reassembly procedure
(To be continued)
Assembling the gear parts

 Loading...