34
Reassembly procedure (continued)
Friction clutch
Friction clutch with
mechanical brake
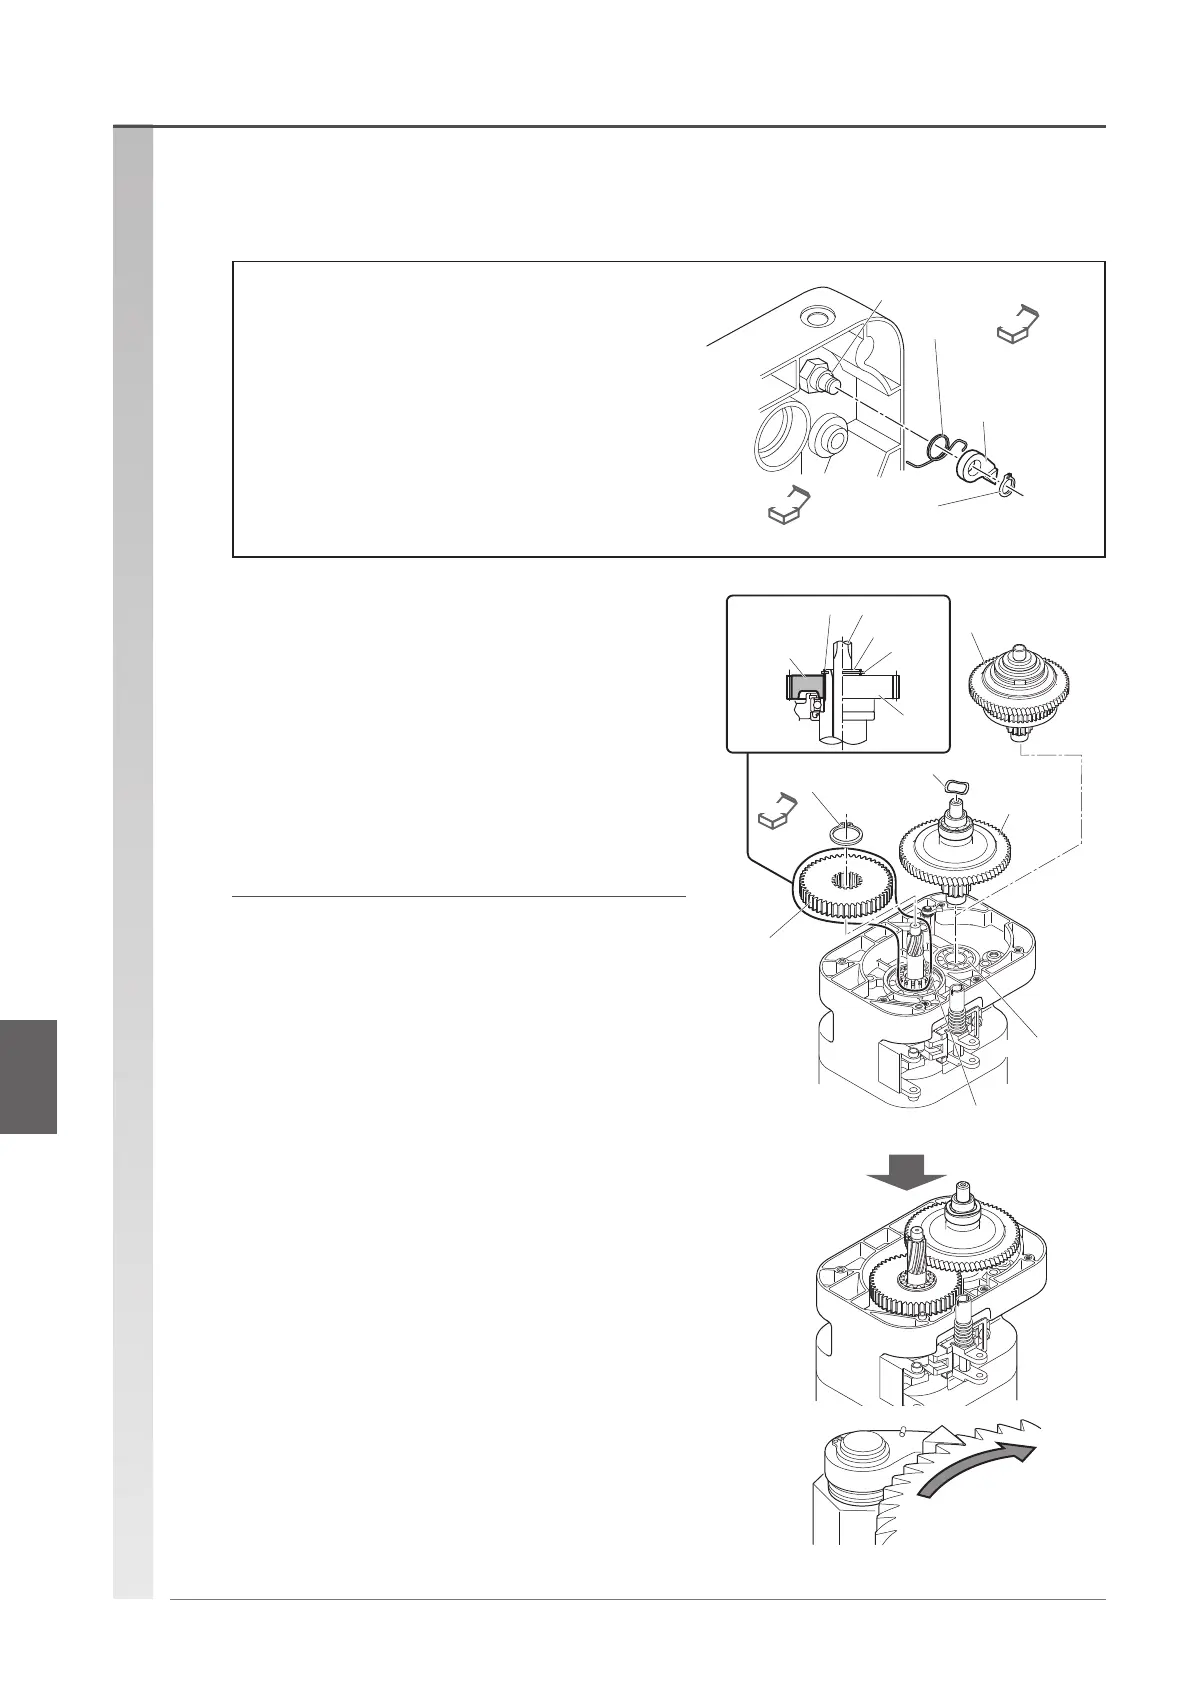
Fig. A Orientation of the load gear
Wave washser
Snap ring
Pinion
Load gear
Bearing
NEW
Load
gear
Snap ring
Load sheave
Pinion
Spline
Boss part
(Bearing side
has indentation.)
Double reduction
•
Mechanical brake specication (option)
Pawl spring
Snap ring
Pawl
(Replace it with
a new part if worn.)
NEW
NEW
(1) Insert the pawl spring and pawl to the pawl
shaft, and lock them with a snap ring.
•
Check the orientation so that the pawl is in engagement
with the ratchet disc.
Assembling the gear parts
5
(1) Insert the load gear to the load sheave, and
lock it with a new snap ring.
•
Make sure that the snap ring is inserted fully.
•
For the orientation of the load gear to install it correctly,
refer to Figure A.
(2) Install the friction clutch, and mount the
wave washer.
Friction clutch with mechanical brake
specication(option)
•
Install the friction clutch with mechanical brake while
checking the engagement between the ratchet disc and
pawl.
(No wave washer available.)
Rotational direction
when hoisting
Reassembly procedureAssembling the gear parts

 Loading...