48
Oil filling
9
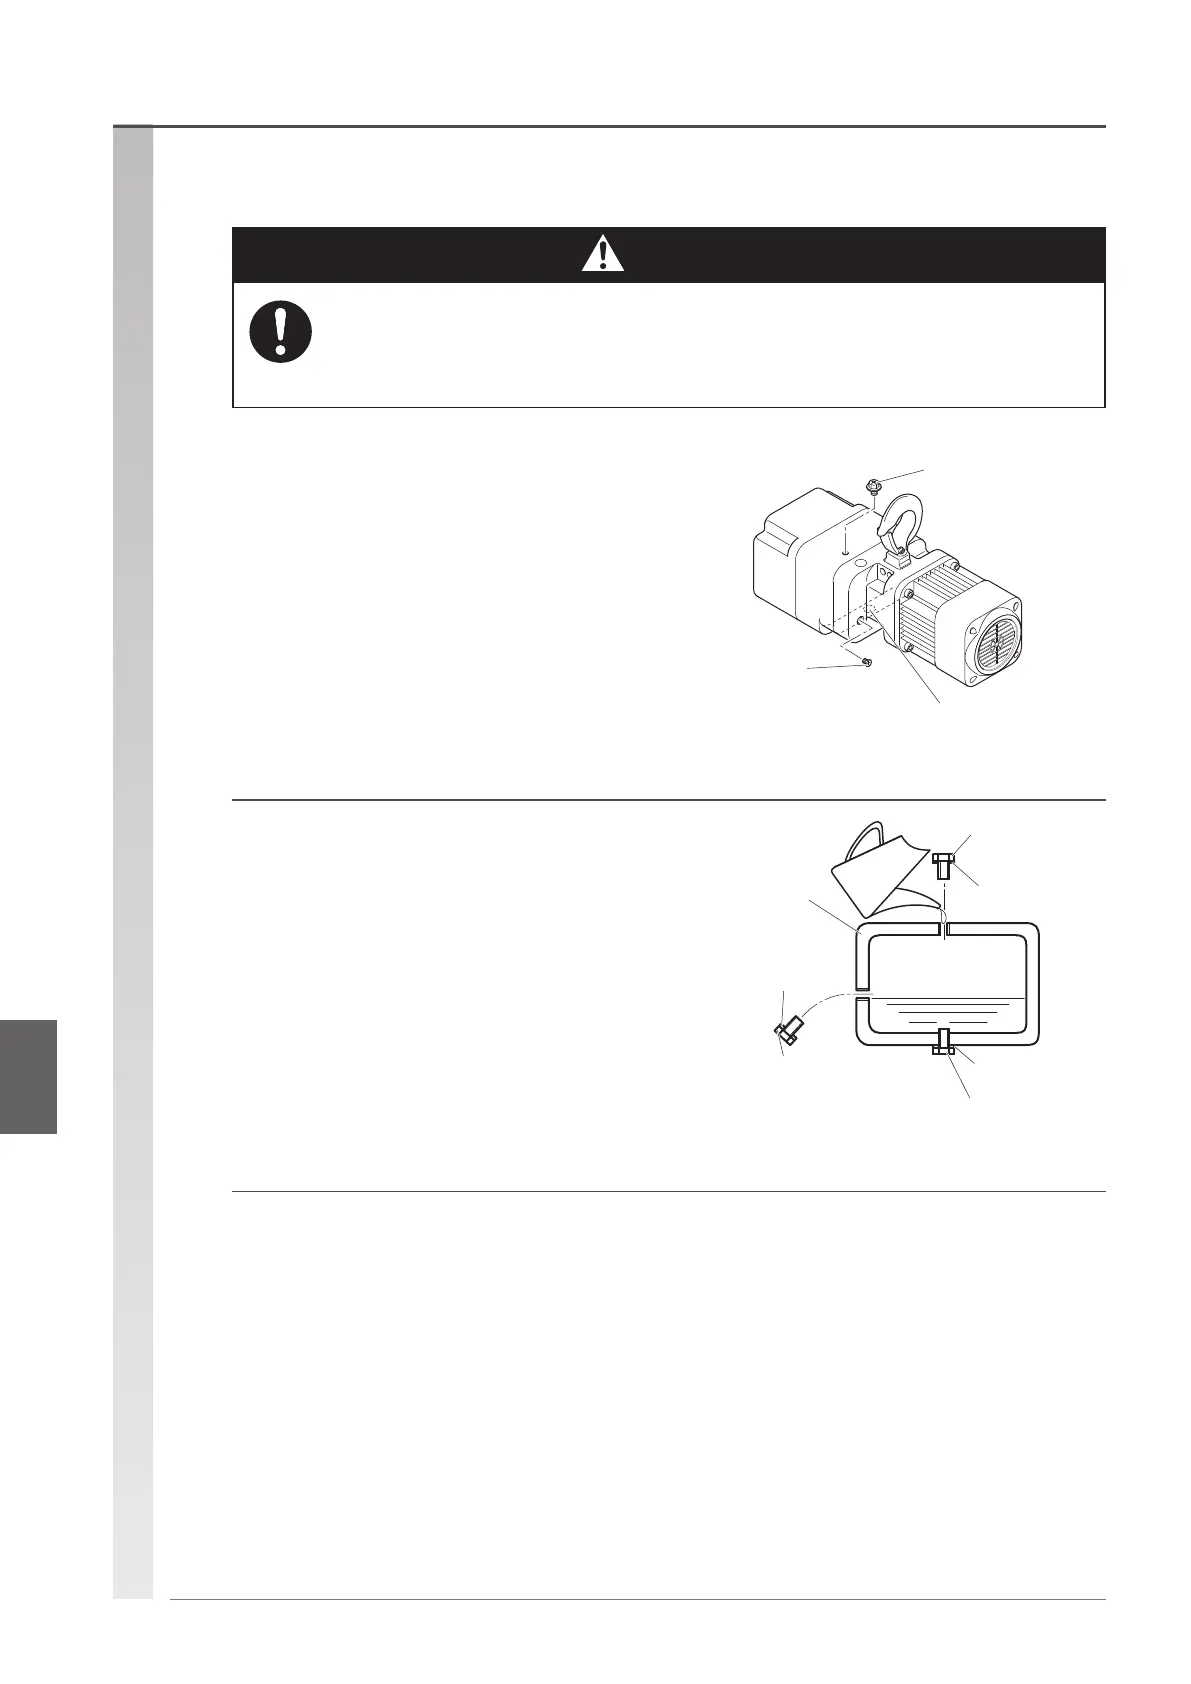
(1) Tighten the oil plug (for waste oil hole) with
a new packing securely.
Oil plug
(for waste oil hole)
Oil plug
(for oil check window)
OIL plug B
(for oilhole)
• Use genuine gear oil.
If you inject (or mix) any oil other than genuine oil, a major accident such as death or
serious injury may occur due to a dropped load.
(2) Inject gear oil from the oil plug B
(for oilhole).
•
Inject a proper quantity of oil by referring to the table on
the next page.
Inject oil up to the proximity of the oil plug (for oil check
window).
(3) Place a new packing on the oil plug B (for
oilhole) and tighten it.
Use Kito genuine gear oil. (Refer to the oil
quantity on the next page.)
* The friction clutch with mechanical brake specification has a
sticker that indicates “With mechanical brake" (orange letters
on a black background) to the right side seen from the main
body controller cover.
Packing
Packing
Packing
Oil plug B
(for oilhole)
Main body
Oil plug
(for waste oil hole)
Oil plug
(for oil check window)
Gear oil
Mandatory
Danger
Reassembly procedure (continued)
Reassembly procedureOillling

 Loading...