42
J
Dual speed inverter type (Basic main body B/C type)
Plate screw
Fulcrum pin
Plate
Draw out from the notch
of the plate.
From motor
Connect to
each terminal.
Wiring hole inside
the gear case
Controller cover
Ground line
Cover belt
Pan-head
machine screw
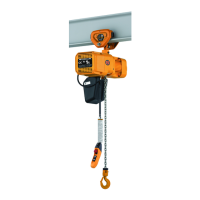
• Be careful so that your finger won't get caught by the panel plate.
(1) Fix the plate securely with the 3 setscrews.
•
Align the elongate hole of the plate to the fulcrum pin head
of the gear case, and rotate it slightly for position it.
(2) Reconnect the motor lead wire.
•
Check the wire connection by looking at the connecting
diagram. The connecting diagram is attached on the
inside of the controller cover.
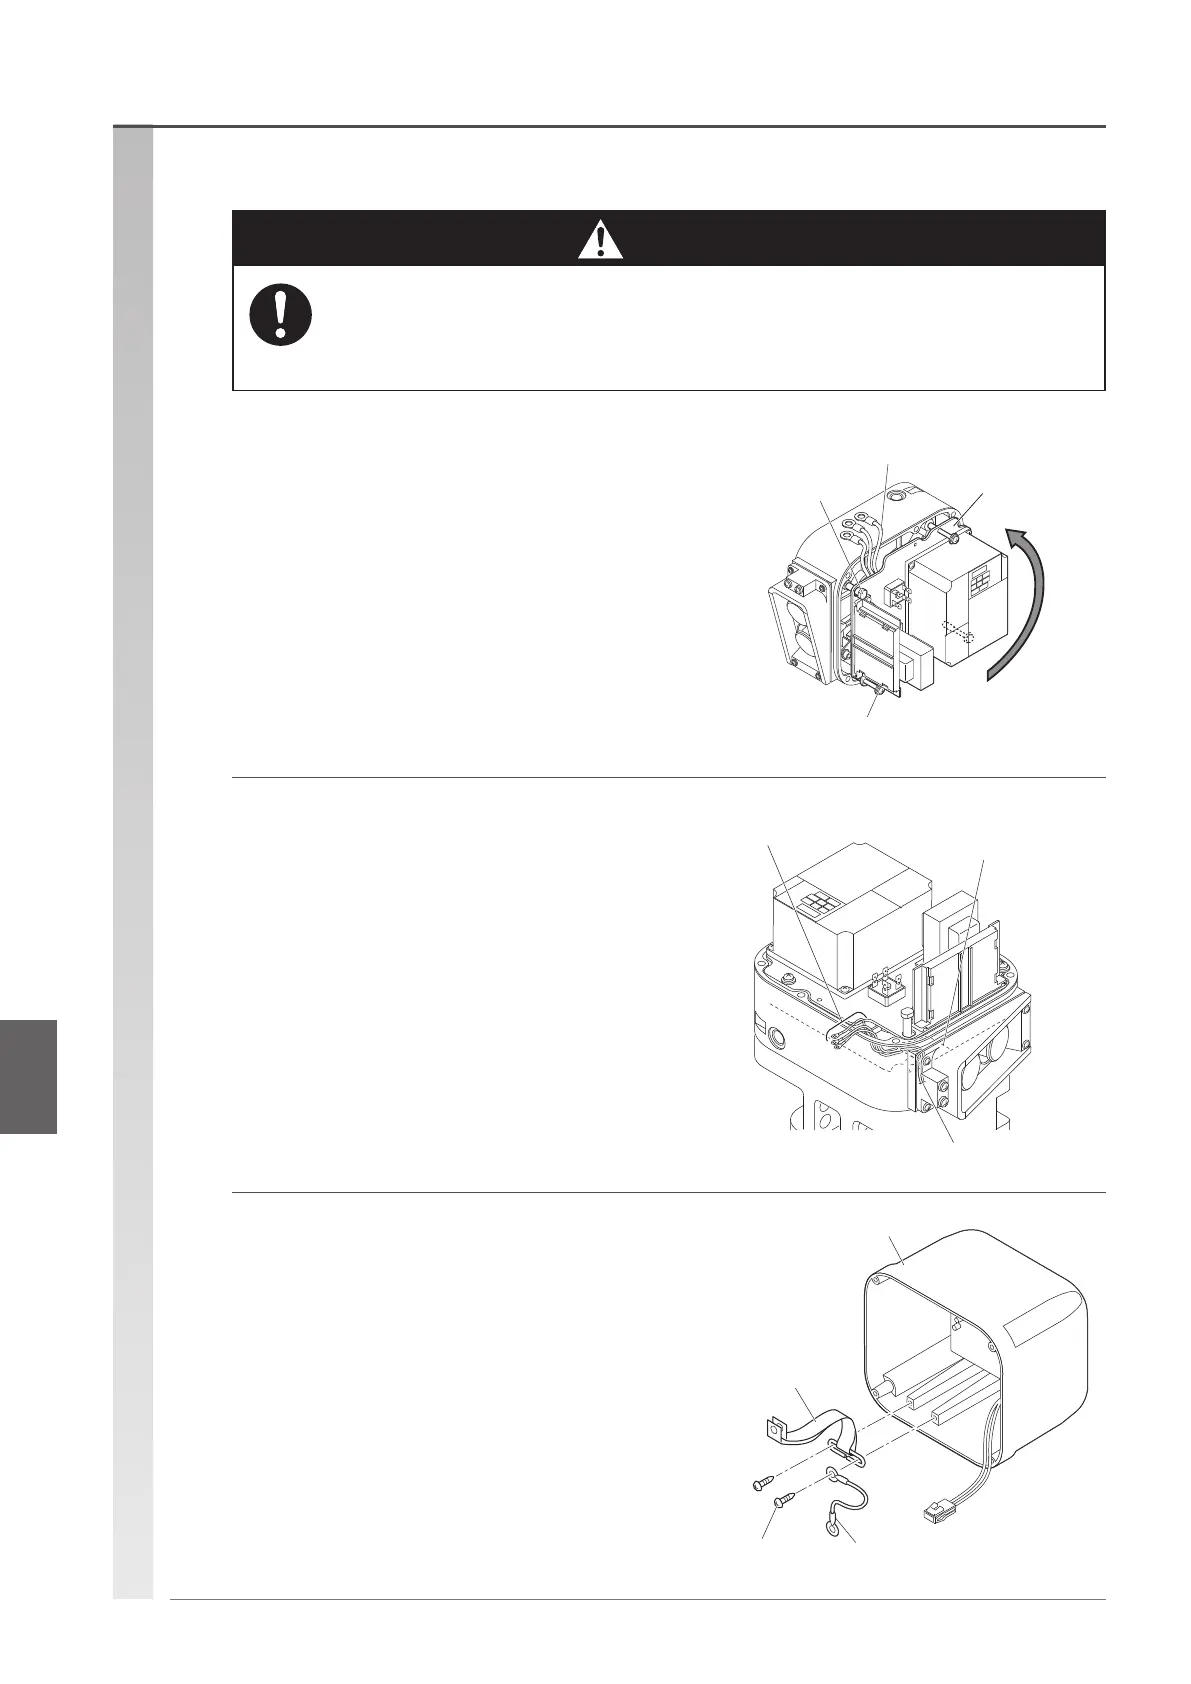
(3) Install the cover belt to the controller cover (if
removed).
•
Be careful so that the cover suspender faces the direction
as shown in the gure.
Mandatory
Caution
Reassembly procedure (continued)
Reassembly procedureAssembling the controller cover

 Loading...