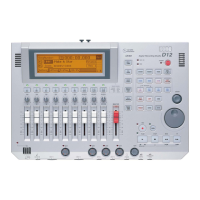
KORG D1600 Guided Tour
23
1. Reset the song to the beginning, and then press the PLAY key to begin playback.
2. In the MASTER EFFECT page, press the “FinalEff” tab, and note that “F008 DY2:StudioLimitr” is the effect assigned.
3. Press to “toggle” the “Bypass” button and “Cancel” button, to listen to the song without and with the Final effect.
4. Press the “Cancel” button to recall the effect.
5. Press to highlight “F008”, and rotate the DIAL to audition new Final effects while the song plays. When you’ve selected a Final
effect that you like, press the “effect” button to the right of the effect number, and select and edit the parameters to suit. Note:
The “Next:” or “Prev” buttons in the display select the pages of edit parameters available.
Store the new Final effect in a user location:
6. Once you’ve completed editing desired parameters, press the “OK” button 2x, then press the STOP key.
7. Press the “Rename” button, then press the “>” button to move through the effect name cell, and use the additional “buttons”
and the DIAL to enter a new name for the edited effect.
8. Press the “OK” button, then press the “Store” button in the display.
9. Press to highlight “u033” (the first user effect), and rotate the DIAL to select “u040 DY2: StudioLimitr”, then press the
“Exec.” button to store the effect. Note: The new assigned effect is now indicated in the display and is stored with this song.
Playback the song and make any final mix changes:
10. Reset the song to the beginning, press the PLAY key, and set the faders, pan knobs, EQ and effect settings for a final mix
setup. (Track playback EQ is accessed with the EQ/PHASE key and the EQ tabs in the display).
11. When you’re satisfied with the mix, press the STOP key and reset the song to the beginning.
Store a new initial Scene for the song:
1. Press the SCENE key, then press the “ReadDel” tab.
2. Press the “Filter” button. This page lets you filter (disable) EQ, pan, fader, etc. for specific channels. In multiple Scene
playback during a song, filtering allows you to disable pan, EQ, etc. settings for specified tracks or overall parameters. For this
exercise, you’ll turn all Scene Filtering OFF:
3. Press each of the following Channel Filter “buttons” at the bottom of the display so that they are not highlighted: “EQ, Pan/Bal,
Pair, Aux, Send1, Send2”.
4. Press the “Next>” button, and press to disable filtering for all of the Overall Filter “buttons” on this page, then press the “OK”
button.
Note: The original demo song uses scene filters for specific tracks, as indicated by highlighted tracks for each mode (EQ,
Pan/Bal, etc.) For this exercise it is not necessary to individually-disable track filters, as you’ve just pressed to disable each
of the mode buttons “globally.
5. Press the “Delete” button, then press the “SelectAll” button, followed by pressing the “Yes” button, to delete all previously
stored Scenes in the copied song.
6. Press the STORE key, then press the SCENE key, to write the new scene. The display will indicate “001:NEW SCENE”.
7. Press the “SceneRead:Off” button so that it reads “SceneRead:On”. The SCENE key will light, and your new mix will be
stored in memory (and automatically saved on power-off). The next time you power-on, the SCENE key will light when you
select this song, and the initial SCENE will be recalled.
 Loading...