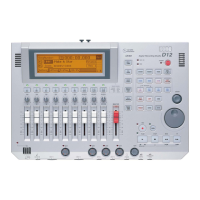
KORG D1600 Guided Tour
36
Audition a few of the 215 metronome and rhythm patterns:
1. Press the TEMPO / RHYTHM key, then press the “Rhythm:Off” button to read “Rhythm:On”. You’ll hear the metronome, and
the display will indicate the current settings. To adjust the metronome volume level, press to highlight “Vol:070” in the display,
then rotate the DIAL.
2. Press to highlight “Metro4” in the display.
3. Slowly-rotate the DIAL to the right, to audition some of the metronome and PCM rhythm patterns in memory. Note that some of
the patterns are indicated as Intro, Fill, or Ending by an I, F or E preceding the pattern name.
4. Play your source instrument along with the rhythm patterns, and select and pay particular attention to the rhythm pattern
group named “8bt Rock 1”, as you’ll be creating a Tempo Map with these patterns in the next exercise.
5. To set desired tempo, press to highlight “120” in the display, then rotate the DIAL. The display will indicate the new tempo
setting.
6. The time signature can be set as desired, by pressing to highlight 04/04 in the display, and then rotating the DIAL. However,
leave the time signature selection at “04/04” for now…
7. Press the “Rhythm:On” button to set “Rhythm:Off” and stop pattern playback.
Note: For time signatures 3/4, 4/4 and 6/8, all patterns can be selected. If you choose any other time signature, only the Metro or
Hihat can be selected. For this exercise, leave time signature set to 04/04.
Tip: Song tempo can be set manually, by tempo maps, or with a tempo track which can be recorded via MIDI clock or by tap
tempo. For more information, see the D1600 Owner’s Manual, page 62.
Create a new Tempo Map:
Tempo maps let you specify tempo, time signature and rhythm patterns for each measure in a song. There are 200 tempo map
events available for each song.
1. In the “Setup” tab of the TEMPO page, press the “>” popup button to the left of “MANUAL” (tempo source), and select the
“TempoMap” radio button, then press “OK”.
2. Press the “TmpMap” tab, and make sure that “Map001” is selected ( the initial song tempo).
3. Press the “Edit” button, then press the “edit cell” to the right of “Rhythm>”, and rotate the DIAL to select pattern “I8bt
Rock1”. Leave the other parameters set as follows: “Measure 001-004, Tempo 120, Beat 04/04”.
4. Press “OK”, then press the “New” button. Press “I8bt Rock1” and rotate the DIAL left to select pattern “8bt Rock1”.
5. Press the END MEASURE “005” (above “Beat:”), and rotate the DIAL to select “019”. (Now you’ve entered a 4-bar intro,
followed by a 15-bar, 8 beat pattern. Get the idea? Now to add a fill-in pattern…
6. Press “OK”, then press the “New” button. Press “8bt Rock 1” and rotate the DIAL to select pattern “F8bt Rock 1”.
7. Press the END MEASURE “019” and rotate the dial to select “20” (1-bar fill-in), then press “OK”.
8. Press the “New” button, then press “F8bt Rock 1”, and rotate the DIAL to select pattern “8bt Rock1”.
9. Press the END MEASURE “21”, and rotate the DIAL to select “28”, then press “OK”.
10. Finally, press the “New “ button, press “8bt Rock1”, rotate the DIAL to select “E8bt Rock 1”. Notice that the END MEASURE
is already set to “032”, because each time you enter a new pattern, the length is indicated to the right of the end measure. This
pattern is a 4-bar ending, so simply press “OK”.
 Loading...