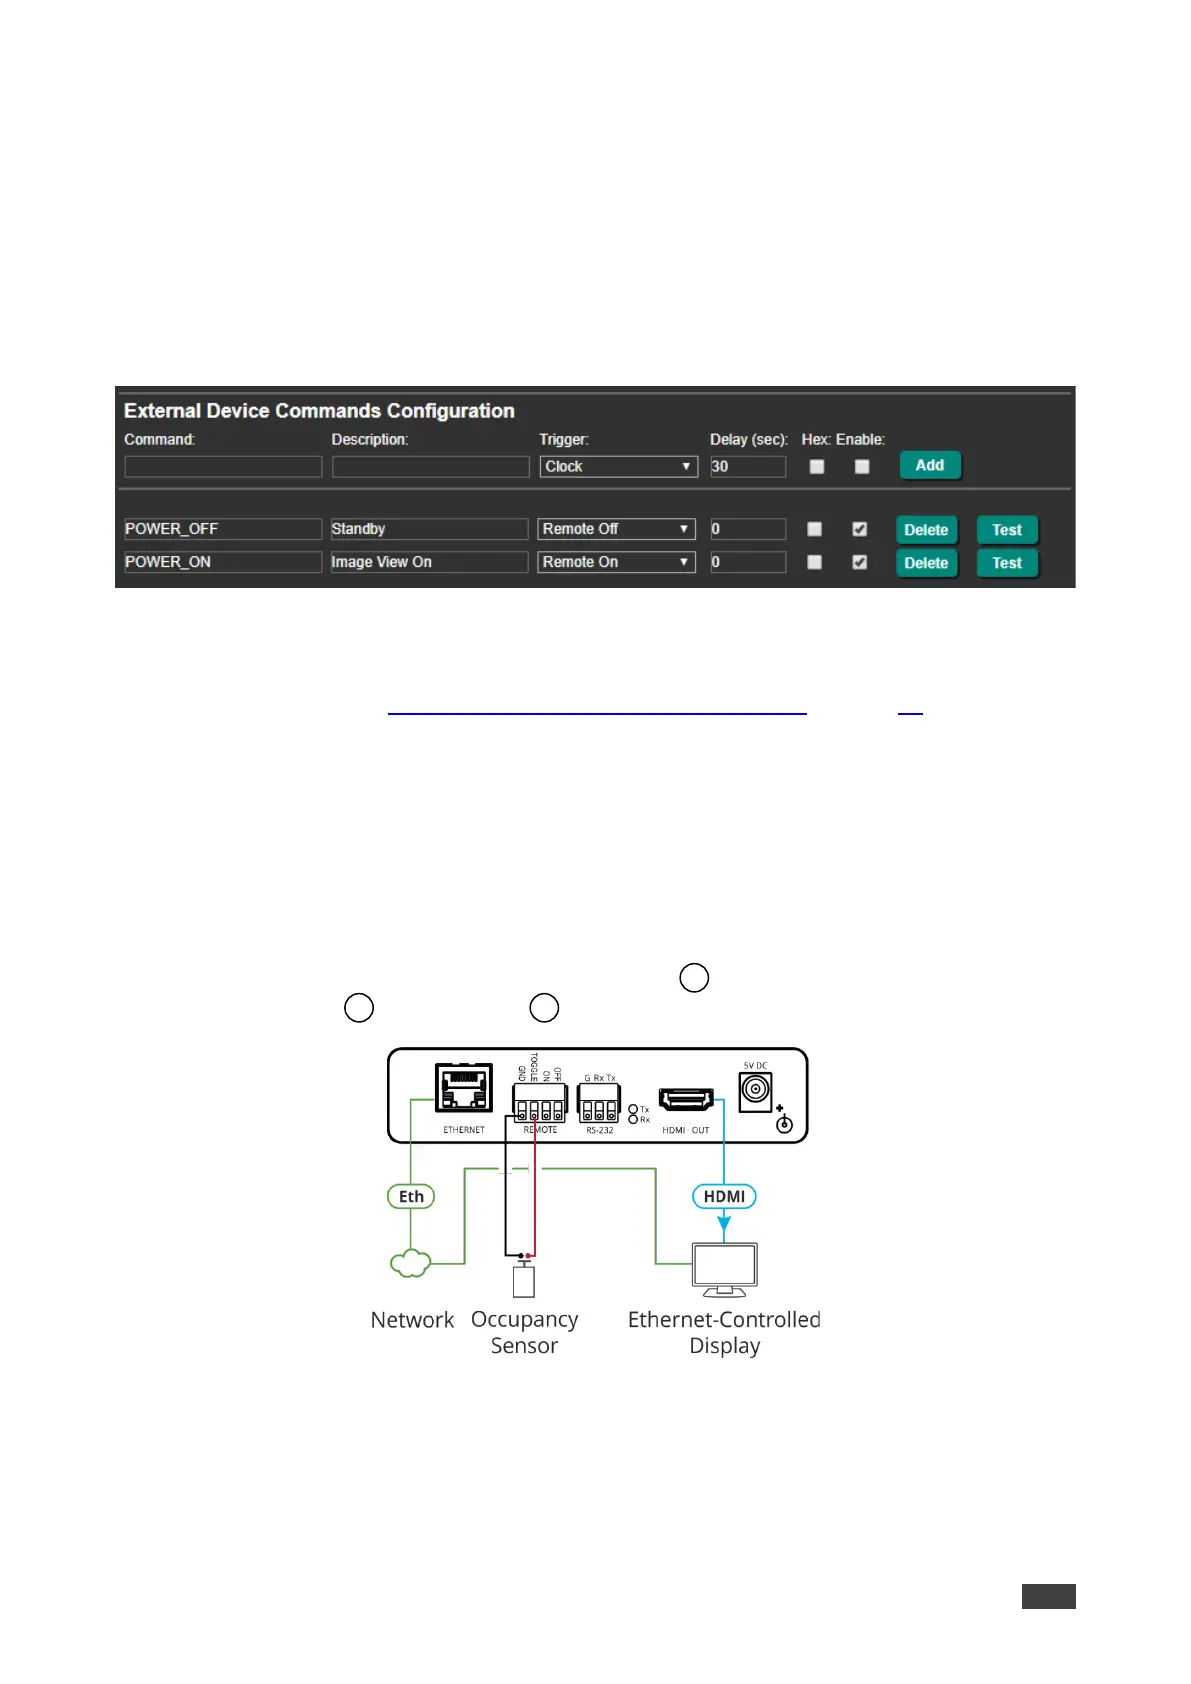
3. Click Enable to control the display via the Ethernet.
4. Enter the Remote IP address and click Set.
5. Set the remote port (UDP – 50002; TCP – 5002, by-default).
6. Click TCP or UDP to select the protocol mode.
7. Configure the Remote On and Remote Off commands.
8. Check Enable next to the Button On and Button Off commands, and click Add.
9. Momentarily connect an ON or OFF pin to the G pin to turn the display on or off.
Figure 43: Ethernet Page – Adding Commands
The display is controlled via ON and OFF buttons on the front panel.
For further details, see Controlling an External Device via Ethernet on page 52.
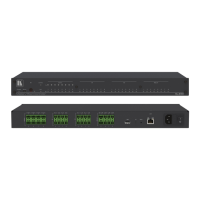
Controlling the Display from REMOTE TOGGLE Pin (Sending
Ethernet to the Display)
You can turn the display on or off via the contact closure TOGGLE pin that is connected, for
example, to an occupancy sensor.
To control the display using the REMOTE TOGGLE pins via HDMI:
1. Connect the REMOTE TOGGLE and GND pins to remote control buttons, and the
Ethernet port and HDMI port to the Ethernet-controlled display.
Figure 44: Sending Occupancy-Sensor Triggered Commands via Ethernet Port
2. In the Navigation page, click RS-232 & Remote. The RS-232 & Remote page appears.