7 Servicing/Maintenance
47 of 76
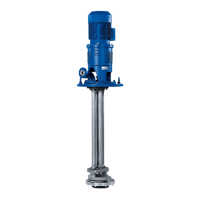
CTN / CTN-H
CAUTION
Bending of the shaft
Damage to the shaft!
▷ Support the shaft assembly if the shaft is long.
ü For large installation depths with several shafts 211, 212, 213, these have been
dismantled once the threaded coupling 852.01 is accessible, before dismantling
the next piping assembly.
1. Dismantle shaft 210.
2. If applicable, unscrew threaded couplings 852.02.
Inject Caramba, Ferex etc. into the small drilled hole.
Hold the threaded coupling and shaft with a wrench and turn them against
each other (right-hand thread).
If the threaded coupling cannot be unscrewed, heat the coupling to 180°C and
repeat the process.
7.4.8 Dismantling the bearing sleeves
Standard design Shrink-fitted bearing sleeve 529.01/03
ü The notes and steps stated in (ðSection7.4.1,Page43) bis
(ðSection7.4.7,Page46) have been observed/carried out.
1. Carefully heat the bearing sleeve using a burner flame and remove with a pull-
off device.
If this proves difficult, turn off the bearing sleeve using a lathe or split it open
along its length using an abrasive cutting machine.
CTN special design Bearing sleeve 529.01/03 fastened with parallel pin and grub screw
ü The notes and steps stated in (ðSection7.4.1,Page43) bis
(ðSection7.4.7,Page46) have been observed/carried out.
1. Undo and remove grub screws 904.11/.13.
2. Remove parallel pins 562.18/.19.
Bearing sleeve 529.01/03 fastened with screws (for brittle materials)
ü The notes and steps stated in (ðSection7.4.1,Page43) bis
(ðSection7.4.7,Page46) have been observed/carried out.
1. Unscrew screws 900.18/.19 from the shaft.
Pull off the bearing sleeve.
Bearing sleeve 529.01/03 fastened with parallel pin (with special materials and
single piece SiC sleeve)
ü The notes and steps stated in (ðSection7.4.1,Page43) bis
(ðSection7.4.7,Page46) have been observed/carried out.
1. Carefully bore open parallel pins 561.18/.19 and remove.
If the bearing sleeve shows signs of wear and needs to be replaced, it can be
smashed and the parallel pin can be removed.
CTN-H special design Bearing sleeve 529.01/03 fastened with key and grub screw
ü The notes and steps stated in (ðSection7.4.1,Page43) bis
(ðSection7.4.7,Page46) have been observed/carried out.
1. Undo and remove grub screws 904.11/.12.
2. Remove keys 940.05/.07.
Bearing sleeve 529.01/03 fastened with screws (for brittle materials)
ü The notes and steps stated in (ðSection7.4.1,Page43) bis
(ðSection7.4.7,Page46) have been observed/carried out.
1. Unscrew screws 900.18/.19 from the shaft.
Pull off the bearing sleeve.