S-73
07-E3B SERIES, WSM
ENGINE
Connecting Rod Cap
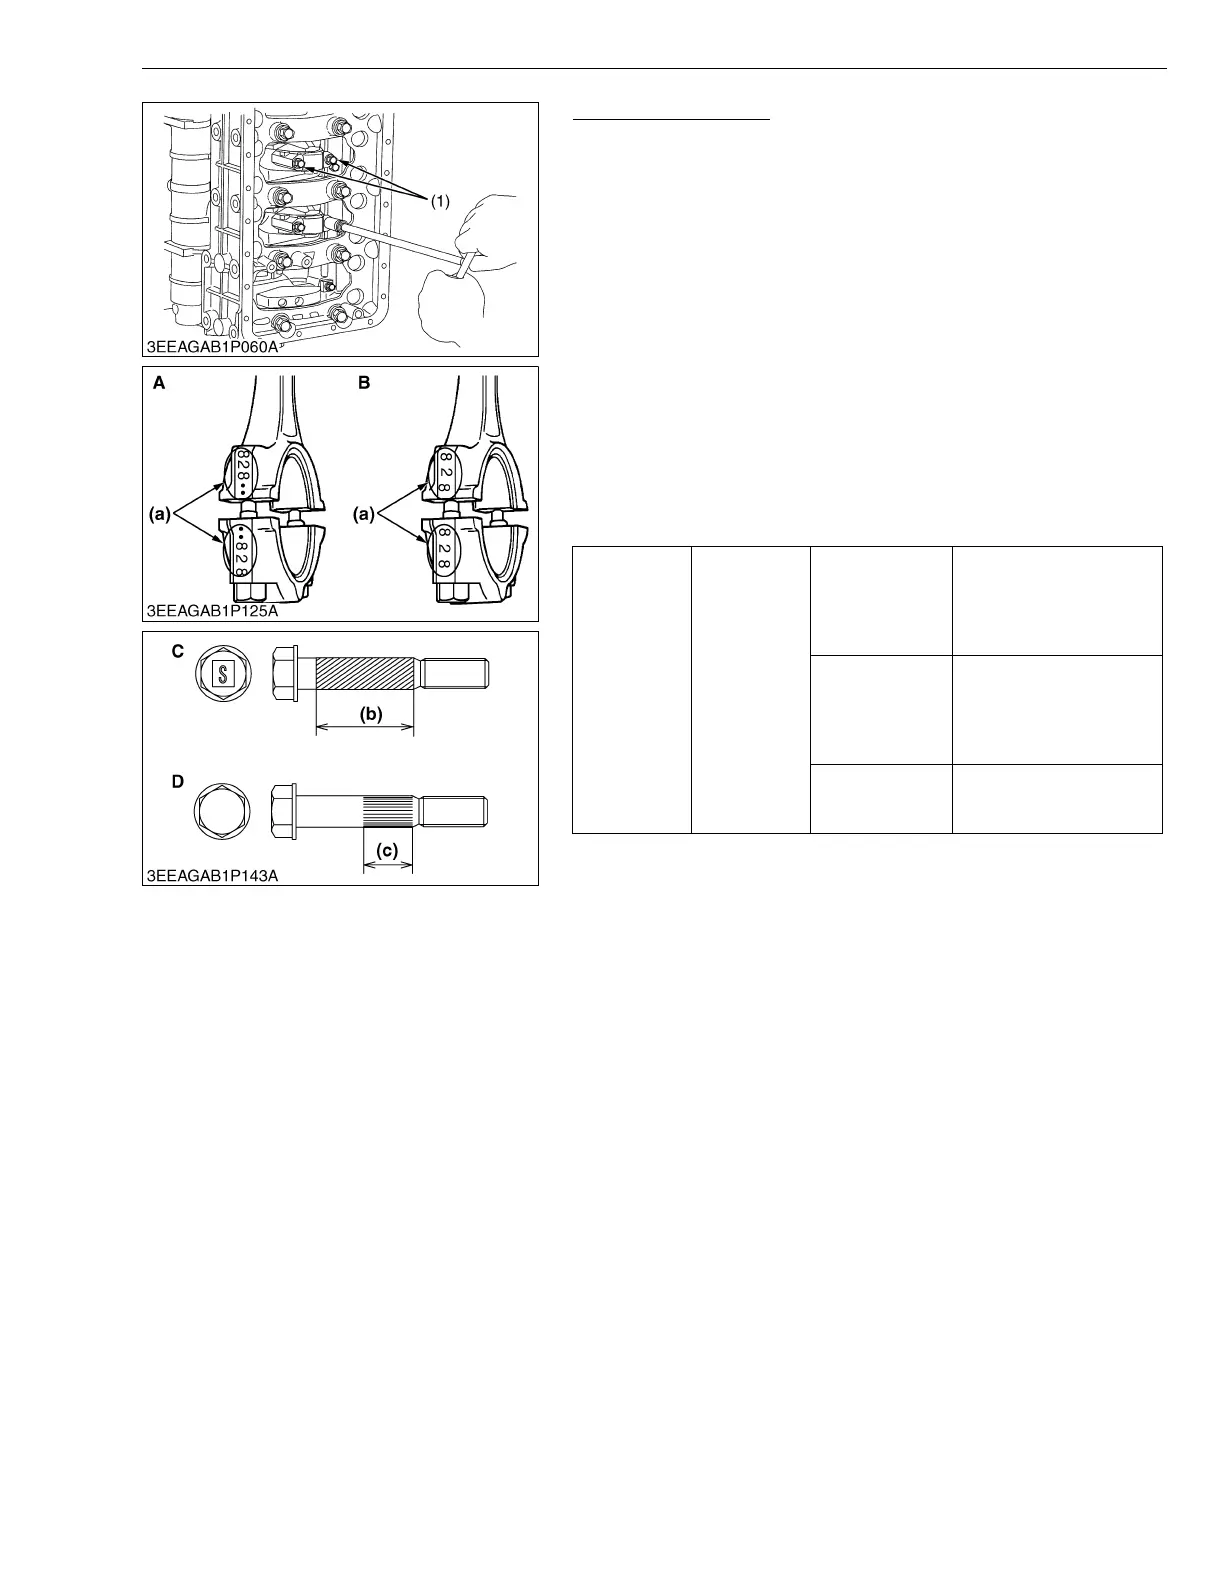
1. Remove the connecting rod screws (1) from connecting rod cap.
2. Remove the connecting rod caps.
(When reassembling)
• Align the marks (a) with each other. (Face the marks toward the
injection pump.)
• Apply engine oil to the connecting rod screws (1) and lightly
screw it in by hand, then tighten it to the specified torque.
If the connecting rod screw (1) won’t be screwed in smoothly,
clean the threads.
If the connecting rod screw (1) is still hard to screw in, replace it.
• When using the existing crank pin metal again, put tally marks on
the crank pin metal and the connecting rod in order to keep their
positioning.
• At the time of reassembling the connecting rod caps, use a
combination of the connecting rod screws with the same
specified tightening torque.
W1058252
Tightening
torque
Connecting
rod screw
V2607-DI-T-E3B
[Serial No. :
8G0001
to 9K9999]
(Fig. C)
45 to 49 N·m
4.5 to 5.0 kgf·m
33 to 36 lbf·ft
V2607-DI-E3B
V2607-DI-T-E3B
[Serial No. :
9L0001 and
above] (Fig. D)
41 to 45 N·m
4.1 to 4.6 kgf·m
30 to 33 lbf·ft
V3007-DI-T-E3B
V3307-DI-T-E3B
69 to 73 N·m
7.0 to 7.5 kgf·m
51 to 54 lbf·ft
(1) Connecting Rod Screw
(a) Mark
(b) Serration (Spiral) : 26 mm (1.0 in.)
(c) Serration (Axial direction) :
13 mm (0.51 in.)
A : V2607-DI-E3B / V2607-DI-T-E3B
B : V3007-DI-T-E3B / V3307-DI-T-E3B
C : Old Connecting Rod Screw
D : New Connecting Rod Screw
 Loading...