3 / 10 © 2016 Spectrum Brands, Inc.Kwikset: 1-800-327-5625 • www.kwikset.com
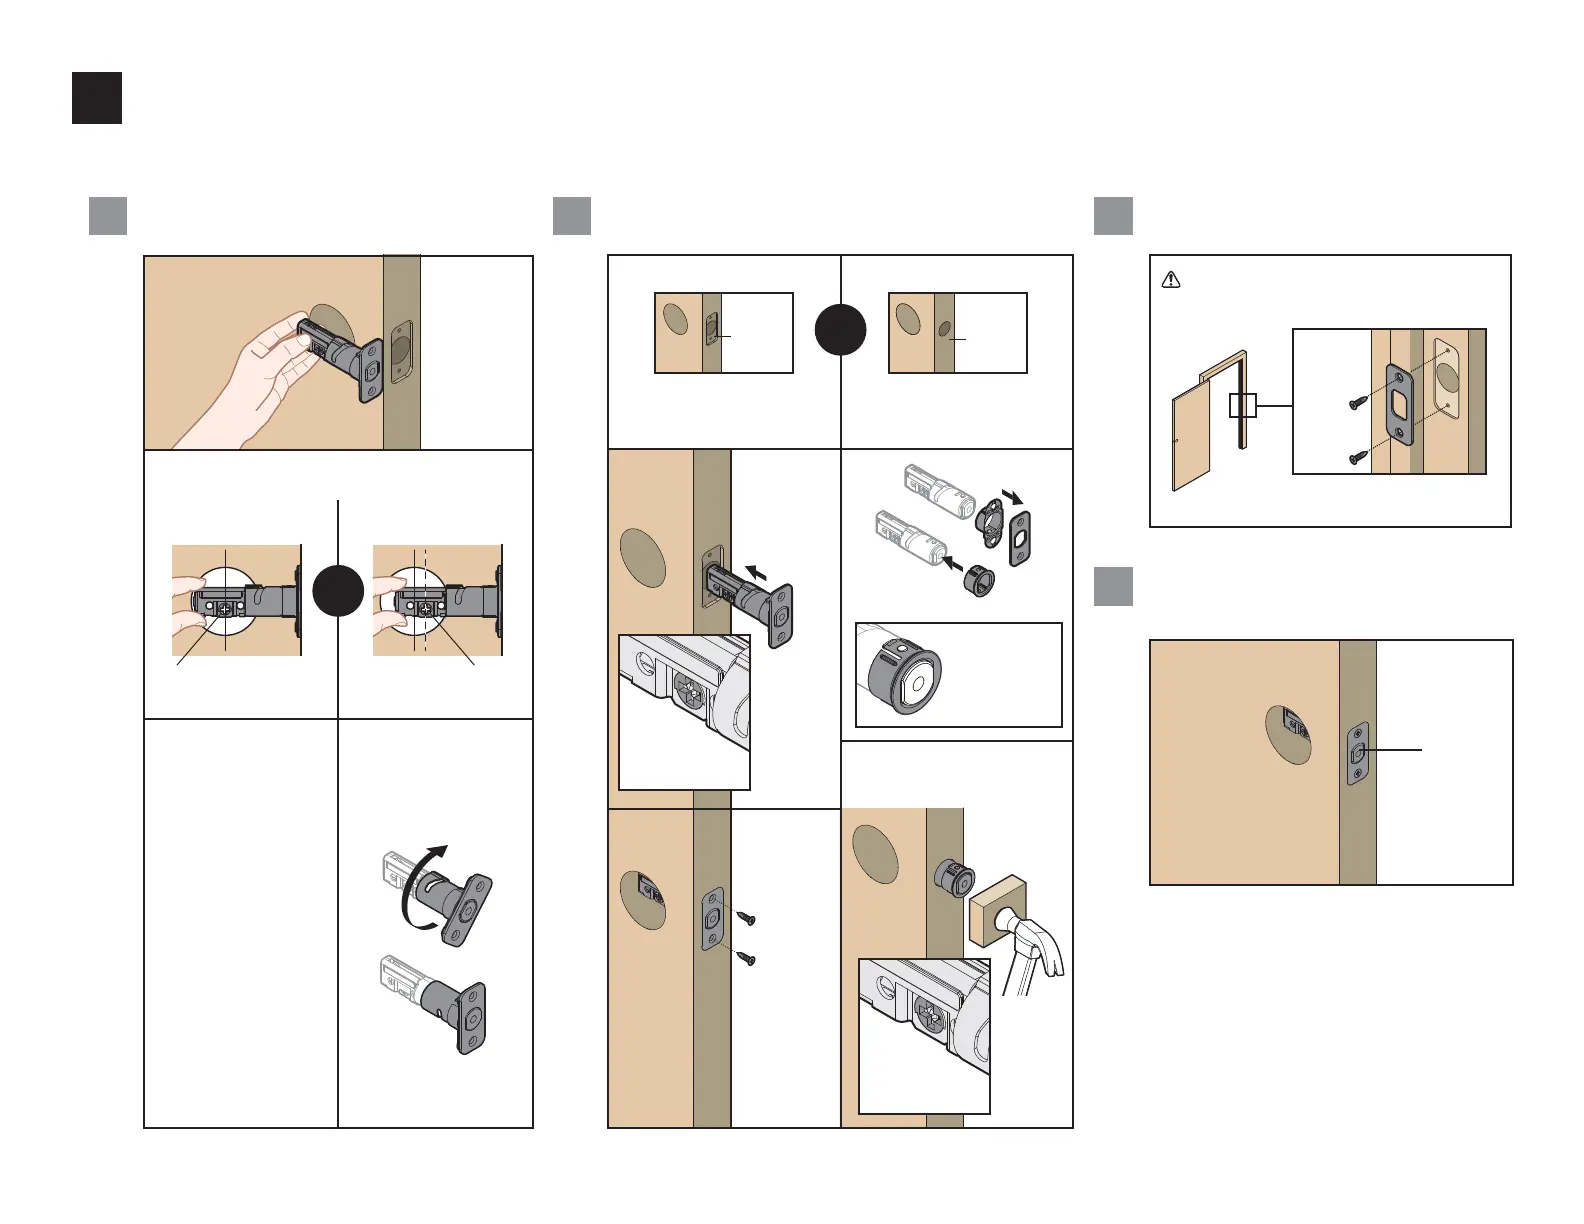
Align tabs with
holes in collar.
A
A
A
A
K (2x)
K (2x)
B
180°
BA
Is the door edge chiseled?
Is the cross-shaped hole centered in the door hole?
Hold the latch in front of the door hole, with
the latch face lush against the door edge.
YES
YES
NO
NO
Install latch in door with
supplied screws.
No adjustment is required.
Proceed to next step.
cross-shaped hole
is centered
cross-shaped hole
is NOT centered
Rotate latch face as
shown to extend latch.
Remove rectangular
face from latch and
install drive-in collar.
Install latch in door with
wood block and hammer.
C
D
Install strike on the door frame.
Make sure the latch bolt is fully retracted (in the
unlocked position).
door frame
Make sure hole in door frame is drilled a
minimum of 1” (25 mm) deep.
or
chiseled
not
chiseled
or
2
Install the latch and strike
Make sure
cross-shaped
hole is at
bottom of latch.
Make sure
cross-shaped
hole is at
bottom of latch.
Ensure collar
snaps into place.
Pull collar to test
for tight it.
unlocked
C
 Loading...