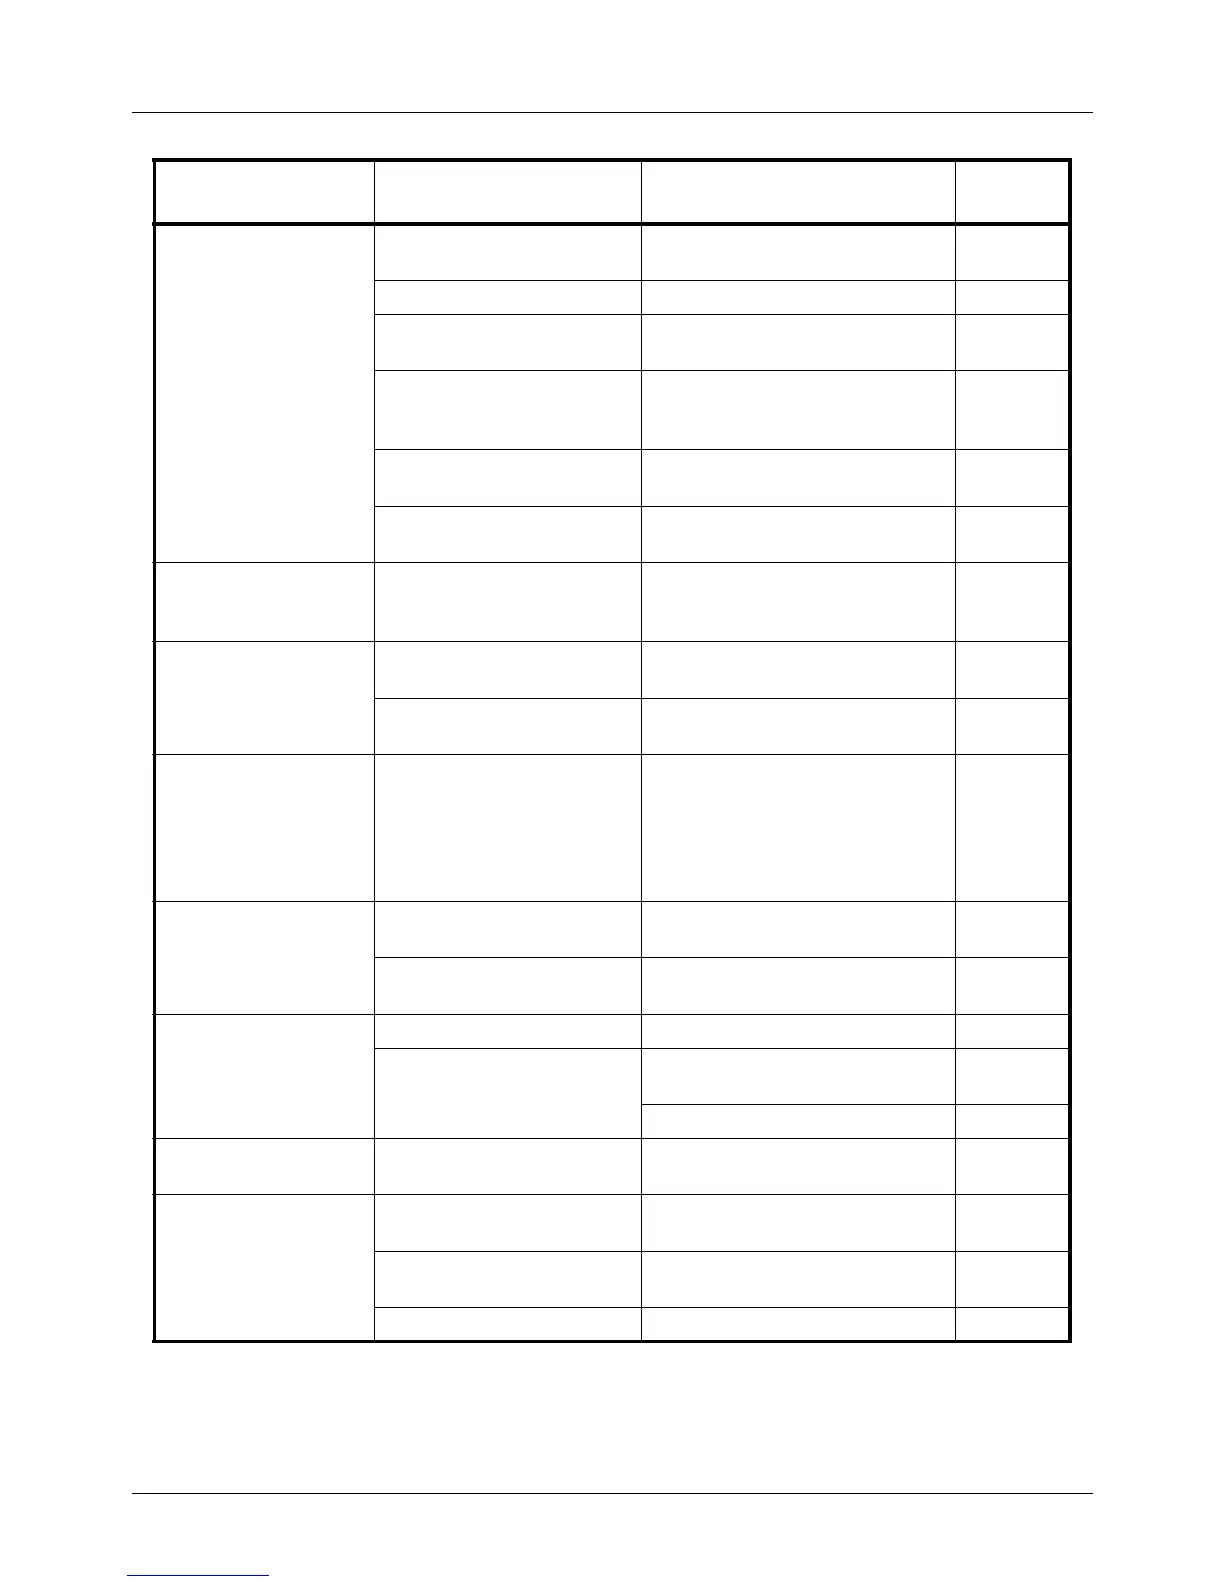
10-4
Troubleshooting
Cannot print. Is the machine plugged in? Plug the power cord into an AC
outlet.
—
Is the machine powered on? Turn on the main power switch. 2-6
Is the printer cable
connected?
Connect the correct printer cable
securely.
2-5
Was the machine powered
on before the printer cable
was connected?
Power on the machine after
connecting the printer cable.
2-5
2-6
Is the print job paused? Press [Resume] (the Left Select
key) to resume printing.
7-18
Is the error message
displayed?
Follow the corresponding
procedure.
10-6
Documents are
printed improperly.
Are the application software
settings at the PC set
properly?
Check that the printing system
driver and application software
settings are set properly.
—
Cannot print with USB
memory.
Is the USB host blocked? Select Unblock in the USB host
settings.
8-149
— Check that the USB memory is
securely plugged into the machine.
—
When displaying an
image sent from the
machine on the PC, an
image size is shrunk
vertically or
horizontally.
Have you selected
200×100dpi Normal or
200×400dpi Super Fine for
the scan resolution?
Select a scan resolution other than
200×100dpi Normal or 200×400dpi
Super Fine when sending an
image.
5-14
USB memory not
recognized.
— Check that the USB memory is
securely plugged into the machine.
—
Is the USB host blocked? Select Unblock in the USB host
settings.
8-149
Vertical streaks
appear on prints.
Is the slit glass dirty? Clean the slit glass. 9-2
The inside of the machine
may be dirty.
Check the toner container and if
necessary replace.
9-5
Refresh drum. 8-102
The top edge or back
of the paper is dirty.
The inside of the machine
may be dirty.
Clean the inside of the machine. 9-3
Part of the image is
periodically faint or
shows white lines.
Is the developer unit
attached correctly?
Attach the developer unit correctly. —
— Open and then close the rear
cover.
—
— Refresh drum. 8-102
Symptom Checkpoints Corrective Actions
Reference
Page
 Loading...