FS-9120DN/9520DN
1-6-3
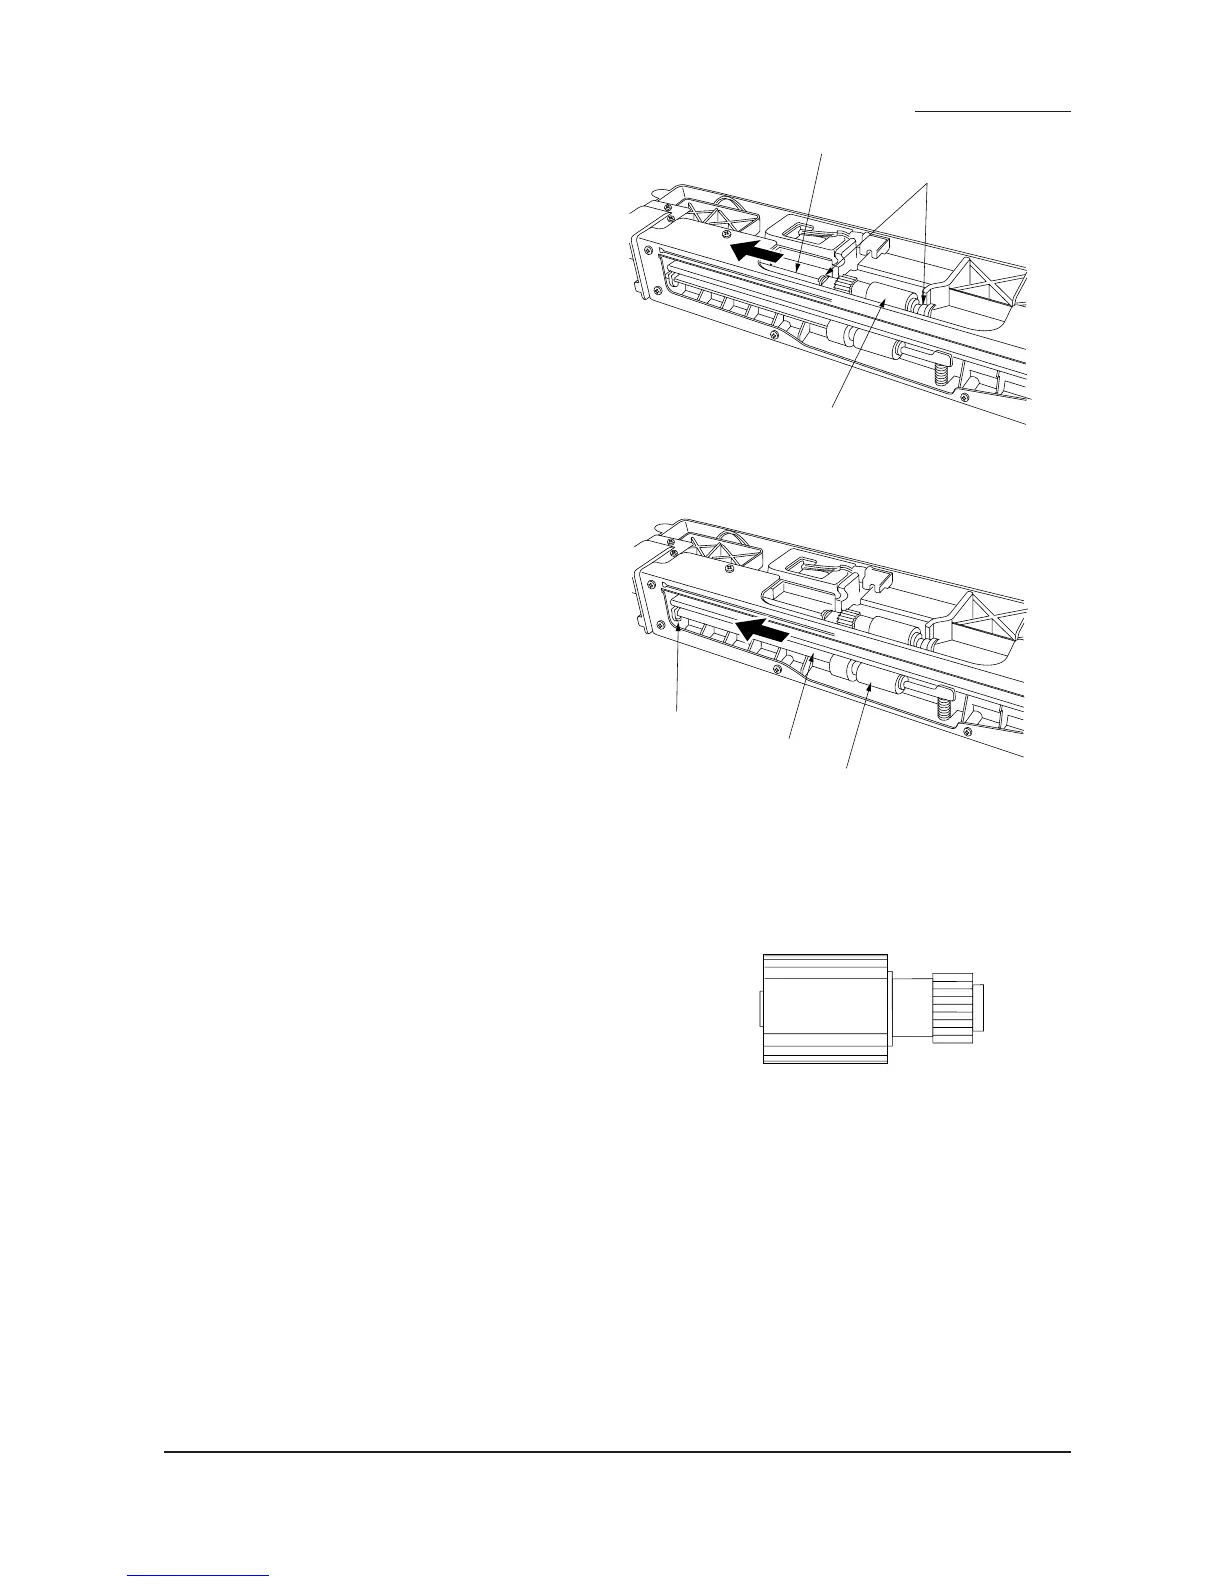
• Removing the paper feed pulley
6. Remove the two stop rings.
7. Pull the paper feed shaft toward the rear of
the primary paper feed unit (in the direction of
the arrow) and remove the paper feed pulley.
Figure 1-6-4
• Removing the separation pulley
8. Remove the stop ring on the rear of the
primary paper feed unit.
9. Pull the separation shaft toward the machine
rear (in the direction of the arrow) and
remove the separation pulley.
Figure 1-6-5
10. Replace the forwarding, paper feed and
separation pulleys.
Caution:
•When fitting the forwarding pulley, orient it
correctly as shown in Figure 1-6-6.
• When fitting the separation pulley, keep the blue
end of the separation toward the machine rear.
11. Refit all removed parts.
Figure 1-6-6
Stop rings
Paper feed shaft
Paper feed pulley
Separation shaft
Stop ring
Separation pulley
Forwarding pulley
Machine front Machine rear
 Loading...