FS-9120DN/9520DN
1-6-14
1-6-4 Drum section
(1) Detaching and refitting the drum unit
Follow the procedure below to replace the drum unit.
Cautions:
•Avoid direct sunlight or strong light when detaching and refitting the drum unit.
• Never touch the drum surface when holding the drum unit.
Procedure
1. Open the front cover.
2. Remove the toner container and toner
disposal tank.
3. Open the conveying cover and remove the
developing unit (see page 1-6-16).
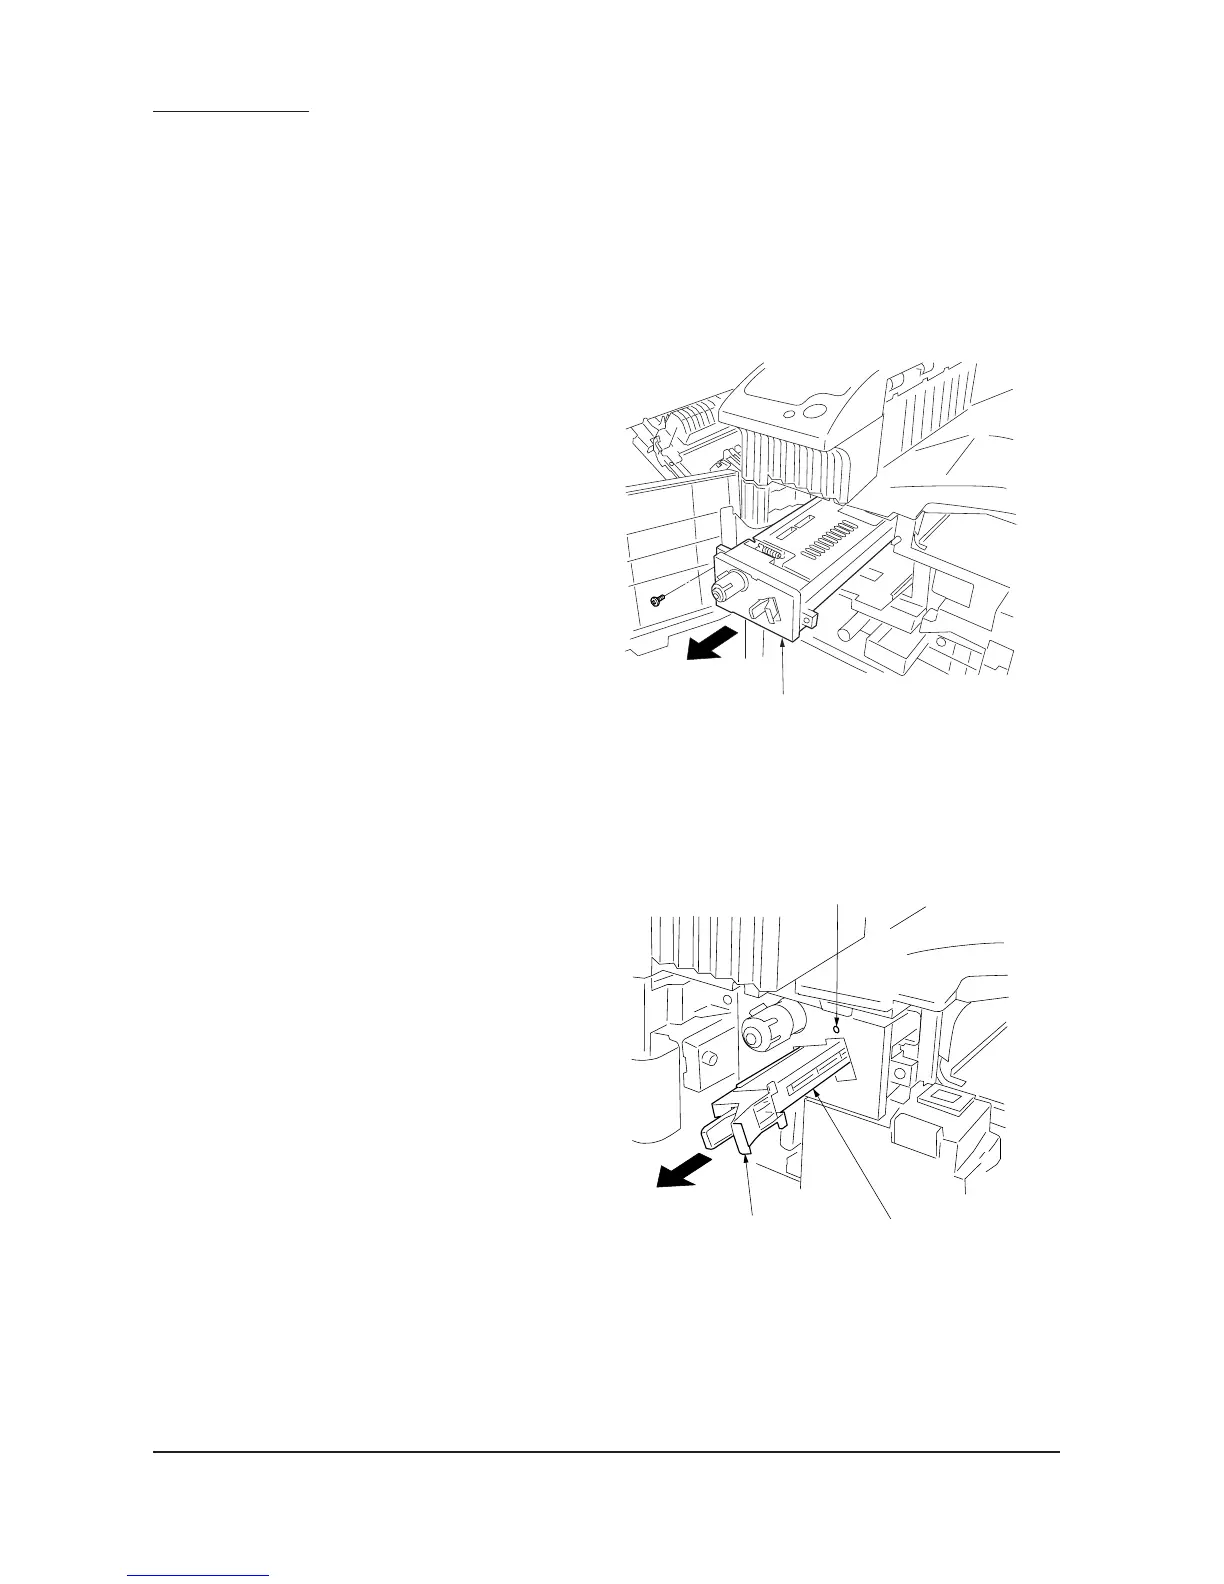
4. Remove the screws holding the drum unit
and then the unit.
5. Replace the drum unit and refit all the
removed parts.
Figure 1-6-29
(2) Detaching and refitting the main charger unit
Follow the procedure below to replace the main charger unit.
Procedure
1. Open the front cover.
2. Pull out the main charger unit holding the
knob.
3. While pushing the hole with a sharp-pointed
object, remove the main charger unit.
4. Replace the main charger unit and refit all the
removed parts.
Figure 1-6-30
Drum unit
Main charger unit
Knob
Hole
 Loading...