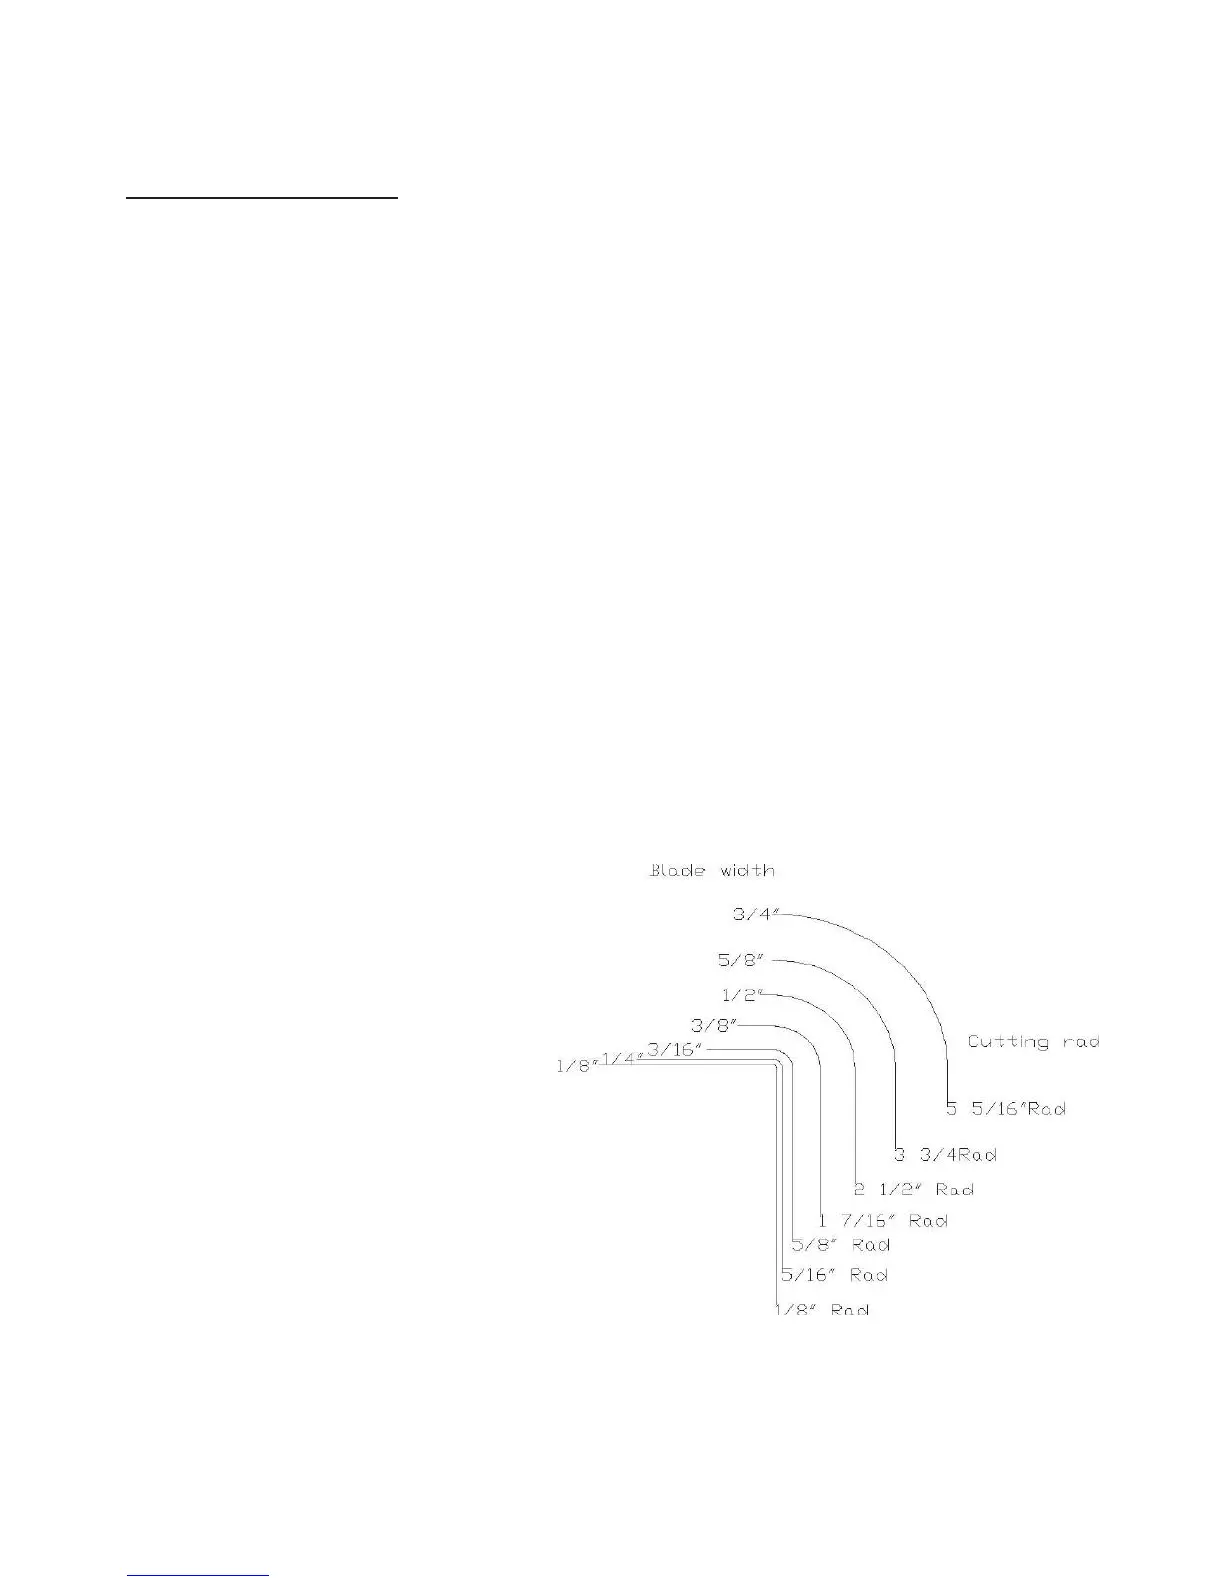
Using a radius chart
Until you become well acquainted with your saw it is best to use the contour
(radius) chart to determine which size blade to use for a specific application.
Radius charts can be found in many woodworking books, magazine articles, and
on blade boxes. They differ slightly from one another but are good as rough
indicators of how tightly a curve can be cut with a particular blade. Each blade
saw, and operator is different so it is impossible to make a truly accurate chart.
A blade can cut continuously without backtracking any curve that has a radius
as much as or more than is shown on the chart. For example: a 3/16" blade will
cut a circle with a 5/16" radius or a 5/8" diameter. To test if a 3/16" blade
would work for a particular curve place a dime, this is roughly 5/8” over the
pattern. The 3/16" blade can cut a curve bigger than the dime, but not smaller.
You can use everyday items such as coins or a pencil to determine which blade
to use. A quarter is the size of the tightest cut that can be made with a ¼"
blade. A dime is the size of the tightest curve that can be cut with a 3/16"
blade. A pencil eraser is the size of the tightest turn that you can make with a
1/8" blade. After a while you won't even need an object to size the possible
curve of a blade because you will have become familiar with this process. There
are options to matching the blade to the smallest curve pattern. If there is only
one very tight cut, it may be best to use a turning hole, a relief cut, successive
passes, or to change the blade. If you have a lot of cutting to do, you can use a
wider blade for the bigger curves and then switch to a narrower blade for the
tighter curves. Changing the
blades can often save cutting and
finish time.
The chart to the right, is only a
rough guide and is not to scale,
but from the information you can
construct your own guide.