Parlor SI
1. Dismount and Replace SICIP box. All tubes and wires coming out of the old box are to be exchanged. Only exception is the
detergent BD which is reused.
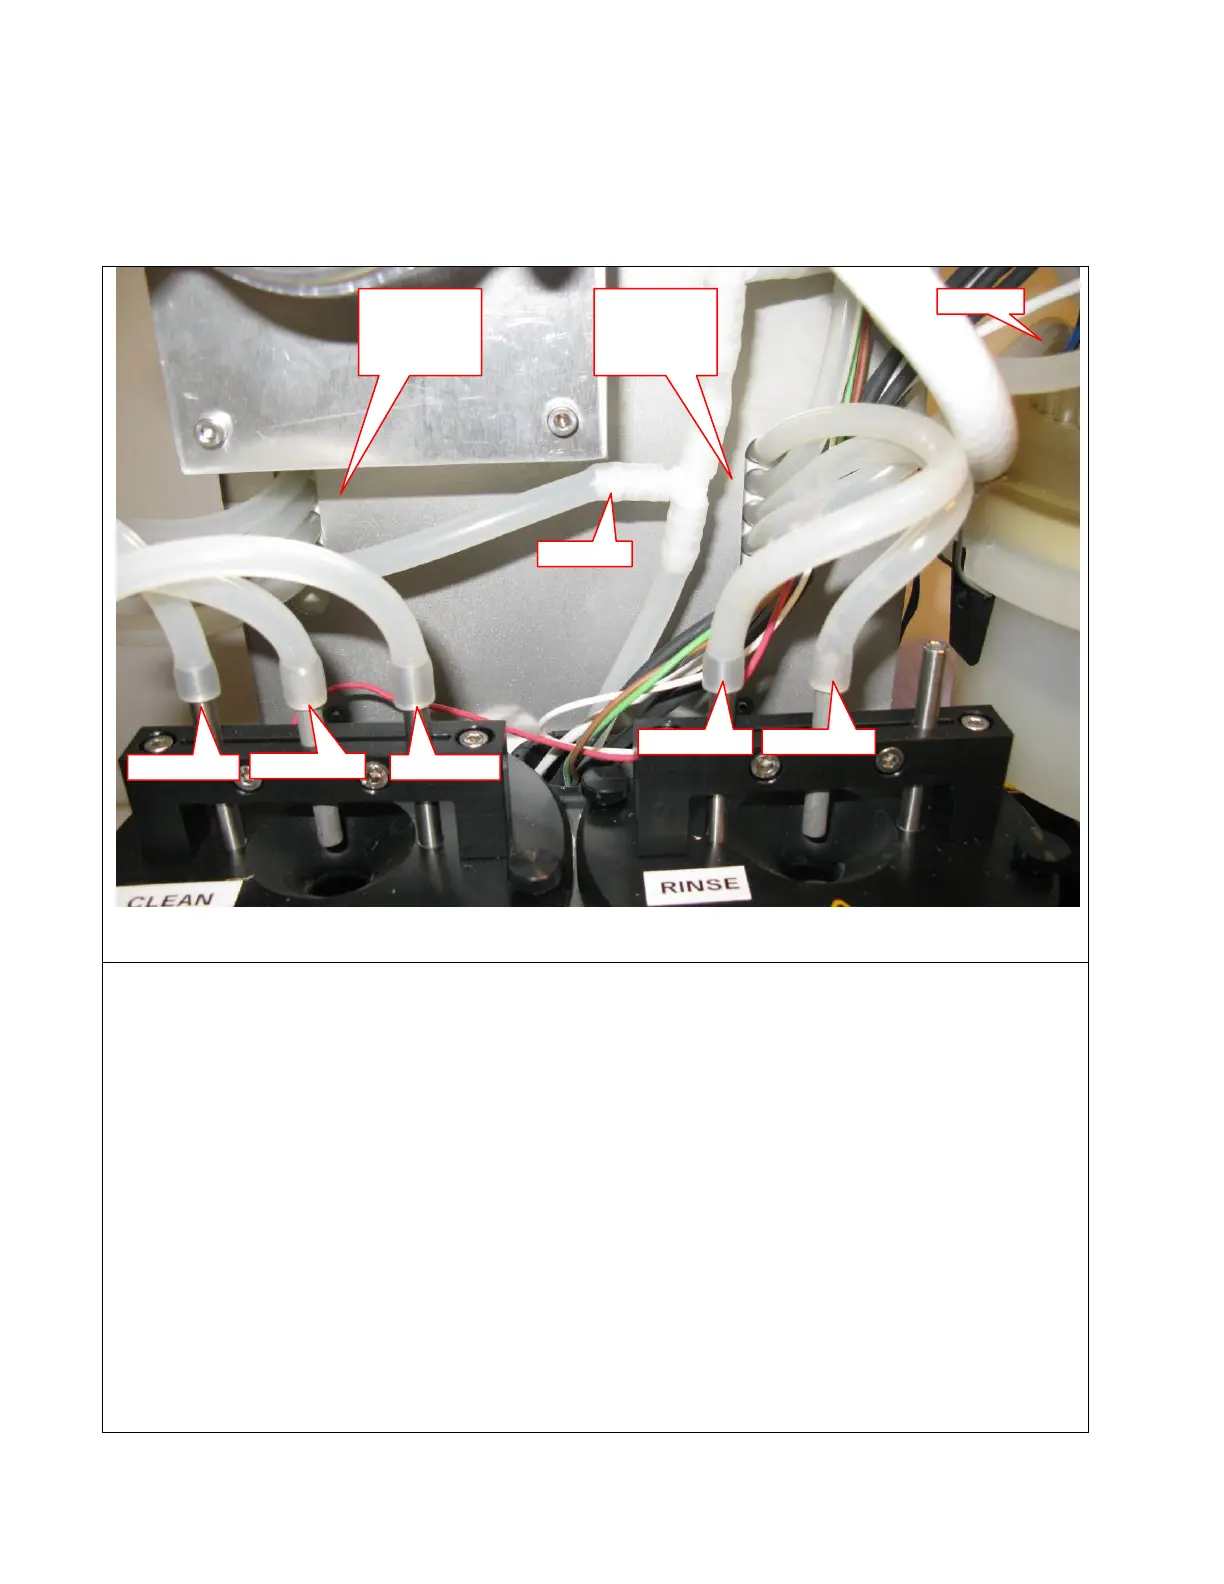
2. Connect tubes as shown above
3. Move the existing Detergent BD from old box to the new. BD is mounted directly on the 6mm silicone tube aprox. 50mm from the
pump
4. Connect the electrical connectors to the controller board and strap the wires with cable ties.
5. Start SI and connect to it via Teraterm
6. In the menu “Service-simple functions-cip” (4.2.3) do:
toggle “rinse water out” on/off (4.2.3.1) and observe if rinse container starts filling
toggle “clean water out” on/off (4.2.3.3) and observe if clean container starts filling
toggle “detergent pump” on/off (4.2.3.5) and observe if detergent is pumped to the clean container
7. For testing it is necessary to temporally change water temperature settings:
In the menu “System config-CIP” (2.4) do:
change setting for “clean temp” (1.2) to : 10 (default is 57)
change setting for “rinse temp” (1.3) to : 10 (default is 40)
8. In the menu “maintenance” (1) do:
“AI CIP” (1.2) and observe the cip and check that water is used from both rinse and clean container
9. In the menu “System config-CIP” (2.4) do:
change setting for “clean temp” (1.2) back to : default (57)
change setting for “rinse temp” (1.3) back to : default (40)
10. Reset the HN by unplug/replug the power