X-431 EURO TAB II User Manual
20
3 Common
Tab: Displays all frequently-used vehicle makes.
4
Regional buttons: Tap different buttons to switch to corresponding
vehicles. If you have purchased a Gasoline & Diesel Version, a
Heavy-duty tab will appear next to the regional button.
5
History Button: Generally once a vehicle diagnosis is performed, the
tablet will record the every details of diagnostic process. This function
provides a quick access to the previously tested vehicles. Testing can
be resumed from the previous operation without starting from scratch.
6
Search bar: Input the desired vehicle model to quickly locate it.
4.2.4 Diagnostics toolbar
The diagnostics toolbar contains a number of buttons that enable various
procedures. It is displayed at the top of the vehicle diagnostic screen throughout
the whole diagnostic session. Refer to the table below for a brief description of
the functions of the diagnostics toolbar buttons:
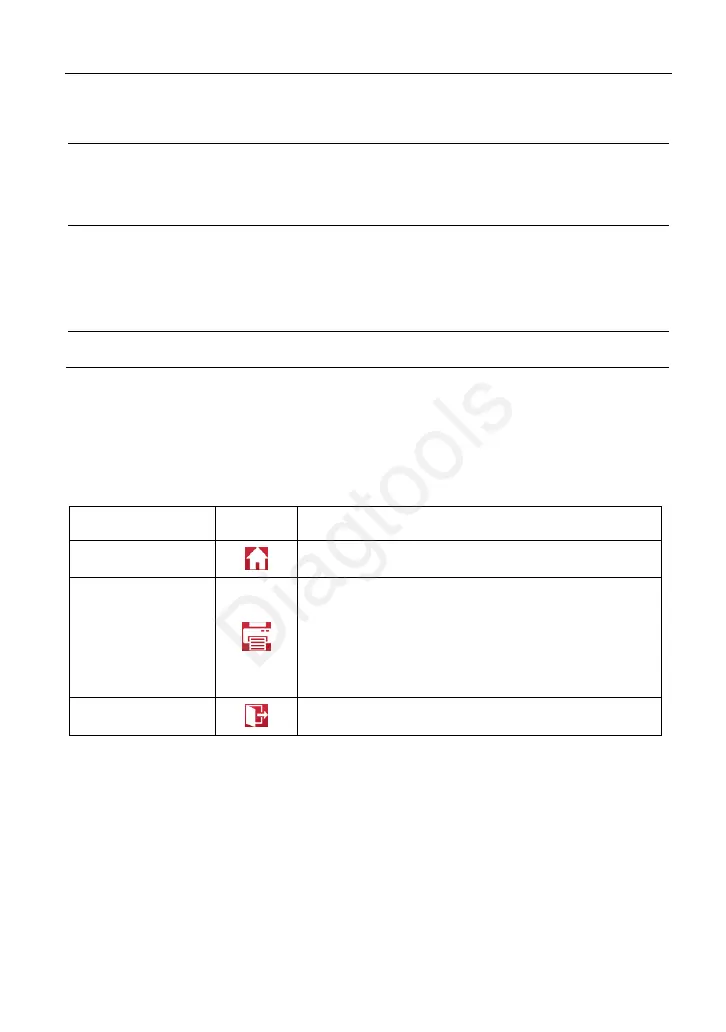
Name Icon Function
Home
Return to the Home screen.
Print
Tap to print the current screen. To perform
printing, you need to purchase an extra
specific MINI printer separately and then
properly configure the wireless printer following
the steps described in Chapter 14.12.3.
Exit
Exit the diagnostic application.
4.3 Diagnosis Methods
The tablet supports 2 communication methods with the VCI device: WLAN
(wireless) and wired (data cable). You may choose any one of the methods to
diagnose a vehicle.
*Notes:
To obtain stable communication, you are strongly recommended to perform the
vehicle diagnosis via data cable. In this case, the data cable is required to connect
the VCI device and the tablet.
(c) Launch & Diagtools. Tel. +37167704152, +37129416069. www.diagtools.lv
 Loading...