14
15
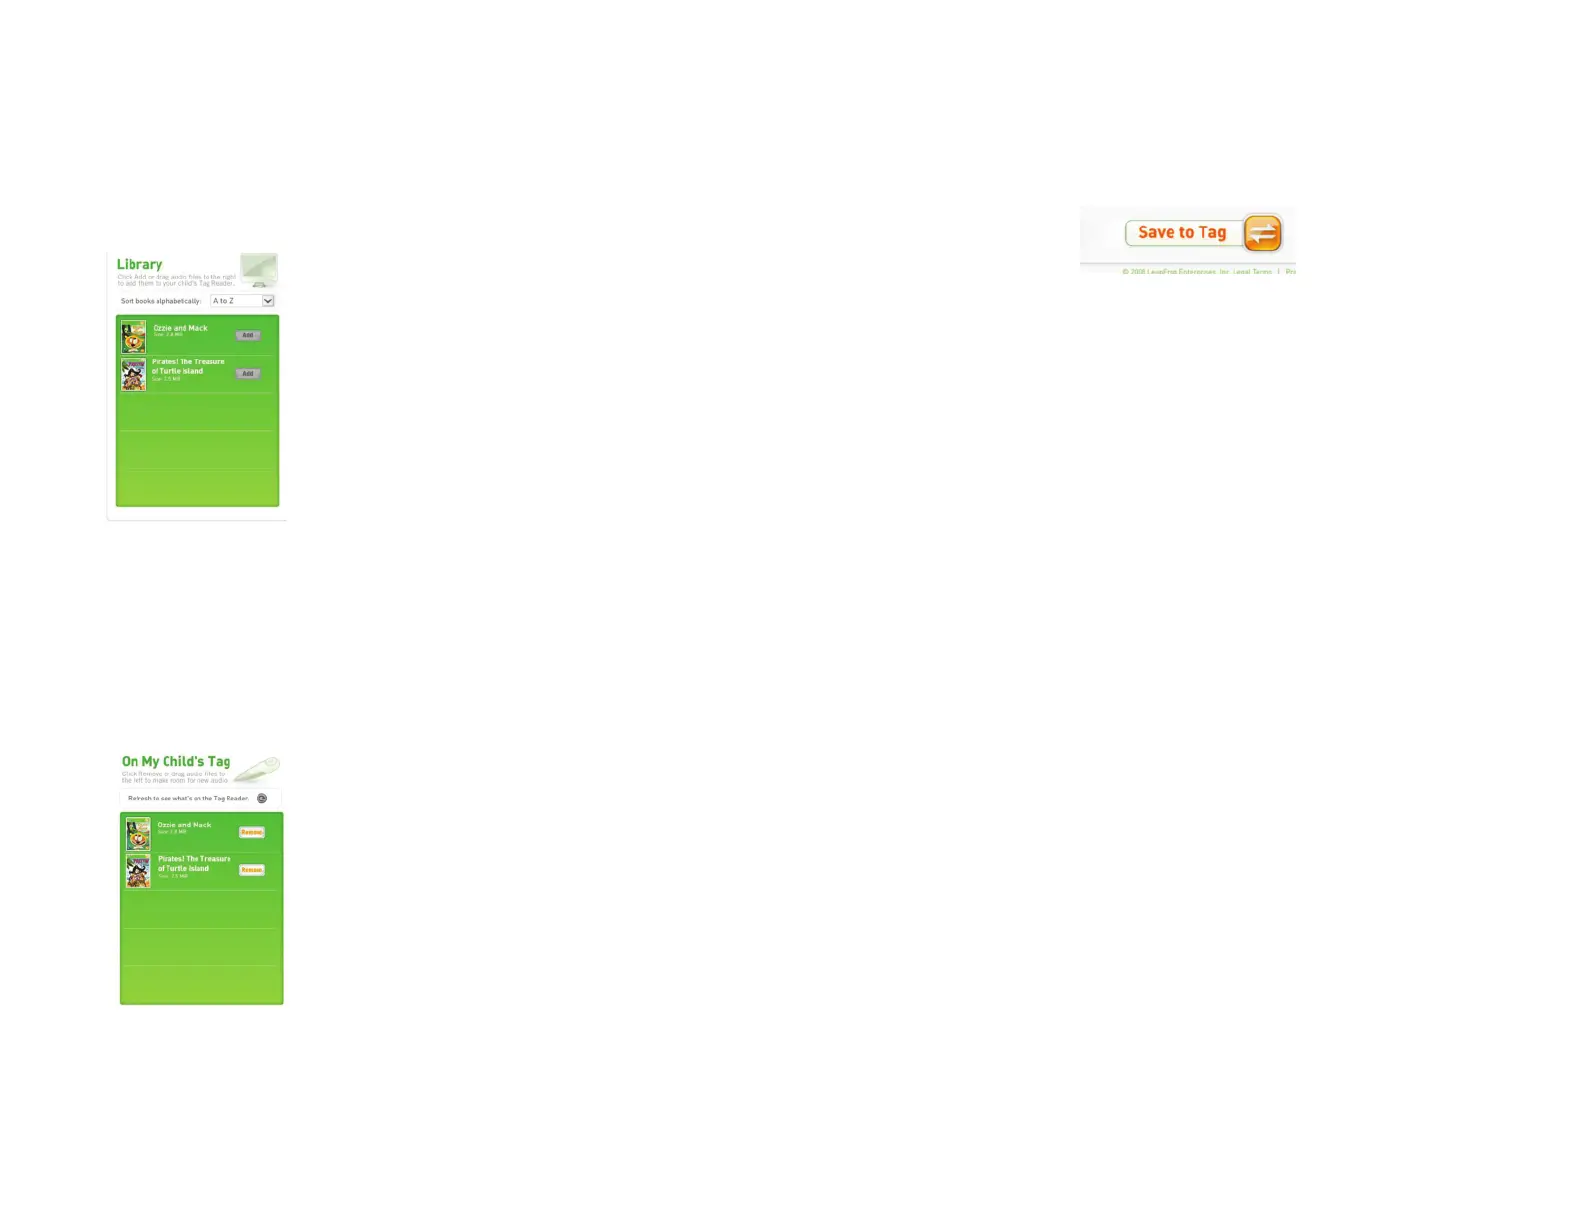
The Library Box
The Library box lets you view the audio downloads that are stored on your computer,
and allows you to add these fi les to your child’s TAG™ Reader. When you download
new fi les from the Audio Downloads page, they will appear in the list of items in the
Library box.
Each audio fi le in the Library box displays the title
and size of the fi le. The Add button next to each fi le
is only clickable if that fi le is not already in the On
My Child’s TAG box.
To transfer a fi le to the TAG Reader:
1. Click the Add button or drag and drop the fi le into
the On My Child’s TAG box
2. Click the Save to TAG button
You can sort the available fi les alphabetically by clicking
the A to Z drop-down menu at the top of the box.
If you have more than 5 titles to view, a slider will
appear on the right side of the box which you can use
to scroll up and down the list.
The On My Child’s TAG Box
The On My Child’s TAG box shows what is currently stored on the TAG Reader or
waiting to be added to the device.
Each audio fi le in the On My Child’s TAG box
displays the title and size of the fi le.
To remove a fi le from the TAG Reader:
1. Click the Remove button or drag and drop the fi le
back into the Library box
2. Click the Save to TAG button
Note: Clicking a Remove button will not delete that
audio fi le from your computer; it will remain available
in the Library box and can be added to your child’s
TAG Reader again at any time.
The TAG Reader holds approximately 5 titles,
however, if you do have more than 5 titles to view,
a scrollbar will appear on the right side of this box
which you can use to scroll up and down the list. The
memory gauge will tell you how much space is left
for adding more audio fi les.
At any time during your organization, you can click
the orange Refresh button to undo the changes
waiting to be applied and see what is currently
stored on your child’s TAG Reader.
The Save to TAG button is located under the On My Child’s TAG box. Once a change is
made in the On My Child’s TAG box, the Save to TAG button will fl ash and a message
will appear in the bottom left corner of the page asking you to sync.
Syncing the TAG Reader
Syncing means saving audio fi les to, or removing audio fi les from, your device. You can
make all of your changes before clicking the Save to TAG button, or you can make them
one at a time.
Note: The Save to TAG button will be grayed out during a sync process, or when there
is no sync action to complete.
After you click the Save to TAG button, the changes to your child’s TAG Reader will be
applied. You cannot cancel the sync process and cannot make any additional changes
until the sync completes. However, you can navigate around the other components
of the TAG view such as visiting the Audio Downloads page or checking the Rewards
page for any new rewards. You will not be able to log out of the current TAG player
profi le until the sync completes.
You will be notifi ed when the sync completes in both the Message Center, located in
the upper right corner of the LEAPFROG® Connect Application window, and in the
bottom left corner of the page. The On My Child’s TAG box will also become visible
again and refresh to show what is now loaded on the TAG Reader.
Do not disconnect the TAG Reader during a sync. If the TAG Reader is disconnected
during a sync, it may become corrupt. If this happens, the next time the device is
connected, a message will appear noting that the TAG Reader needs to be updated
and/or repaired and will prompt you to do so.
Battery Level and Syncing
Before a sync happens, the LEAPFROG Connect Application will check to see if the
battery level of your TAG Reader is adequate to complete the action. If the battery level
is insuffi cient, you will be asked to change the batteries before continuing.
The TAG Reader will power off while you change the batteries. Unfortunately, this
means that the changes that are waiting to be saved to your TAG Reader will be lost.
Once the batteries are changed, you will have to choose the desired audio fi les again,
and then click the Save to TAG button.

 Loading...