33
Attention!
– Prior to making any assembly work, always
disconnect the power supply at the
external transformer outlet and the
microscope outlet!
– Allow the lamp housing to cool prior to
opening it (at least 15 min.), explosion
hazard!
– Never touch the glass parts of the burner
with your hands. If required, carefully
remove finger prints and dust (use alcohol
if necessary).
– Adjust lamps immediately after ignition.
– Avoid frequent switching on and off
because this could affect the service life
(→ p. 76) and stability. Hot Hg lamps will
ignite only after cooling off. It is recom-
mended to run in new burners for a couple
of hours without interruption.
– Make sure that the lamp housing is
sufficiently ventilated. Never block air slots
with paper etc., fire hazard!
– It is good practice to record the hours of
use and to compare them to the manu-
facturer’s specifications.
Replace discoloured, worn burners in due
time.
– We must refuse any liability for damage
resulting from a possible explosion of the
lamp.
• If required, disconnect the mains plug of the
power unit and the microscope.
• Open the 106 z lamp housing by slightly
loosening the screws (36.4), pulling out the
cut-out plug from the socket (36.11) and
flipping up the lid of the lamp housing.
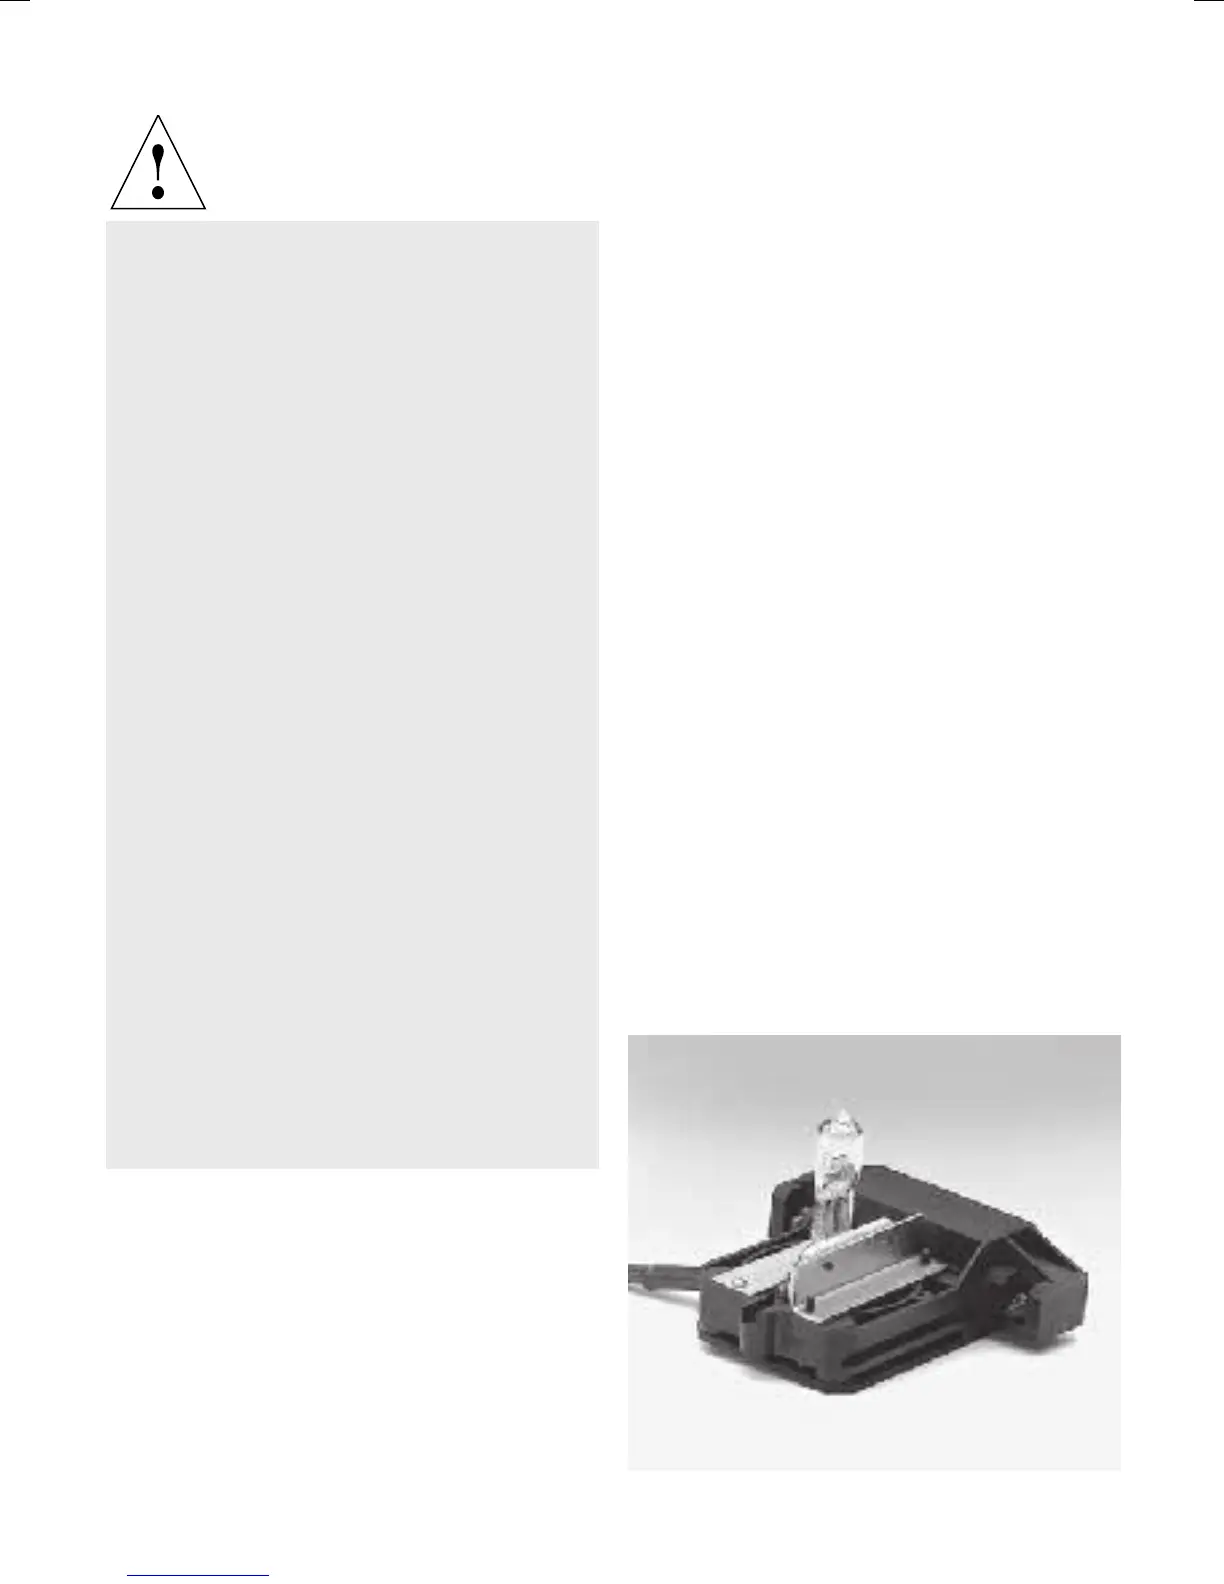
• Unscrew the safety screws (36.10) and pull
out the lamp holder (Fig. 39, 40).
• Insert the burner as follows while strictly
observing the above safety instructions:
• If a plastic protective sleeve is present,
leave it in place for the time being.
• Insert the burner so that the lettering is
upright after installation. For Hg 50, Hg 100,
and Xe 75, the different height of the metal
base ensures installation at the proper
height.
• Align any existing glass fused nipple (40.2)
by rotating the burner so that the nipple is
orientated to the side and away from the
beam path.
• Insert the upper pin of the burner between
the clamps of the flexible power supply and
fix it with the screw (40.1) .
• Slightly unscrew the stud (40.4) in the hol-
der.
• Insert the burner into the lower end of the
metal base and retighten the stud.
• Remove the protective sleeve of the burner
if it is still present.
Fig. 39 12 V/100 W lamp holder


 To Next Page