52
Switching on and adjusting the 12 V/100 W
halogen lamp in the 106* lamp housing
• Switch on the 12 V/100 W halogen lamp at the
power unit.
• Open the light stop.
• Move the filter block into the beam path.
• Remove the objective in the beam path.
• Place a white sheet of paper on the specimen
stage.
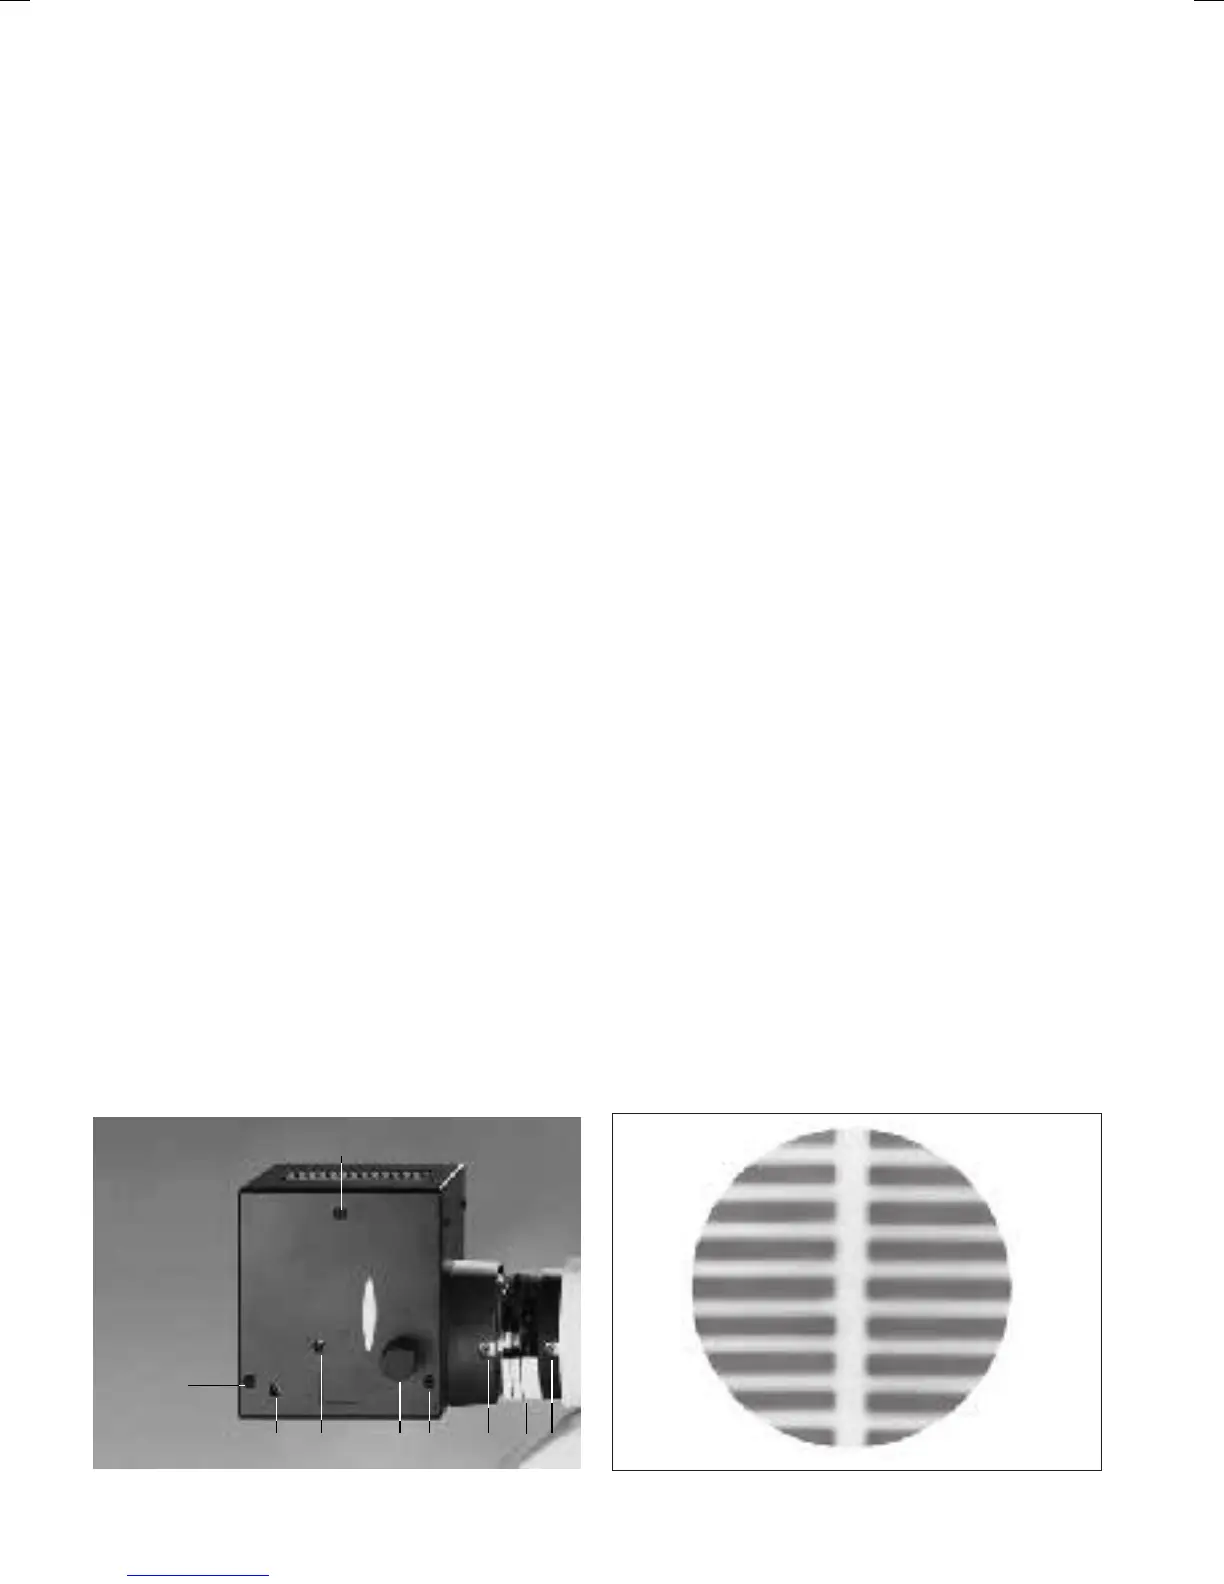
• Rotate the collector adjustment (51.4) until the
lamp filament (Fig. 52) is clearly projected.
• Use a 3 mm fixed spanner to adjust the
centring screws for level adjustment (51.2)
and for horizontal adjustment (51.3) of the
lamp until the lamp filament is in the centre of
the light spot.
Fig. 51 106 lamp housing (with 12 V/100 W halogen lamp)
1 Screw for opening the lamp housing, 2, 3 X/Y centring of the
lamp (compartment for storing a 3 mm allen key or screw-
driver), 4 Collector focusing, 5, 7 Lock screw for mounting,
6 Filter holder (intermediate piece) for 50 mm filter
Items 3 – 4 do not apply to the 107 lamp housing
Fig. 52 106 lamp housing
Reflection of the lamp filament, greatly schematised: In
reality, the reflection is extremely low in contrast, the bright
overlap area is wider and less defined. With the 106 z lamp
housing, the reflection is rotated by 90°.
3
2
1
45
7
1 6
1
• Remove the paper.
• Position the specimen.
• Check with low objective magnification that
the image is illuminated in a homogeneous
manner.
• Adjust the collector (51.4) if necessary.
Switching on and adjusting the halogen,
Xe and Hg lamps in the 106 z lamp housing*
• Switch on the lamp at the power unit.
• Open the light stop.
• Move the filter block into the beam path.
• Place a white sheet of paper on the specimen
stage.
• Coarsely focus on the surface using a dry
objective with low to medium magnification.


 To Next Page