5: Getting started
71
GR25 setup in a non-DHCP network using screen and buttons
In a field campaign the GR25 can be configured through the screen and buttons, to start or stop pre-configured data streams
and logging sessions.
For initial setup, the GR25 IT configuration for setup in a non-DHCP network can be done through the screen and buttons.
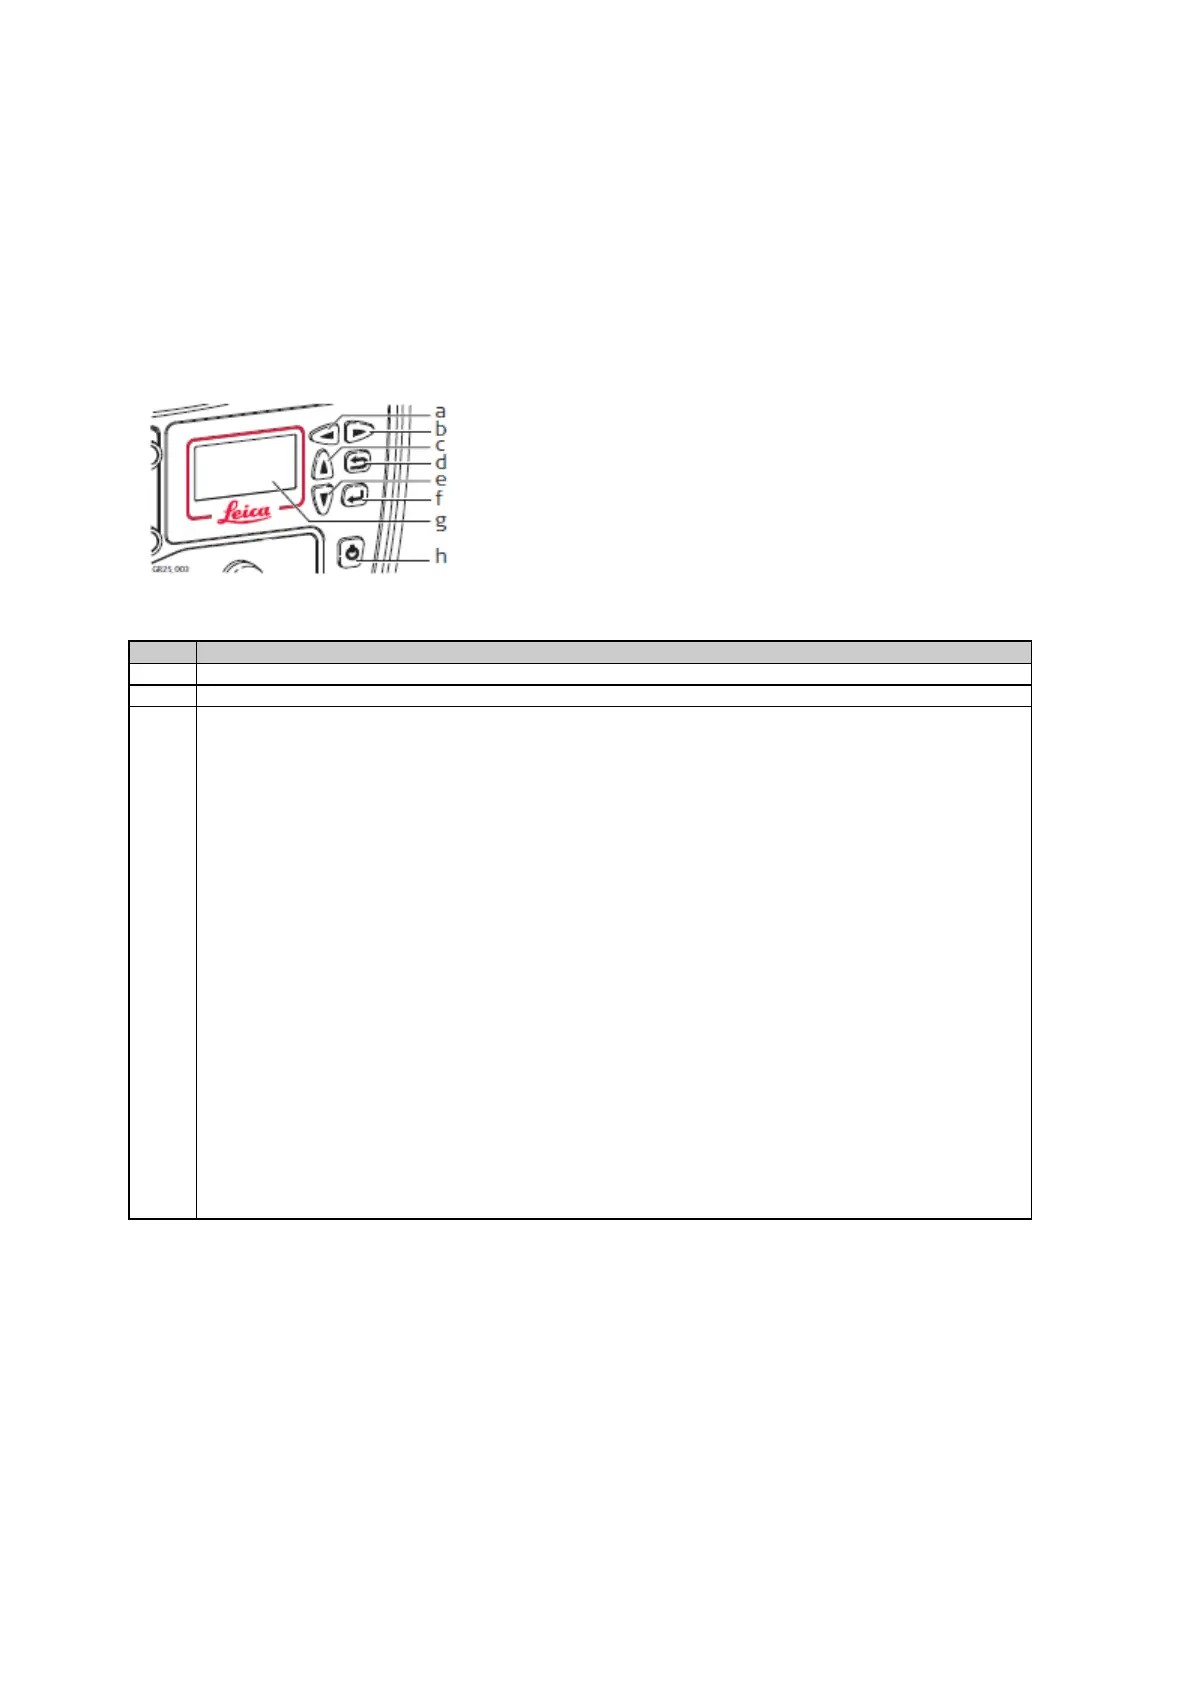
b. Right button
c. Up button
d. Cancel button
e. Down button
f. Enter button
g. Screen
h. ON/OFF button
Use the arrow buttons go to Configuration, Network Config.
To use a custom static IP address, disable DHCP, then enter the IP address, Subnet mask and gateway. Press
Enter to store each setting.
OR
To use the default static IP address, leave DHCP enabled. Once the ethernet cable is connected to a non-DHCP
network, the receiver will fall back to the settings:
• IP address 192.168.0.3
• Gateway 255.255.255.0
Configure your PC accordingly to access the receiver (e.g. via crossed ethernet cable).
OR
To use a previously configured static IP address, disable DHCP. The receiver will fall back to the last used static
IP address. If no static IP address had previously been configured, the receiver will use the default settings:
• IP address 192.168.0.3
• Gateway 255.255.255.0