4 Operation
4.1 Instrument Setup
4.1.1 General Information
The instrument should always be set up on its tripod. Using the tripod spe-
cied for the scanning system guarantees maximum stability during scanning
operations.
☞
Always set up the instrument on its tripod. Do not set up the instru-
ment directly on the ground for scanning operations.
☞
It is always recommended to shield the instrument from direct sun-
light and avoid uneven temperatures around the instrument.
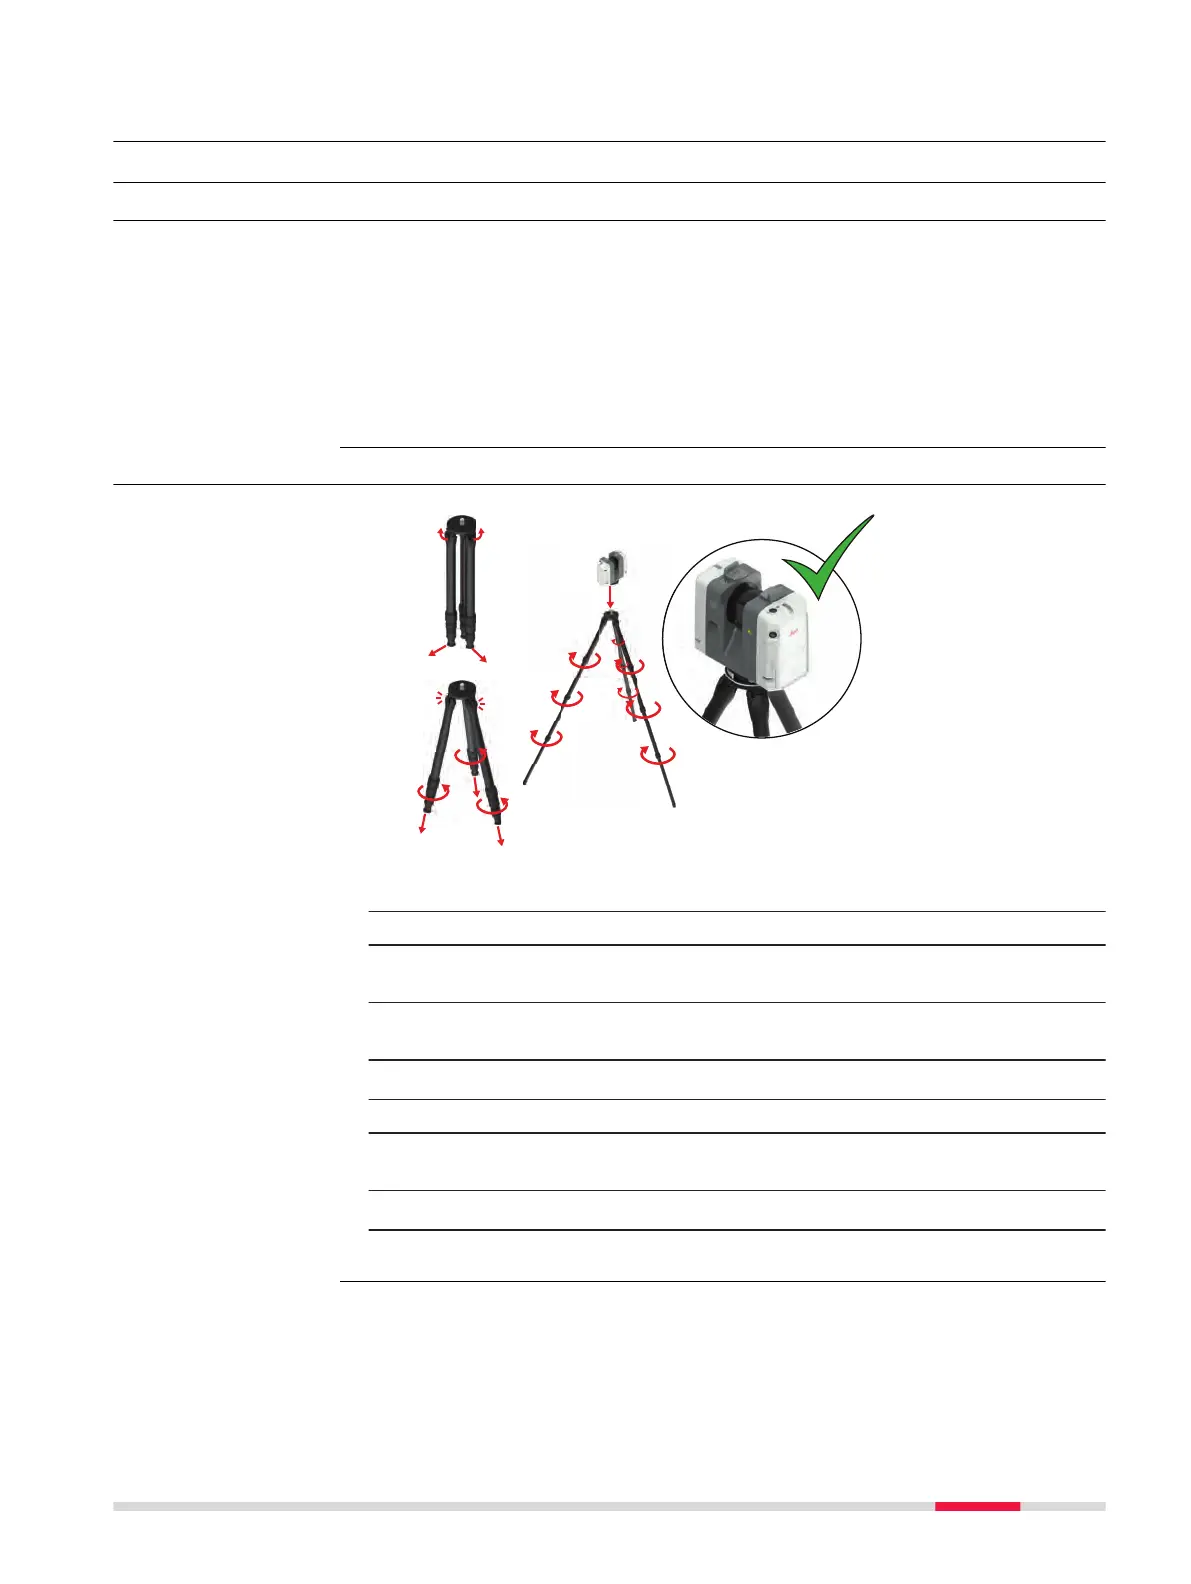
4.1.2 Lightweight Tripod Setup
1. Unlock the locks at the top of the legs.
2. Unfold the legs so that the locks lock in their maximum position.
3. Move the legs back to a xed position so that the locks click into
place.
4. Unscrew the locking screws and extend the tripod legs to allow for a
comfortable working posture.
☞
Only unscrew the locking screws by half a revolution.
5. Tighten all locking screws at the tripod legs.
☞
Remove the rubber caps at the bottom of the tripod legs to uncover
spikes for usage on a soft ground.
☞
Do not use the spikes on slippery ground.
6. Place the instrument on the quick release mount and secure it.
Use the tripod
Instrument setup
step-by-step
Operation 25