47
After a shear bolt has broken:
Leave the implement in the ground.
Carry out the following work on the imple-
ment behind the plough body in the direc-
tion of travel:
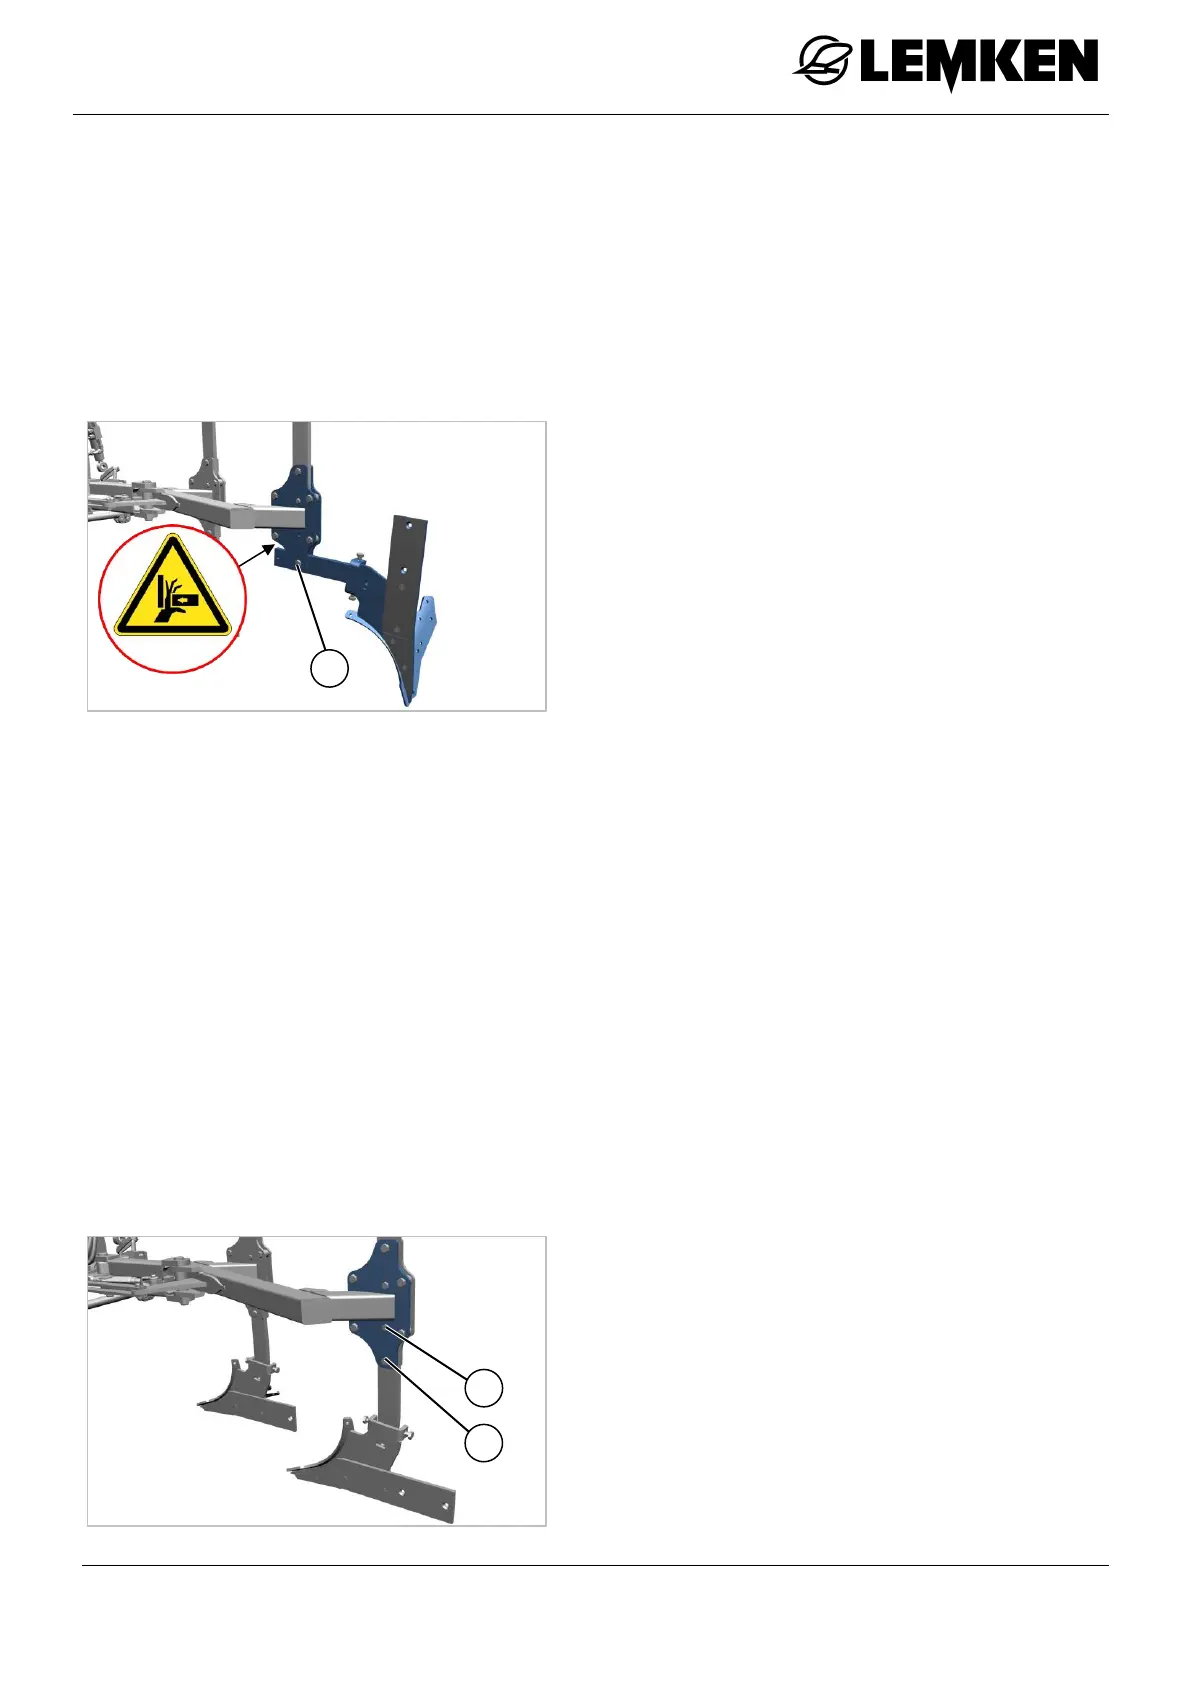
Remove the remains of the shear bolt
(1).
WARNING: Risk of cuts due to sharp
edges at the shear bolt
Keep hands and fingers away from the
area of the stalk and leg bracket.
WARNING: Risk of being crushed by
moving components.
Loosen the screw (2) on the leg.
Keep hands and fingers away from the
area of the stalk and leg bracket.
Lift up the implement until the plough
body swivels into its working position.
Have a new shear bolt M12x55 – 10.9
ready.
ATTENTION: Only use the aforesaid
shear bolt. Only this bolt guarantees
effective protection against damage.
If the swivelled out plough body is not
yet in the working position when the im-
plement is raised:
Swivel the plough body all the way back
into its working position by hand.
Perform a visual inspection whether the
holes for the shear bolt are in alignment.