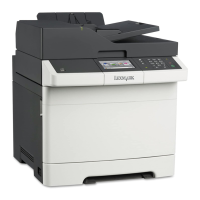
Use the To
4 LINE port Connect the printer to an active telephone line through a standard wall jack (RJ‑11), DSL
filter, or VoIP adapter, or any other adapter that allows you to access the telephone line
to send and receive faxes.
5 EXT port Connect additional devices (telephone or answering machine) to the printer and the
telephone line. Use this port if you do not have a dedicated fax line for the printer and
if this connection method is supported in your country or region.
Note: Remove the plug to access the port.
6 USB printer port Connect the printer to a computer.
7 Ethernet port Connect the printer to an Ethernet network.
Setting up the printer software
Installing the printer software
1 Obtain a copy of the software installer package.
• From the software CD that came with your printer.
• Go to http://support.lexmark.com, and then select your printer and operating system.
2 Run the installer, and then follow the instructions on the computer screen.
3 For Macintosh users, add the printer.
Note: Obtain the printer IP address from the TCP/IP section in the Network/Ports menu.
Adding available options in the print driver
For Windows users
1 Open the printers folder.
2 Select the printer you want to update, and then do the following:
• For Windows 7 or later, select Printer properties.
• For earlier versions, select Properties.
3 Navigate to the Configuration tab, and then select Update Now ‑ Ask Printer.
4 Apply the changes.
For Macintosh users
1 From System Preferences in the Apple menu, navigate to your printer, and then select Options & Supplies.
2 Navigate to the list of hardware options, and then add any installed options.
3 Apply the changes.
Additional printer setup 36
 Loading...