Diagnostics information 2-45
7013-XXX
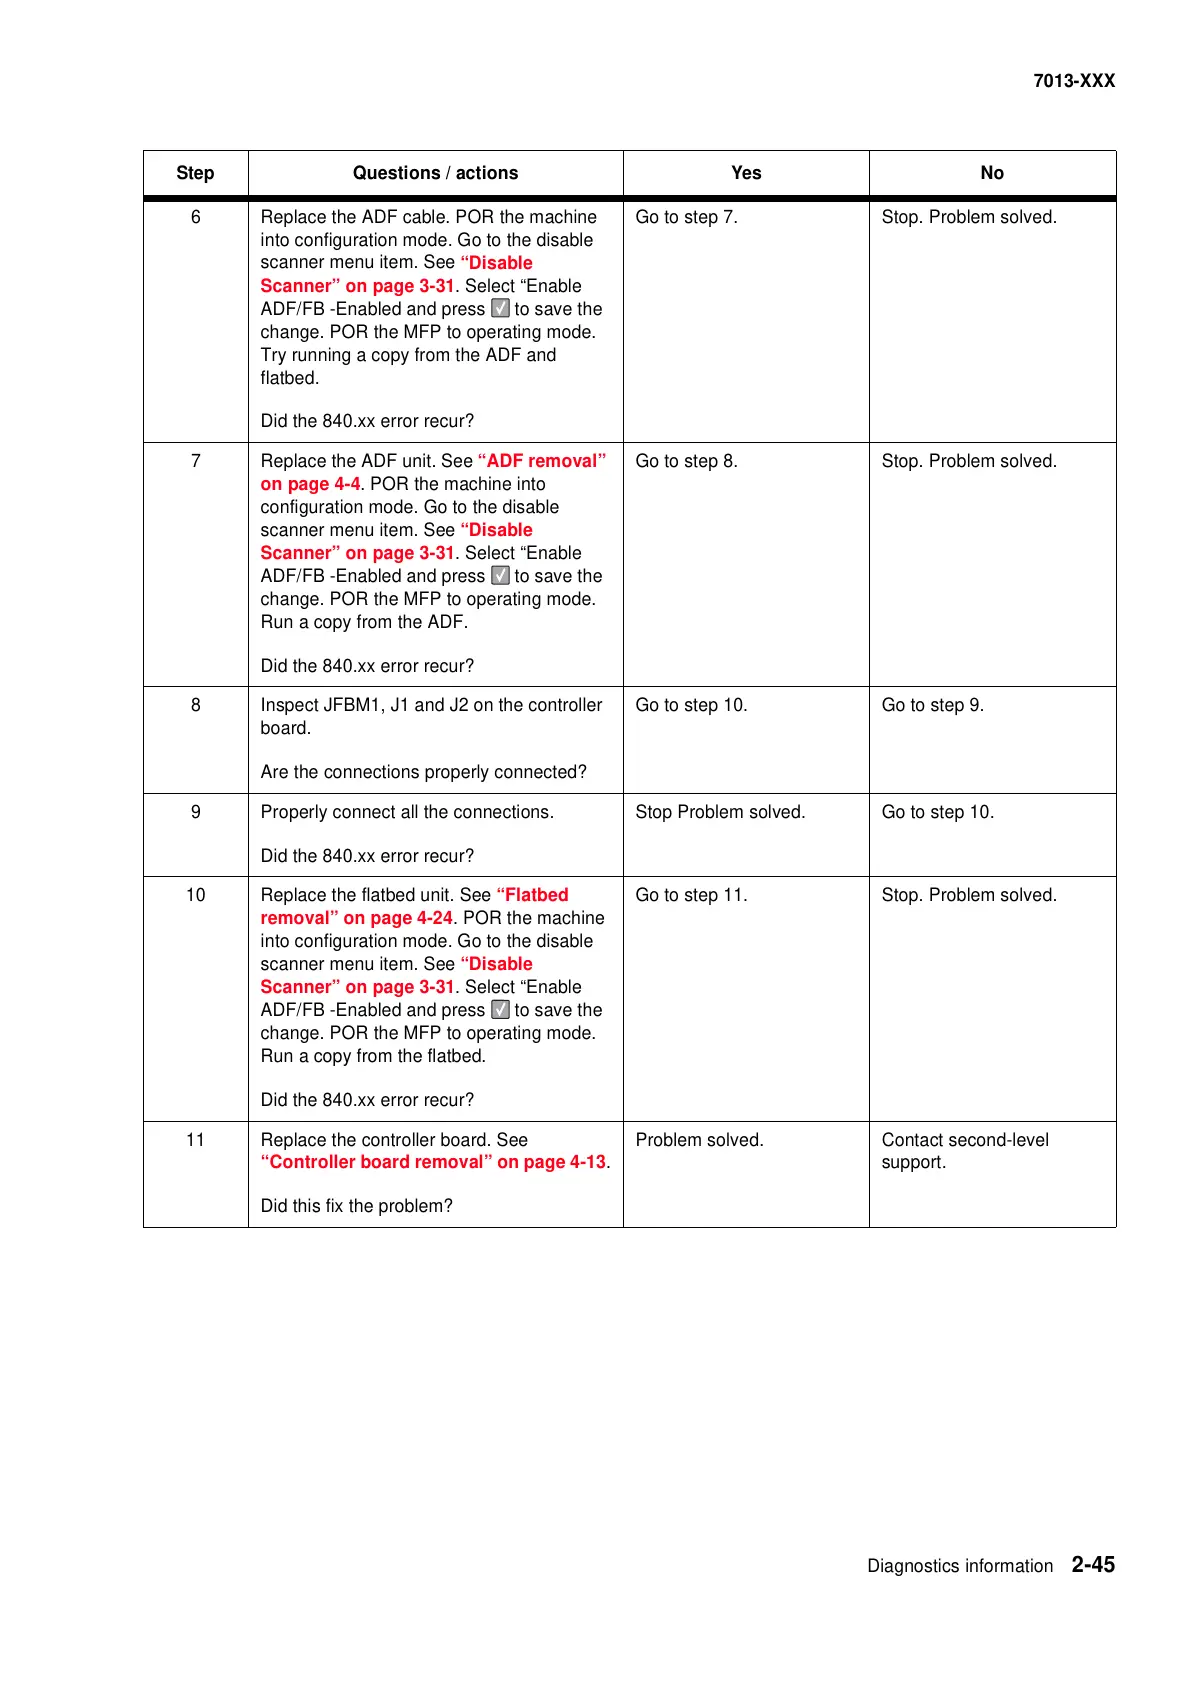
6
Replace the ADF cable. POR the machine
into configuration mode. Go to the disable
scanner menu item. See
“Disable
Scanner” on page 3-31. Select “Enable
ADF/FB -Enabled and press to save the
change. POR the MFP to operating mode.
Try running a copy from the ADF and
flatbed.
Did the 840.xx error recur?
Go to step 7. Stop. Problem solved.
7 Replace the ADF unit. See “ADF removal”
on page 4-4. POR the machine into
configuration mode. Go to the disable
scanner menu item. See
“Disable
Scanner” on page 3-31. Select “Enable
ADF/FB -Enabled and press to save the
change. POR the MFP to operating mode.
Run a copy from the ADF.
Did the 840.xx error recur?
Go to step 8. Stop. Problem solved.
8 Inspect JFBM1, J1 and J2 on the controller
board.
Are the connections properly connected?
Go to step 10. Go to step 9.
9 Properly connect all the connections.
Did the 840.xx error recur?
Stop Problem solved. Go to step 10.
10 Replace the flatbed unit. See “Flatbed
removal” on page 4-24. POR the machine
into configuration mode. Go to the disable
scanner menu item. See
“Disable
Scanner” on page 3-31. Select “Enable
ADF/FB -Enabled and press to save the
change. POR the MFP to operating mode.
Run a copy from the flatbed.
Did the 840.xx error recur?
Go to step 11. Stop. Problem solved.
11 Replace the controller board. See
“Controller board removal” on page 4-13.
Did this fix the problem?
Problem solved. Contact second-level
support.
Step Questions / actions Yes No



 To Next Page