EasyManuals Logo

Lightware HDMI20-OPTC-TX220-Pro User Manual

Lightware HDMI20-OPTC-TX220-Pro
75 pages
To Next Page IconTo Next Page
To Previous Page IconTo Previous Page
Page #46 background imageLoading...
Page #46 background image

ī˜šī˜’ī˜„ī˜°ī˜»ī˜—ī˜„ī˜“ī™–ī™“ī™‹ī™–ī™…ī™‘ī™‘ī™‰ī™–ī™—ī­ī˜„ī˜¶ī™‰ī™Šī™‰ī™–ī™‰ī™’ī™‡ī™‰ 
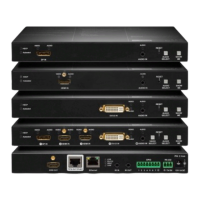
HDMI20-OPTC series – User's Manual 46
ī˜šī˜’ī˜—ī˜’ī˜›ī˜’īLocking Front Panel
Command and Response
Ɲ ī˜·ī˜©ī˜øīµī˜“ī˜±ī˜„ī˜²ī˜„ī˜«ī˜©ī˜±ī˜©ī˜²ī˜øī˜“ī˜¹ī˜­ī˜’ī˜§ī™“ī™’ī™˜ī™–ī™“ī™ī˜°ī™“ī™‡ī™ī˜”ī˜ ī™ī™“ī™‡ī™ī™ƒī™—ī™˜ī™…ī™˜ī™™ī™—ī˜¢
Ü ī™”ī™›īµī˜“ī˜±ī˜„ī˜²ī˜„ī˜«ī˜©ī˜±ī˜©ī˜²ī˜øī˜“ī˜¹ī˜­ī˜’ī˜§ī™“ī™’ī™˜ī™–ī™“ī™ī˜°ī™“ī™‡ī™ī˜”ī˜ ī™ī™“ī™‡ī™ī™ƒī™—ī™˜ī™…ī™˜ī™™ī™—ī˜¢
Example
Ɲ ī˜·ī˜©ī˜øī˜„ī˜“ī˜±ī˜„ī˜²ī˜„ī˜«ī˜©ī˜±ī˜©ī˜²ī˜øī˜“ī˜¹ī˜­ī˜’ī˜§ī™“ī™’ī™˜ī™–ī™“ī™ī˜°ī™“ī™‡ī™ī˜”ī˜•
Ü ī™”ī™›ī˜„ī˜“ī˜±ī˜„ī˜²ī˜„ī˜«ī˜©ī˜±ī˜©ī˜²ī˜øī˜“ī˜¹ī˜­ī˜’ī˜§ī™“ī™’ī™˜ī™–ī™“ī™ī˜°ī™“ī™‡ī™ī˜”ī˜•
Parameters
ī˜ ī™ī™“ī™‡ī™ī™ƒī™—ī™˜ī™…ī™˜ī™™ī™—ī˜¢ 0: None - All functions of the front panel button are enabled.
1: Locked - The front panel button is locked.
2: Force Locked - The front panel button is locked and unlock is only possible via protocol
command.
ī˜šī˜’ī˜—ī˜’ī˜œī˜’īEnabling Dark Mode
Command and Response
Ɲ ī˜·ī˜©ī˜øīµī˜“ī˜±ī˜„ī˜²ī˜„ī˜«ī˜©ī˜±ī˜©ī˜²ī˜øī˜“ī˜¹ī˜­ī˜’ī˜Øī˜„ī˜¶ī˜Æī˜±ī˜³ī˜Øī˜©ī˜’ī˜Øī™…ī™–ī™ī˜±ī™“ī™ˆī™‰ī˜©ī™’ī™…ī™†ī™ī™‰ī˜”ī˜ ī™ˆī™…ī™–ī™ī™ƒī™‘ī™“ī™ˆī™‰ī™ƒī™—ī™˜ī™…ī™˜ī™™ī™—ī˜¢
Ü ī™”ī™›īµī˜“ī˜±ī˜„ī˜²ī˜„ī˜«ī˜©ī˜±ī˜©ī˜²ī˜øī˜“ī˜¹ī˜­ī˜’ī˜Øī˜„ī˜¶ī˜Æī˜±ī˜³ī˜Øī˜©ī˜’ī˜Øī™…ī™–ī™ī˜±ī™“ī™ˆī™‰ī˜©ī™’ī™…ī™†ī™ī™‰ī˜”ī˜ ī™ˆī™…ī™–ī™ī™ƒī™‘ī™“ī™ˆī™‰ī™ƒī™—ī™˜ī™…ī™˜ī™™ī™—ī˜¢
Parameters
ī˜ ī™ˆī™…ī™–ī™ī™ƒī™‘ī™“ī™ˆī™‰ī™ƒī™—ī™˜ī™…ī™˜ī™™ī™—ī˜¢ī˜„ī˜„ true: The LEDs and the brightness of LCD display on the extender are turned on.
false: The LEDs and the brightness of LCD display on the extender are turned off.
Example
Ɲ ī˜·ī˜©ī˜øī˜„ī˜“ī˜±ī˜„ī˜²ī˜„ī˜«ī˜©ī˜±ī˜©ī˜²ī˜øī˜“ī˜¹ī˜­ī˜“ī˜Øī˜„ī˜¶ī˜Æī˜±ī˜³ī˜Øī˜©ī˜’ī˜Øī™…ī™–ī™ī˜±ī™“ī™ˆī™‰ī˜©ī™’ī™…ī™†ī™ī™‰ī˜”ī™˜ī™–ī™™ī™‰
Ü ī™”ī™›ī˜„ī˜“ī˜±ī˜„ī˜²ī˜„ī˜«ī˜©ī˜±ī˜©ī˜²ī˜øī˜“ī˜¹ī˜­ī˜“ī˜Øī˜„ī˜¶ī˜Æī˜±ī˜³ī˜Øī˜©ī˜’ī˜Øī™…ī™–ī™ī˜±ī™“ī™ˆī™‰ī˜©ī™’ī™…ī™†ī™ī™‰ī˜”ī™˜ī™–ī™™ī™‰
ī˜šī˜’ī˜—ī˜’ī˜ī˜’īSetting the Dark Mode Delay
The LEDs turn off after the dark mode is enabled. The delay time can be set (the default value is 60s).
Command and Response
Ɲ ī˜·ī˜©ī˜øīµī˜“ī˜±ī˜„ī˜²ī˜„ī˜«ī˜©ī˜±ī˜©ī˜²ī˜øī˜“ī˜¹ī˜­ī˜’ī˜Øī˜„ī˜¶ī˜Æī˜±ī˜³ī˜Øī˜©ī˜’ī˜Øī™…ī™–ī™ī˜±ī™“ī™ˆī™‰ī˜Øī™‰ī™ī™…ī™ī˜”ī˜ ī™ˆī™‰ī™ī™…ī™ī™ƒī™—ī™‰ī™‡ī˜¢
Ü ī™”ī™›īµī˜“ī˜±ī˜„ī˜²ī˜„ī˜«ī˜©ī˜±ī˜©ī˜²ī˜øī˜“ī˜¹ī˜­ī˜’ī˜Øī˜„ī˜¶ī˜Æī˜±ī˜³ī˜Øī˜©ī˜’ī˜Øī™…ī™–ī™ī˜±ī™“ī™ˆī™‰ī˜Øī™‰ī™ī™…ī™ī˜”ī˜ ī™ˆī™‰ī™ī™…ī™ī™ƒī™—ī™‰ī™‡ī˜¢
Example
Ɲ ī˜·ī˜©ī˜øī˜„ī˜“ī˜±ī˜„ī˜²ī˜„ī˜«ī˜©ī˜±ī˜©ī˜²ī˜øī˜“ī˜¹ī˜­ī˜“ī˜Øī˜„ī˜¶ī˜Æī˜±ī˜³ī˜Øī˜©ī˜’ī˜Øī™…ī™–ī™ī˜±ī™“ī™ˆī™‰ī˜Øī™‰ī™ī™…ī™ī˜”ī˜•ī˜”
Ü ī™”ī™›ī˜„ī˜“ī˜±ī˜„ī˜²ī˜„ī˜«ī˜©ī˜±ī˜©ī˜²ī˜øī˜“ī˜¹ī˜­ī˜“ī˜Øī˜„ī˜¶ī˜Æī˜±ī˜³ī˜Øī˜©ī˜’ī˜Øī™…ī™–ī™ī˜±ī™“ī™ˆī™‰ī˜Øī™‰ī™ī™…ī™ī˜”ī˜•ī˜”
ī˜»ī™Œī™‰ī™’ī˜„ī™ˆī™…ī™–ī™ī˜„ī™‘ī™“ī™ˆī™‰ī˜„ī™ī™—ī˜„ī™‰ī™’ī™…ī™†ī™ī™‰ī™ˆī˜ī˜„ī™˜ī™Œī™‰ī˜„ī˜°ī˜©ī˜Øī™—ī˜„ī™…ī™–ī™‰ī˜„ī™˜ī™™ī™–ī™’ī™‰ī™ˆī˜„ī™“ī™Šī™Šī˜„ī™…ī™Šī™˜ī™‰ī™–ī˜„ī˜•ī˜”ī™—ī˜’
ī˜šī˜’ī˜—ī˜’ī˜•ī˜”ī˜’īSetting the Dark Mode on the Remote Device
INFO: This command is available for the transmitter.
Dark mode on the receiver can be activated by sending a command to the transmitter.
Command and Response
Ɲ ī˜·ī˜©ī˜øīµī˜“ī˜¶ī˜©ī˜±ī˜³ī˜øī˜©ī˜“ī˜Øī˜•ī˜’ī˜Øī™…ī™–ī™ī˜±ī™“ī™ˆī™‰ī˜©ī™’ī™…ī™†ī™ī™‰ī˜”ī˜ ī™ˆī™…ī™–ī™ī™ƒī™‘ī™“ī™ˆī™‰ī™ƒī™—ī™˜ī™…ī™˜ī™™ī™—ī˜¢
Ü ī™”ī™›īµī˜“ī˜¶ī˜©ī˜±ī˜³ī˜øī˜©ī˜“ī˜Øī˜•ī˜’ī˜Øī™…ī™–ī™ī˜±ī™“ī™ˆī™‰ī˜©ī™’ī™…ī™†ī™ī™‰ī˜”ī˜ ī™ˆī™…ī™–ī™ī™ƒī™‘ī™“ī™ˆī™‰ī™ƒī™—ī™˜ī™…ī™˜ī™™ī™—ī˜¢
Parameters
ī˜ ī™ˆī™…ī™–ī™ī™ƒī™‘ī™“ī™ˆī™‰ī™ƒī™—ī™˜ī™…ī™˜ī™™ī™—ī˜¢ī˜„ī˜„ true: LEDs on the receiver are turned on.
false: LEDs on the receiver are turned off.
Example
Ɲ ī˜·ī˜©ī˜øī˜„ī˜“ī˜¶ī˜©ī˜±ī˜³ī˜øī˜©ī˜“ī˜Øī˜•ī˜’ī˜Øī™…ī™–ī™ī˜±ī™“ī™ˆī™‰ī˜©ī™’ī™…ī™†ī™ī™‰ī˜”ī™˜ī™–ī™™ī™‰
Ü ī™”ī™›ī˜„ī˜“ī˜¶ī˜©ī˜±ī˜³ī˜øī˜©ī˜“ī˜Øī˜•ī˜’ī˜Øī™…ī™–ī™ī˜±ī™“ī™ˆī™‰ī˜©ī™’ī™…ī™†ī™ī™‰ī˜”ī™˜ī™–ī™™ī™‰
ī˜šī˜’ī˜—ī˜’ī˜•ī˜•ī˜’īī˜·ī™‰ī™˜ī™˜ī™ī™’ī™‹ī˜„ī™˜ī™Œī™‰ī˜„ī˜¶ī™“ī™˜ī™…ī™–ī™ī˜„ī˜Øī™ī™–ī™‰ī™‡ī™˜ī™ī™“ī™’ī˜„ī™“ī™Šī˜„ī™˜ī™Œī™‰ī˜„ī˜®ī™“ī™‹ī˜„ī˜Øī™ī™…ī™ī˜„ī˜Æī™’ī™“ī™†
Command and Response
Ɲ ī˜·ī˜©ī˜øīµī˜“ī˜±ī˜„ī˜²ī˜„ī˜«ī˜©ī˜±ī˜©ī˜²ī˜øī˜“ī˜¹ī˜­ī˜’ī˜¶ī™“ī™˜ī™…ī™–ī™ī˜Øī™ī™–ī™‰ī™‡ī™˜ī™ī™“ī™’ī˜”ī˜ ī™ˆī™ī™–ī™‰ī™‡ī™˜ī™ī™“ī™’ī˜¢
Ü ī™”ī™›īµī˜“ī˜±ī˜„ī˜²ī˜„ī˜«ī˜©ī˜±ī˜©ī˜²ī˜øī˜“ī˜¹ī˜­ī˜’ī˜¶ī™“ī™˜ī™…ī™–ī™ī˜Øī™ī™–ī™‰ī™‡ī™˜ī™ī™“ī™’ī˜”ī˜ ī™ˆī™ī™–ī™‰ī™‡ī™˜ī™ī™“ī™’ī˜¢
Parameters
ī˜ ī™ˆī™ī™–ī™‰ī™‡ī™˜ī™ī™“ī™’ī˜¢ī˜„ 0: The rotary direction of down is clockwise.
1: The rotary direction of down is counter clockwise.
Example
Ɲ ī˜·ī˜©ī˜øī˜„ī˜“ī˜±ī˜„ī˜²ī˜„ī˜«ī˜©ī˜±ī˜©ī˜²ī˜øī˜“ī˜¹ī˜­ī˜’ī˜¶ī™“ī™˜ī™…ī™–ī™ī˜Øī™ī™–ī™‰ī™‡ī™˜ī™ī™“ī™’ī˜”ī˜”
Ü ī™”ī™›ī˜„ī˜“ī˜±ī˜„ī˜²ī˜„ī˜«ī˜©ī˜±ī˜©ī˜²ī˜øī˜“ī˜¹ī˜­ī˜’ī˜¶ī™“ī™˜ī™…ī™–ī™ī˜Øī™ī™–ī™‰ī™‡ī™˜ī™ī™“ī™’ī˜”ī˜”
ļ„¢




Table of Contents

Other manuals for Lightware HDMI20-OPTC-TX220-Pro

Questions and Answers:

Question and Answer IconNeed help?

Do you have a question about the Lightware HDMI20-OPTC-TX220-Pro and is the answer not in the manual?

Lightware HDMI20-OPTC-TX220-Pro Specifications

General IconGeneral
BrandLightware
ModelHDMI20-OPTC-TX220-Pro
CategoryExtender
LanguageEnglish

Related product manuals