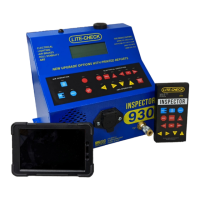
LITE-CHECK INSPECTOR 930
36
10. Tap “Save” to proceed, then press the “Run Tests” button to begin automated testing of all light circuits and
the ABS system. The “info” button for each test can be selected to see results in real time.
11. If you leave the “Run Air Leak Test” box checked, charging of the trailer’s emergency tank and service air
lines will begin upon completion of the ABS test. Note the this will release the spring breaks and the
trailer will roll if it was not properly chocked! Once the air pressure in the emergency system stabilizes
(above the minimum value of 100 PSI) the background leak test will begin automatically. It will run for 60
seconds and record the starting air pressures and air leak rate for both the emergency and service systems.
Note the following:
● The pressure of the background air leak test may be monitored via the status message at the bottom of the
screen.
● If the air pressure has not stabilized above 100 PSI by the time the inspection reaches the Air brakes screen,
the test will be canceled. It may be performed manually in Diagnostic Mode or by repeated in DOT mode
by completing the current inspection, then loading the results by selecting “Previous” in step #3 and
repeating the automated tests.
● Because the ABS ECU vents a small amount of air when power is applied, the Brakes and Aux lights may
not be switched on during the 60-second window of the air leak test itself. Those lights can be activated
before and after that time (while the air is charging or once the test has completed).
● Switching to Diagnostic Mode while the background air leak test is in progress is not recommended and will
cancel the background air leak test.
12. You may proceed with the inspection before the automated tests complete by pressing “Save”. Note,
however, that visual inspection of the lights will be disabled until the electrical and ABS tests finish. This
usually takes approximately 90 seconds.
Each subsequent screen will be one of three types:
● Inspection Screen: for each item in the lest, select “Good,” “OOS” (out of service), or “N/A” (not
applicable). The number in blue superscript are the TMC PMI inspection codes, for reference.
● Light Screen: A screen allowing specific trailer lights to be turned on and off for visual inspection. Tap the
light icon to turn the light circuit on, and tap again to turn it off.
● Tires Screen: A screen showing all the tires on the trailer. It may be necessary to scroll the screen if there
are several axles. Only the tires on the left or right sides will be active, depending on your inspection point,
but previously entered values will be visible for all tires. Select any tire icon to enter its air pressure, tread
depth, and condition in the pop-up dialog. The currently active tire will be highlighted in red. If you the the
Bluetooth tire pressure and tread depth gauge, see Bluetooth Tire Tool.
● Air Brakes Screen: The screen allowing entry of measured values for brake pad/shoe thickness and applied
brake stroke, if applicable. Select the left or right side of each axle to bring up the corresponding dialog and
enter values. For drum brakes, press the “Service” button to activate the brakes and measure the movement
of the slack adjuster rod. Press it again to release the brakes.