Before start-up
- 8 -
11.18909.1550.1-08
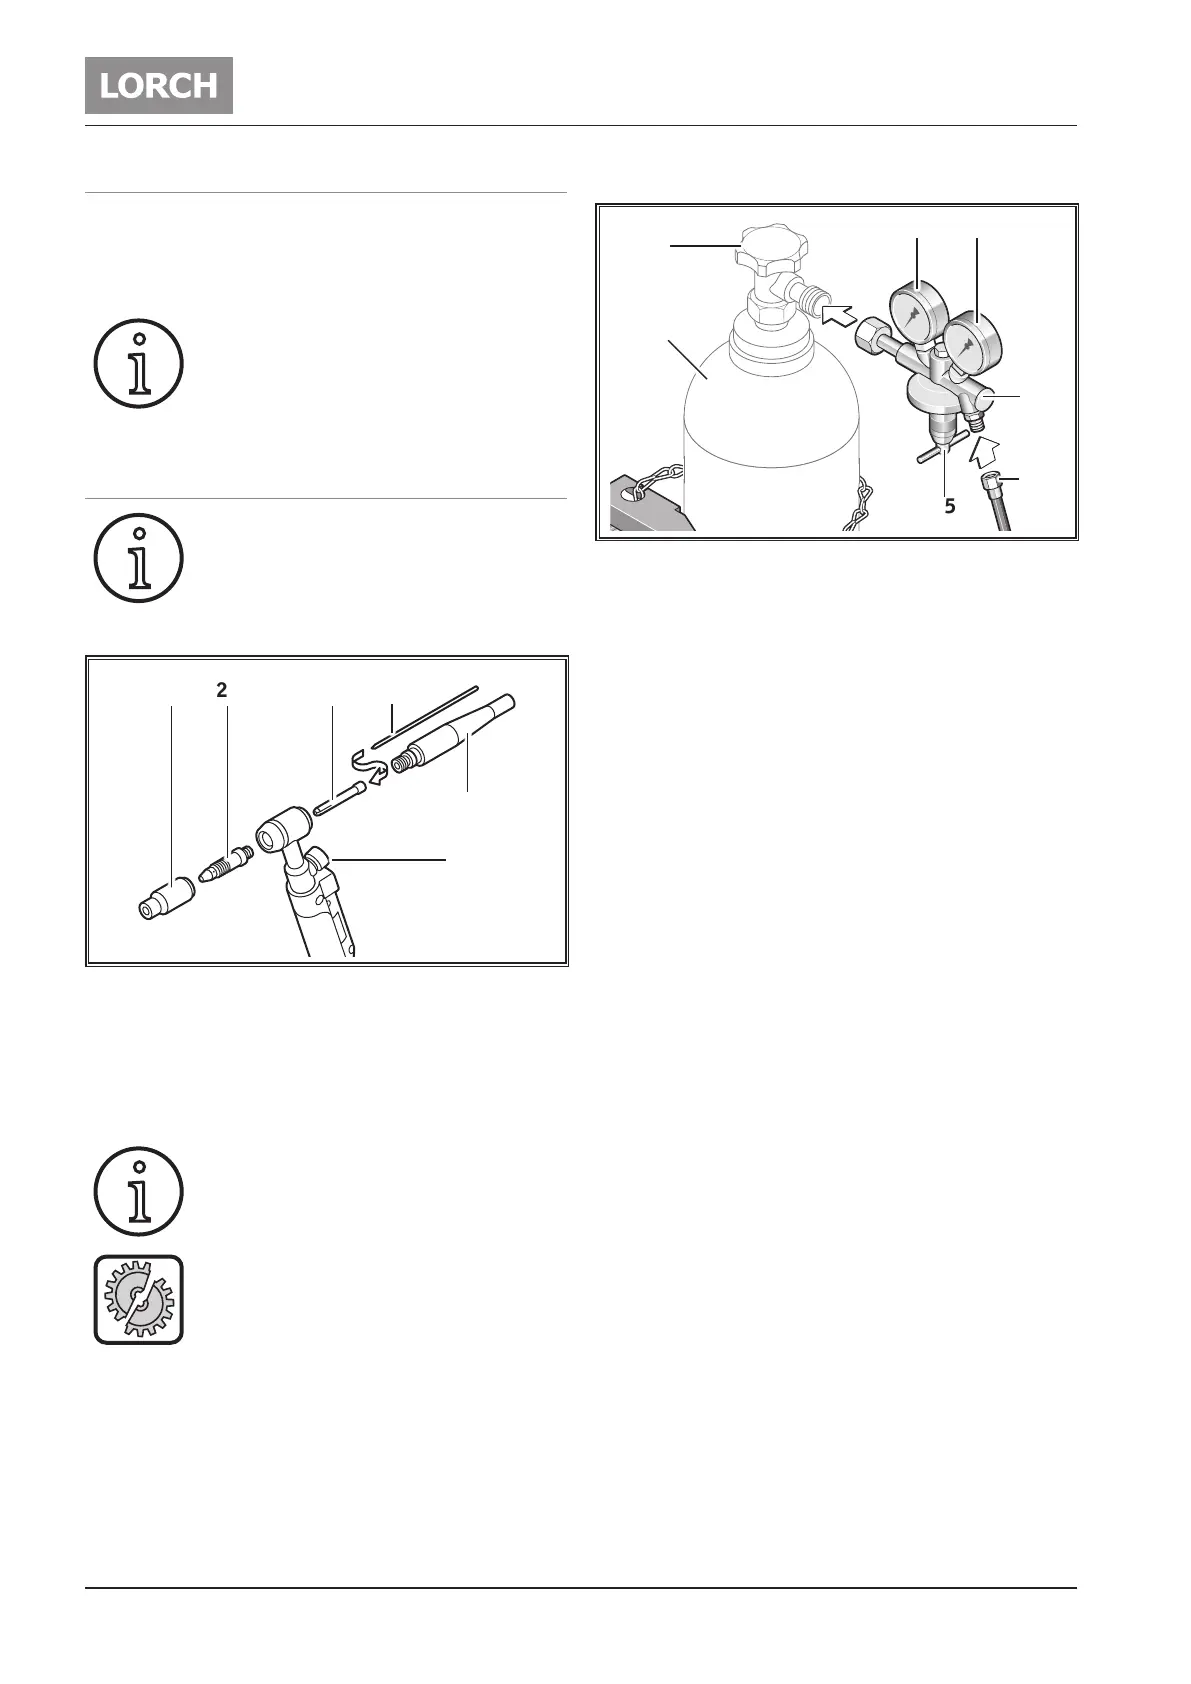
Connecting the inert gas cylinder
26 23
25
28
27
24
22
Abb. 4: Gas connection
 Place the inert gas cylinder 28 in a suitable location
and secure to prevent it from falling over.
The cylinder can be secured using a wall bracket or
cylinder trolley.
 Briey open the gas cylinder valve 27 several times in
order to blow out any dirt particles that are present.
 Connect the pressure reducer 22 to the inert gas cyl-
inder 28.
 Screw the inert gas hose 24 to pressure reducer 22
and open the gas cylinder valve 27.
Setting the inert gas quantity
 Open the valve 19 on the TIG welding torch.
9 Inert gas ows out.
9 The ow meter 23 indicates the gas quantity, and
the content pressure gauge 26 indicates the cylinder
content.
 Close the valve 19 on the TIG welding torch when the
torch is not being used in order to prevent unneces-
sary use of gas.
11.3 Electrode welding process
Connecting the electrode welding cable
 Connect the electrode welding cable to the minus
or plus socket 8 and secure the cable by rotating it
clockwise.
The polarity of the electrode depends on
the type of electrode and the welding proc-
ess. Please follow the manufacturer's in-
structions on the electrode packaging for
this purpose.
11.4 TIG welding process
For TIG welding you require a TIG valve
torch (Type LTV2600) for this device
Installing electrodes
18
16
2021
17
19
 Unscrew the clamping cap 17.
 Remove the electrode 16 from the collet 18.
 Grind the end of the electrode 16.
 Slide the electrode 16 into the collet 18.
 Insert the electrode 16 into the torch and rmly tight-
en the clamping cap 17.
Do not dismantle the collet body 20 and the
gas nozzle 21.
When converting the torch to a different
electrode diameter, please pay attention to
the following.
The collet 18, collet body 20 and electrode 16 must
have the same diameter.
The gas nozzle 21 must be matched to the electrode
diameter.
Connecting the TIG torch
 Connect the TIG torch to the minus 8 connection
socket and secure it by turning it clockwise.
i
i
i