Do you have a question about the Lorell Value Series and is the answer not in the manual?
Lay out all parts on a non-abrasive surface and identify components before starting assembly.
Insert Cam Locks and Cam Screws into Left and Return Mid Panels for initial connection.
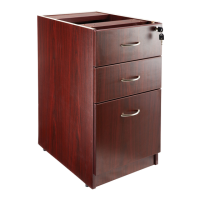
Attach File Drawer Suspensions, Box Drawer Slides, and Locks to the mid panels.
Insert Cam Locks and Cam Screws into Large Back Panel and Return Back Panel.
Connect the Left Mid Panel to the Large Back Panel assembly using cam lock mechanisms.
Attach the Fixed Shelf and Support Panel to the prepared Left Mid Panel.
Connect the Return Mid Panel to the Return Back Panel assembly securely.
Attach the Fixed Shelf and Support Panel to the Return Mid Panel.
Insert Wood Dowels, Cam Screws, Cam Locks, and Adjustable Feet into Return Side Panel.
Insert Wood Dowels, Cam Screws, Cam Locks, and Adjustable Feet into Right Side Panel.
Insert Wood Dowels, Cam Screws, Cam Locks, and Adjustable Feet into Left Side Panel.
Mount File Drawer Suspensions and Box Drawer Slides onto Left and Return Side Panels.
Insert Wood Dowels and Cam Screws into the main Large Top Panel.
Connect the Left and Right Side Panels to the Large Back Panel assembly.
Secure the Return Side Panel to the Return Back Panel assembly.
Insert dowels and screws, attach Flat Brackets to the Return Top Panel.
Connect the Return Top Panel to the Return Side Panel and Back Panel.
Mount the Large Top Panel and attach the Return Unit to the main Desk Shell.
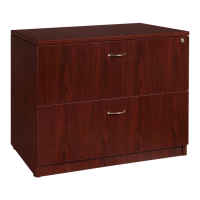
Mount Full Extension Slides onto the Large Drawer Side Panels.
Assemble File Drawer Front/Back, Bottom Panel, and Side Panels.
Mount Box Drawer Tracks onto the Box Drawer Side Panels.
Assemble Box Drawers, insert completed drawers, and finalize unit assembly.
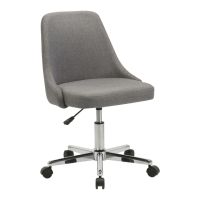
| Seat Material | Fabric |
|---|---|
| Back Material | Fabric |
| Adjustable Height | Yes |
| Arm Type | Fixed |
| Series | Value Series |
| Color | Black |
| Weight Capacity | 250 lbs |
| Product Type | Office Chair |
| Material | Fabric |
| Adjustability | Seat Height |
| Warranty | 5 Years |