3.3. PUTTING PRINT FILES ON THE SD CARD
3.3 Putting Print Files on the SD Card
To print from the GLCD, transfer .gcode print les onto the SD card. Follow
the normal steps, as explained in the Cura chapter, to create .gcode print
les on your computer. Insert the SD card into your computer using a SD
reader slot or USB SD card reader. Open a le browser- / -manager and
locate the created .gcode les; drag and drop or paste the .gcode les to
the SD card. Once the les have transferred, eject the SD card from your
computer and insert it back into the SD card slot on the left side of the
printer, at the top near the GLCD.
3.4 Printing With the Graphical LCD
Controller
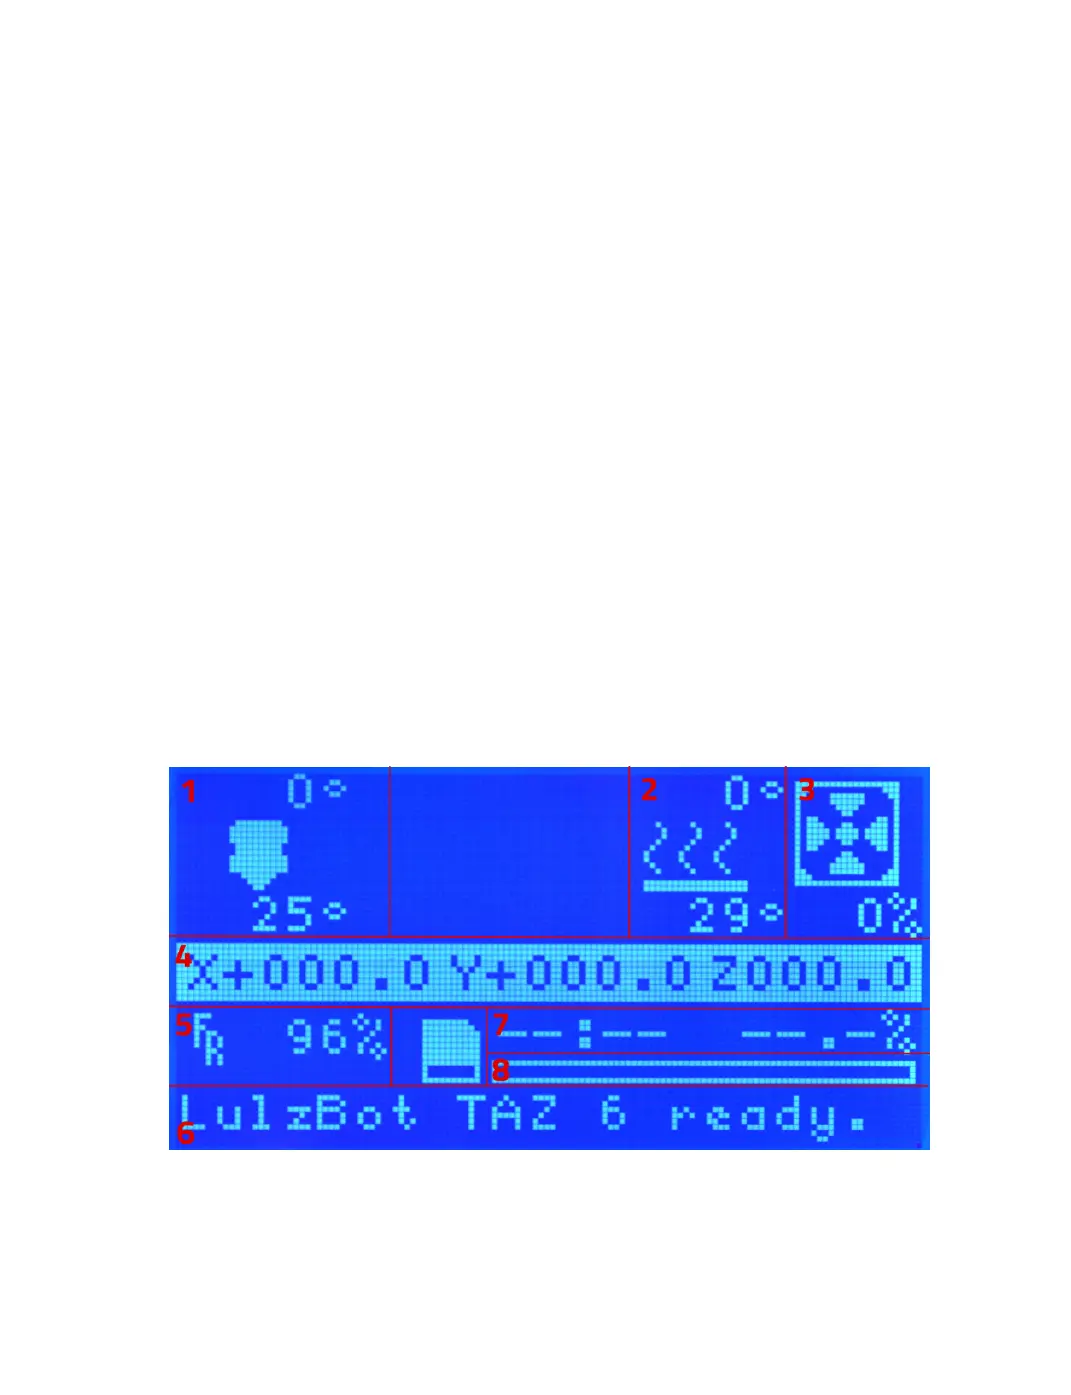
The Graphical LCD Controller Status Screen
The GLCD screen will turn on you power up your LulzBot TAZ 3D printer.
The start-up screen will display the Status screen (g. 3.1, page 57). The
Status screen is the default screen for the GLCD, presenting the current
status of the printer. There are a number of live statuses shown on
Figure 3.1: GLCD Info Screen
57