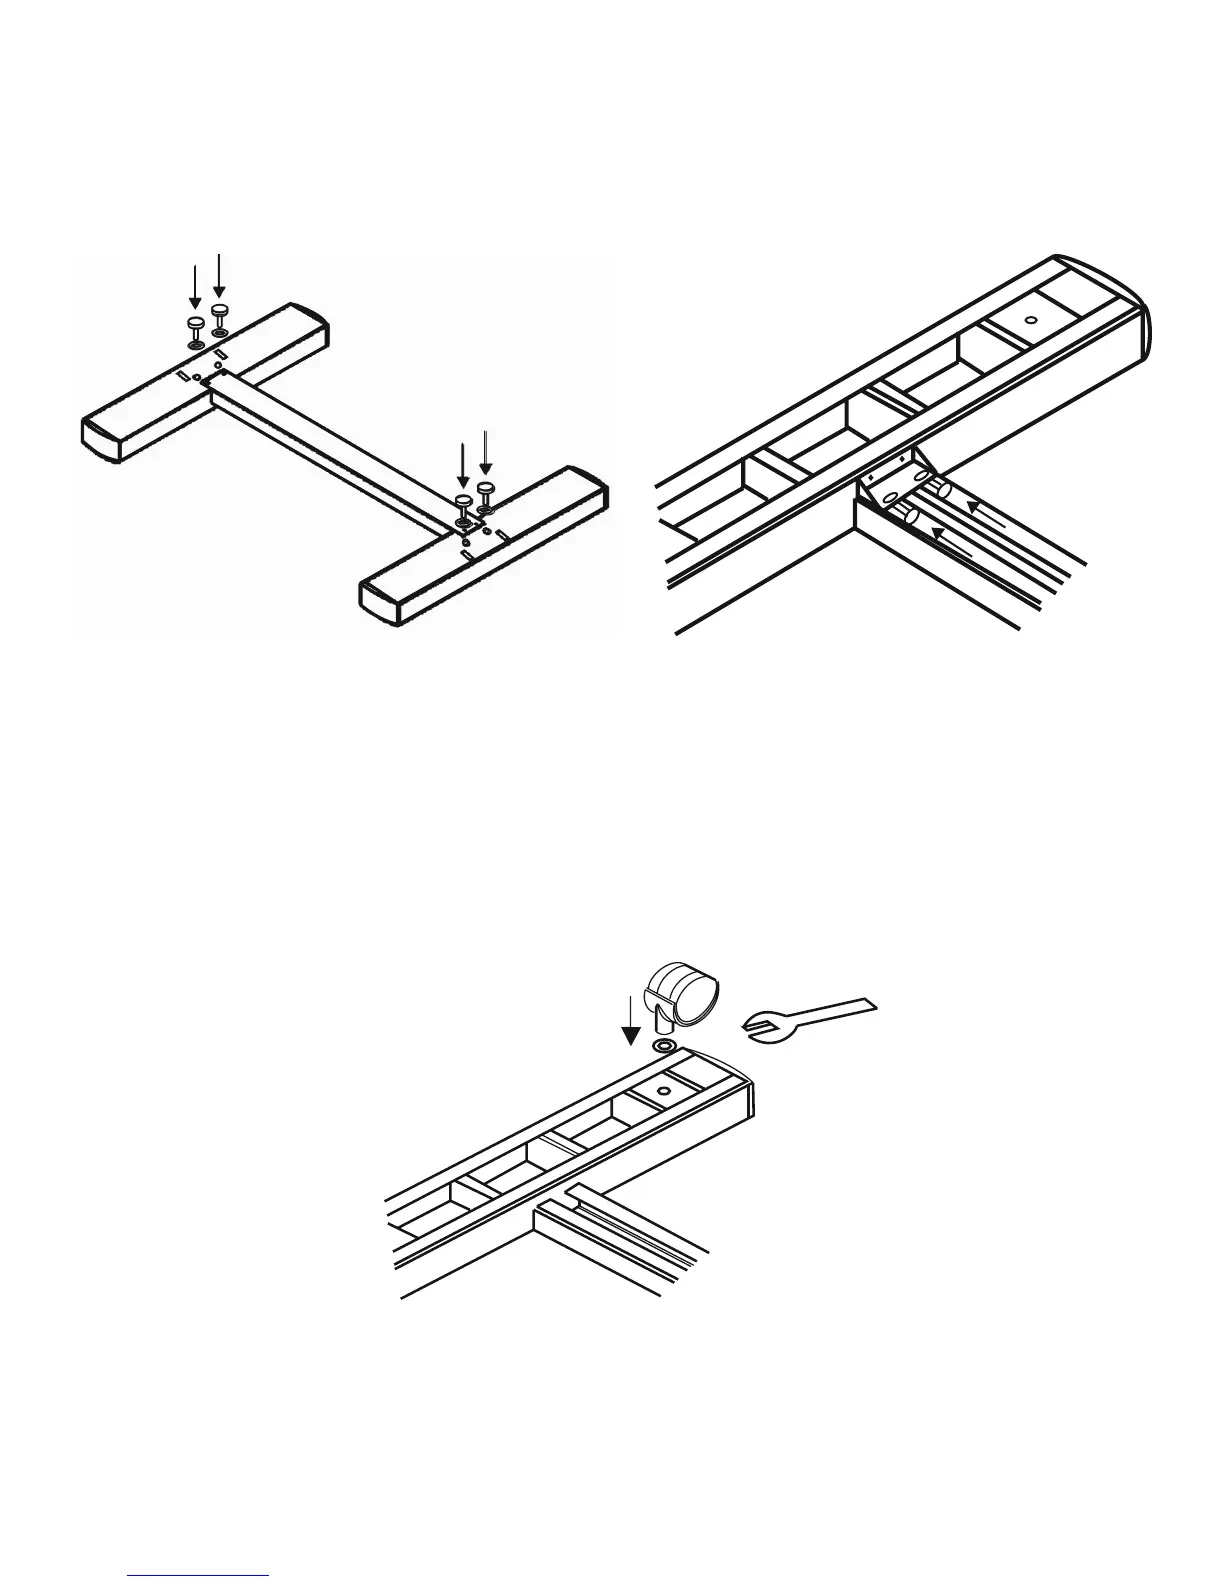
EasyManuals Logo

Lynx S-30 User Manual

Lynx S-30
43 pages
To Next Page IconTo Next Page
To Previous Page IconTo Previous Page
Page #9 background imageLoading...
Page #9 background image
Step 3
Use M6 screws, washers and spring washers to assemble part 1 and 2, then use the screwdriver to
tighten them; this creates an H-shaped base. Figure 2-2 and 2-3 (reverse of the H-stand) will show you the
position to insert screws.
Step 4
Insert the black wheels with washers into the holes on the bottom of H-shape stand as shown in Figure
2-4. Use the wrench to fasten them.
Figure 2-2
Figure 2-3
Figure 2-4
2. Installation 2-3

Questions and Answers:

Question and Answer IconNeed help?

Do you have a question about the Lynx S-30 and is the answer not in the manual?

Lynx S-30 Specifications

General IconGeneral
BrandLynx
ModelS-30
CategoryCutter
LanguageEnglish

Related product manuals