INSTALLATION INSTRUCTIONS
3.4 Replacing Pre-cleaner Support
The new pre-cleaner support will prevent water build-up in the pre-cleaner tube.
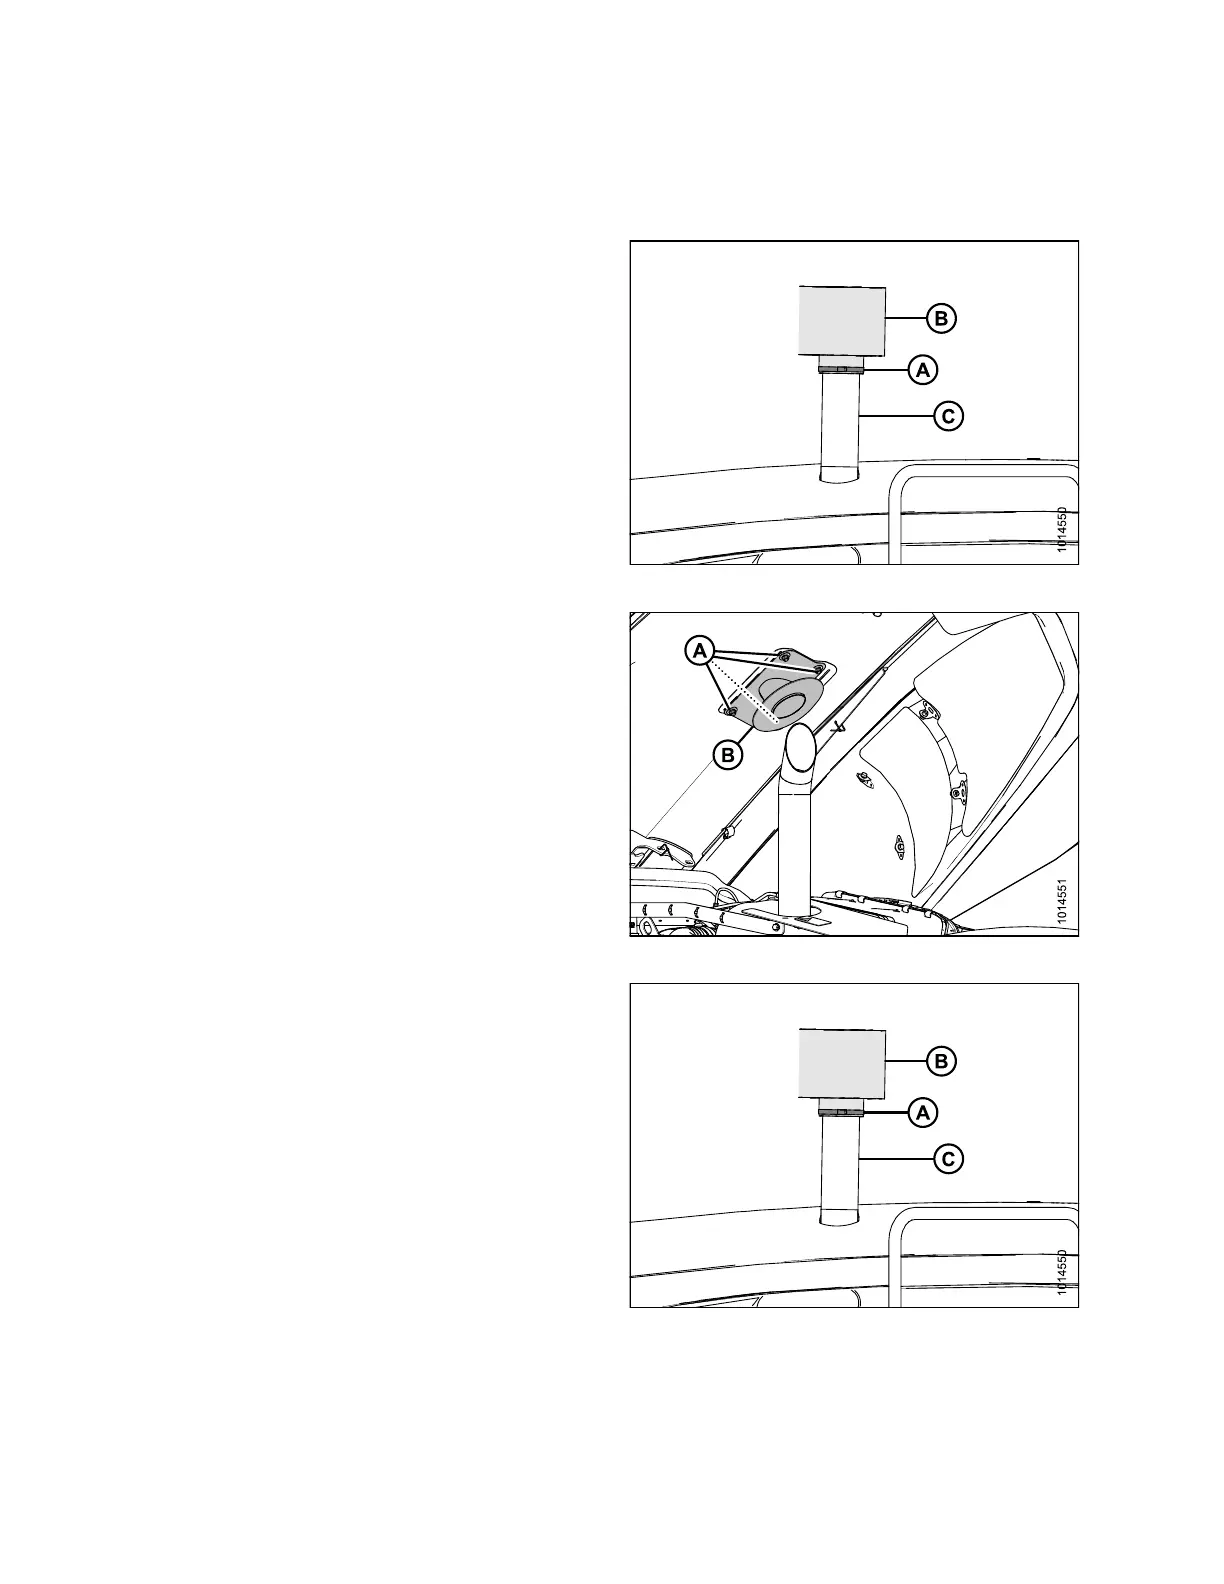
1. Loosen clamp (A) and remove pre-cleaner (B).
2. Slide clamp (A) out of pre‑cleaner support (C).
Figure 3.15: Pre-cleaner
3. Open hood to the highest position.
4. Remove four nuts and washers (A) securing
pre-cleaner support (B) to the hood. Retain hardware
for reinstallation later.
5. Remove pre-cleaner support (B).
6. Install the new pre-cleaner support included with the kit
using the four nuts and wa sh ers (A) th at wa s prev iou sly
removed. Torque to 32–36 ft·lbf (43–49 N·m).
Figure 3.16: Pre-cleaner Support
7. Close hood.
8. Slide clamp (A) on the new pre-cleaner support (C).
9. Reinstall and secure pre-cleaner (B) on the pre‑cleaner
support (C) using the clamp (A).
Figure 3.17: Pre-cleaner
167730 16 Revision B