INSTALLATION INSTRUCTIONS
3.7 Checking High-Intensity Discharge (HID) Auxiliary
Light Wiring
Some M155E4 Self-Prop elle d Windrowe rs from model yea r 2015 we re updated in the factory with the Auxilia ry
Lighting Harne ss kit. Howe ver, It may have been insta lled incorrectly. Befo r e installing the Auxiliary Ligh tin g
Harness Repair Kit (MD #167693), check first if it’s already installed in the m achine and if it was installe d c orrectly.
To check, do the following:
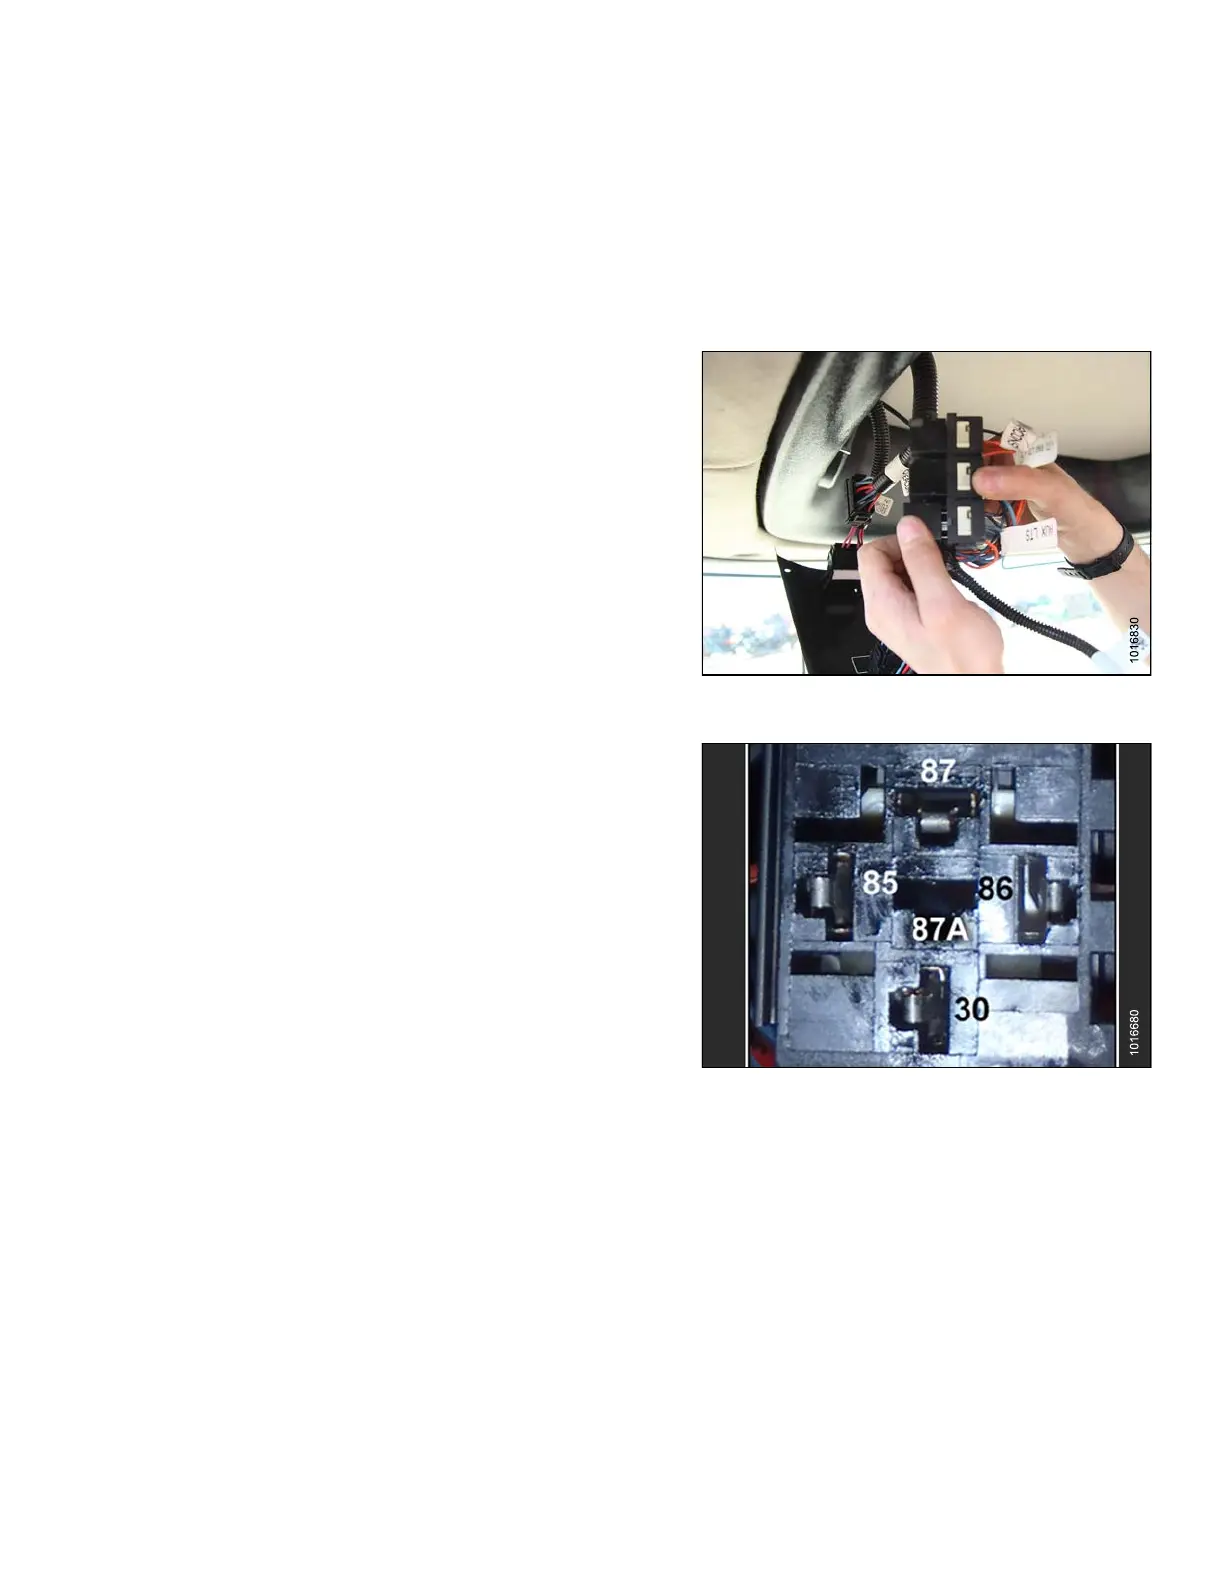
1. Remove the left headliner switch panel to reveal the
auxiliary lights relay and socket.
2. Locate a red wire labeled AUXILIARY LTS (A) on
the relay.
NOTE:
There shou
ld be two wires labeled AUXILIARY
LTS—an ora
ngewireandaredwire.Thered
auxiliary
wire is the updated wiring harness.
3. If there i
s no re d wire labeled AUXILIARY LTS on t he
relay, th
en install kit MD #167693 using instruction
MD #14776
2includedinthekit. Thereisnoneedto
install t
he kit if a red wire labeled AUXILIARY LTS is
already i
nstalled, just continue on to the next step.
Figure 3.44: Auxiliary Lights Relay and Socket
4. Check the connection of the AUXILIARY LTS (red)
wire on the relay. If the wire is connected to
port 30, then verify lights are functioning properly.
Refer to windrower operator’s manual or instruction
MD #147762 included in kit MD #167693. If the
AUXILIARY LTS (red) wire is connected to port 87a,
continue on to the next step.
Figure 3.45: Lights Relay Port
167730
27
Revision B