55
TYRES
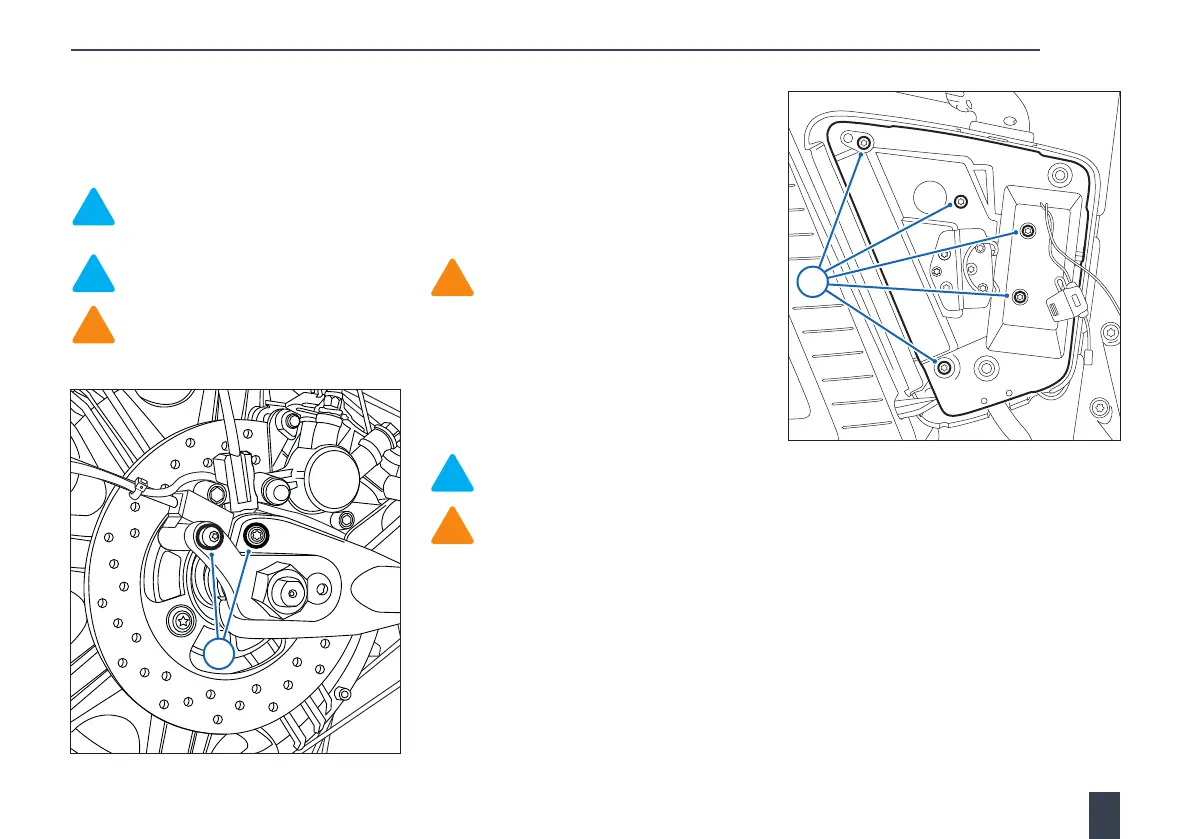
5. Remove the 2 bolts and washers
securing the rear mudguard supports to
the swinging arm and detach the rear
mudguard and light assembly.
Note: Right-hand shown, left-hand
similar.
Note: When refitting, tighten to 12 Nm.
Caution: Make sure the rear
mudguard and light assembly are not
damaged when being repositioned.
6. Carefully displace the rear mudguard
and light assembly from around the
rear wheel and swinging arm and
reposition to one side.
7. Secure the rear mudguard and light
assembly to one side, using string or a
retaining strap.
Caution: Make sure the rear wheel
motor wiring harness is not trapped
or damaged while the rear wheel and
motor assembly is being removed.
8. Remove the 5 bolts securing the battery
carrier insert to the electronics housing.
Reposition the 12-volt battery wires and
remove the insert.
Note: When refitting, tighten to 5 Nm.
Caution: When disconnecting the
following cables and connector, make
sure all connections do not come into
contact with other components or
exposed/disconnected connectors.
Insulate each exposed connection
until it can be reconnected to the
motorcycle.
5
8