Magellan 5
Communicator
PGM
Step 1:
Press []
Step 2: Enter Installer or Maintenance
Code (default: 0000/1111)
Step 3: Select a menu:
[] Zone Programming
[
TBL] Delays & Passwords
[MEM] Communicator
[
BYP] PGM
Step 4: Select the desired setting by
pressing the corresponding key
[1] [2] to [7] [8]
Step 5: Tel. # +
[
ENTER]
Tel. # +
[ENTER]
Tel. # +
[ENTER]
Step 6:
Account
Partition # 1
Message +
[
ENTER]
Step 7: [1]: CID or
[2]: SIA†
Step 8: Account
Partition# 2
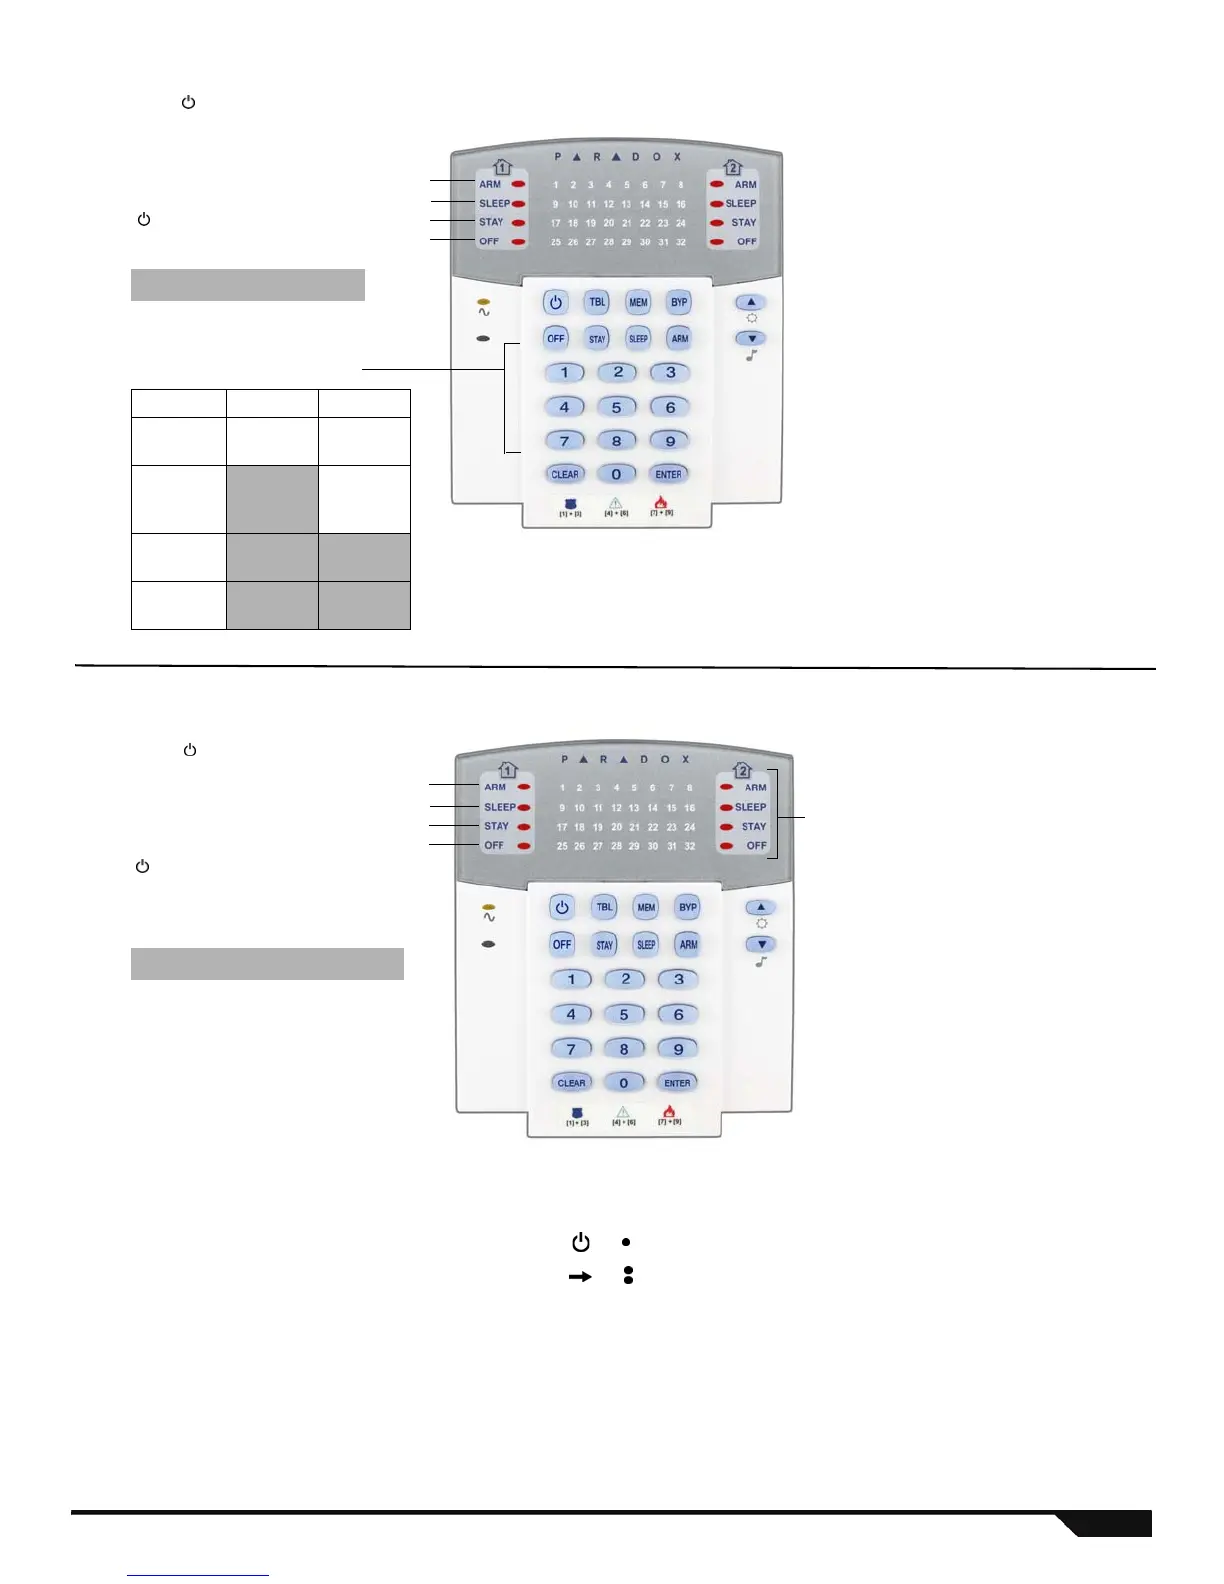
Step 1:
Press []
Step 2: Enter Installer or Maintenance
Code (default: 0000/1111)
Step 3: Select a menu:
[ ] Zone Programming
[
TBL] Delays & Passwords
[MEM] Communicator
[BYP] PGM
Step 4: Enter the desired 2-digit PGM (01-16)*
Step 5: Open/close cover or press [
ENTER] for
hardwired PGM
Step 6: Enter 1-digit PGM type (see below)
Step 7: Enter 1-digit activation delay (see
below)
Step 8: Enter 2-digit zone/remote (see below).
If PGM type is 4, 6, 7, or 8, press [1]
and/or [2] to select the partition from
which the PGM type will occur. Press
[
ENTER]
Monitoring Backup
Per #1
Per #2
Per #3
Per #4
Per #5
Pager
Cancel Com.*
Step 5
Step 6
Step 7
Step 8
Notes
* To cancel all communications
including WinLoad, press [9].
† For other communication formats, see
advanced programming.
PGM Type (Step 6) Activation Delay (Step 7) Zone/Remote (Step 8)
1
Remote Button
or
1 Follow 00 All Zones/Remotes
2
Remote button
or
2 1 sec. 01 to 32 Zone/Remote 01 to 32
3 Follow Zone 3 5 sec.
4 Follow Alarm 4 15 sec.
5 Follow Bell 5 30 sec.
6 Follow Arm 6 1 min.
7 Follow Stay Arm 7 5 min.
8 Follow Sleep Arm 8 15 min.
9 30 min.
Notes
* The keypad shows the first available
PGM by flashing its assigned numerical
LED. When a numerical LED is lit, (not
flashing), the PGM is already
programmed.
† If you select a wireless PGM that is
already programmed, the status LEDs
will indicate the signal strength of the
selected PGM zone module (1 LED lit =
weak signal, 4 LEDs lit = strong signal.)
Also, No LEDs lit = keypad or panel
Step 5
Step 6
Step 7
Step 8
Signal Strength LEDs†
 Loading...